A Little Tipsy

Creative Tips & Ideas

  • home
  • About Me
  • the tipsy top
  • press
  • projects
  • contact me
[print_thumbnail_slider]

American Stars and Stripes Pillow

June 19, 2012 By Michelle Barneck 7 Comments

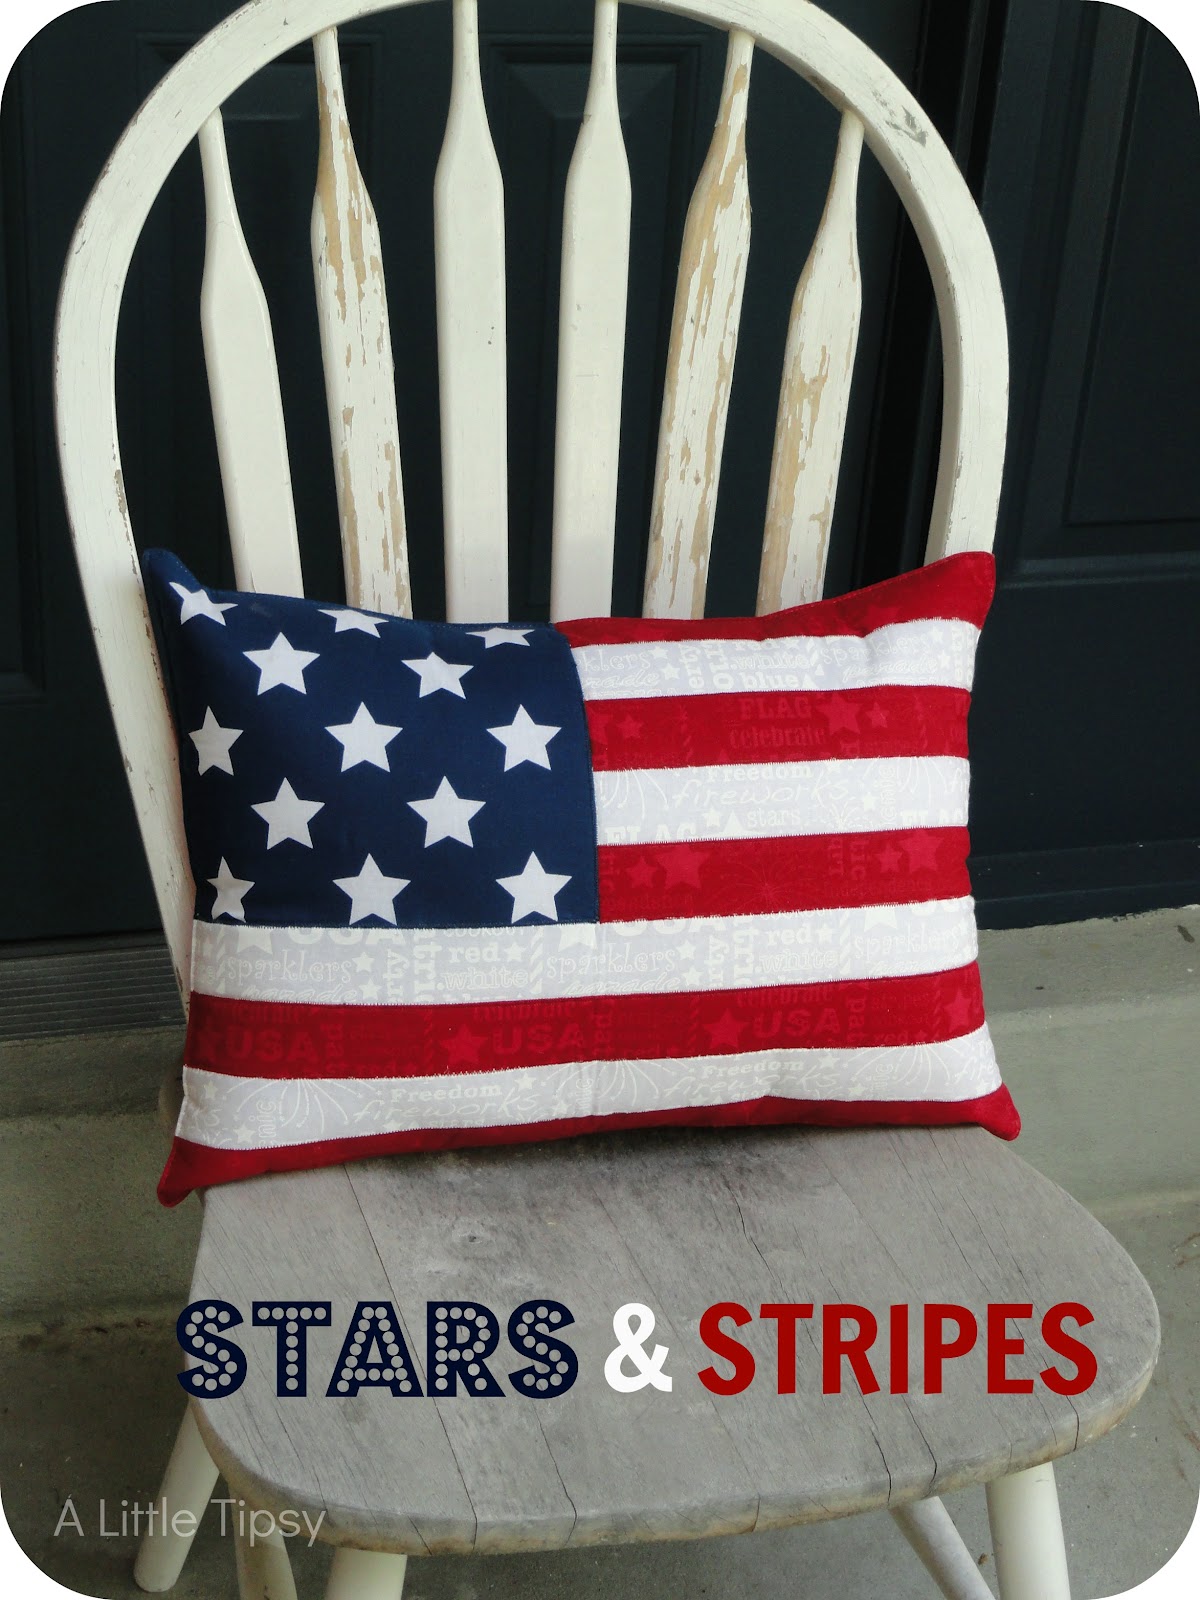
I love our flag. The colors are awesome. It’s clean and crisp and represents so much! I love decorating with it. I also love things that look like they took a lot of work when they were SUPER easy! Thus, I was thrilled to find this American flag placemat for like $3 that would so easily translate in to a faux quilted throw pillow.

American Stars and Stripes Placemat Pillow
SUPPLIES:
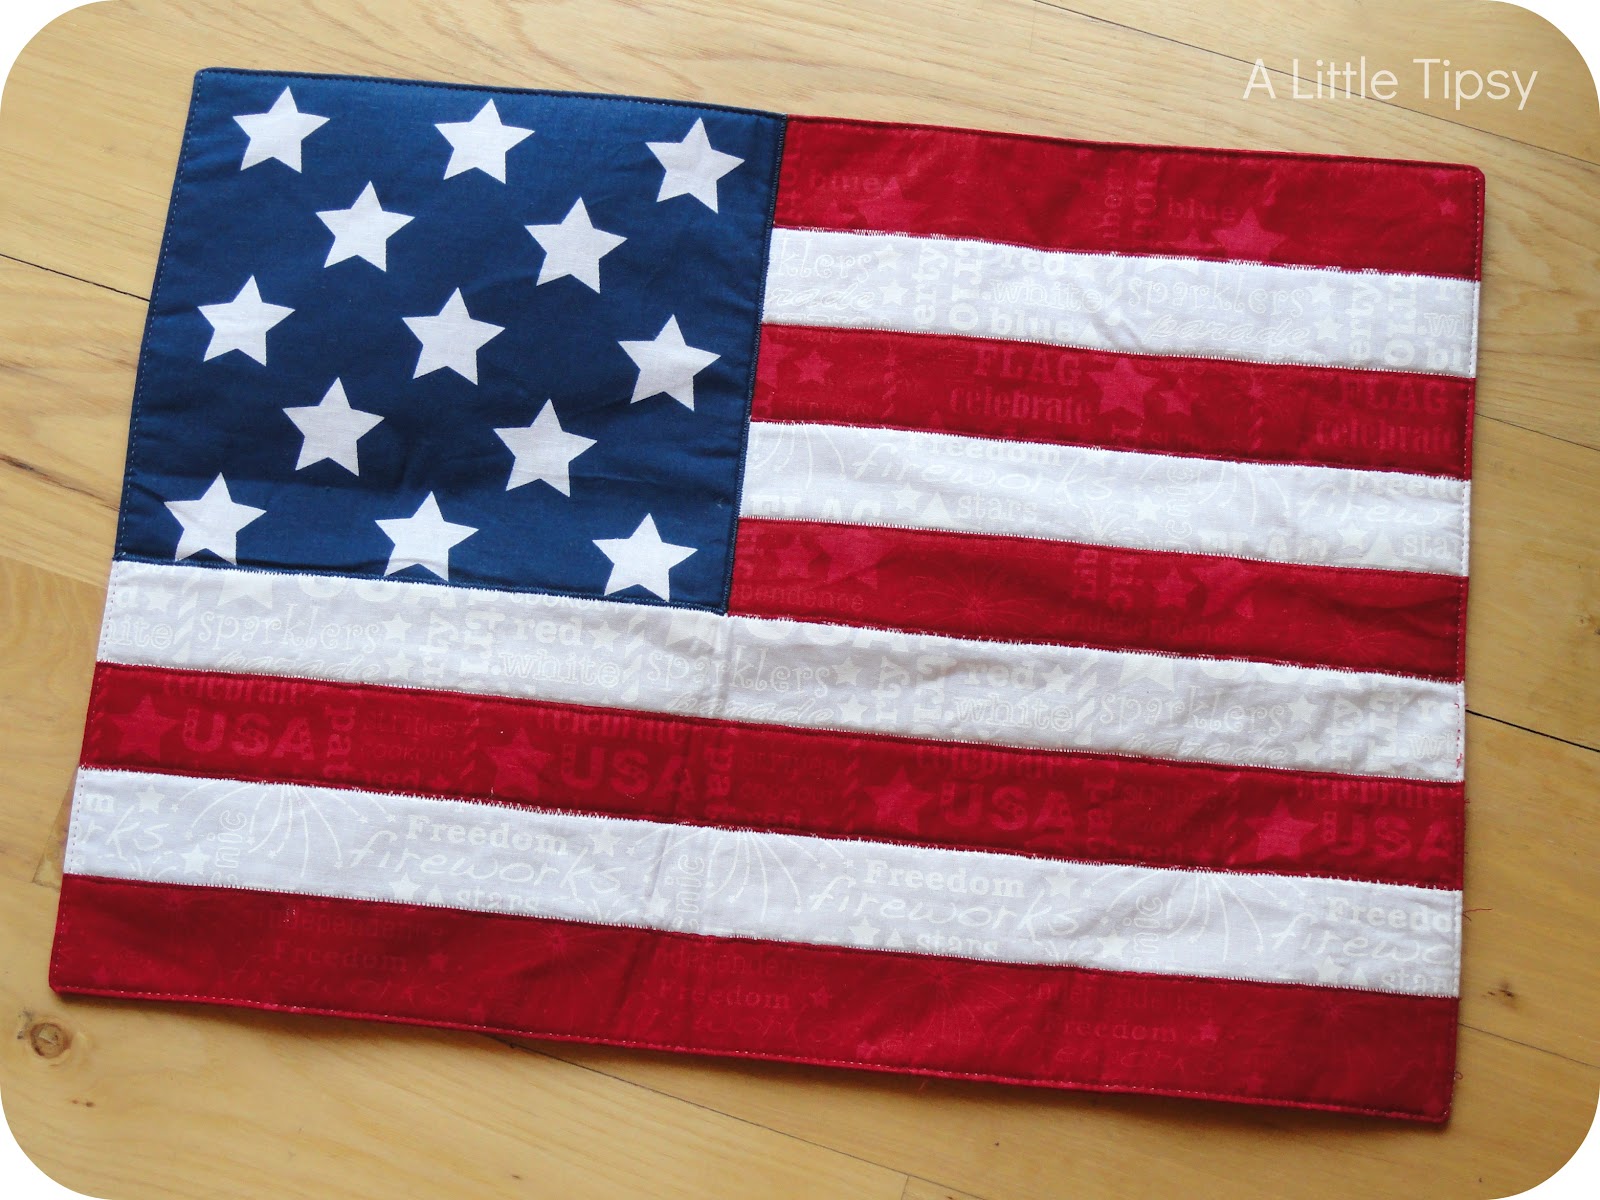
Placemat (from ShopKo)
Seam Ripper
Polyfil
Binder clips
Needle
Thread
DIRECTIONS:
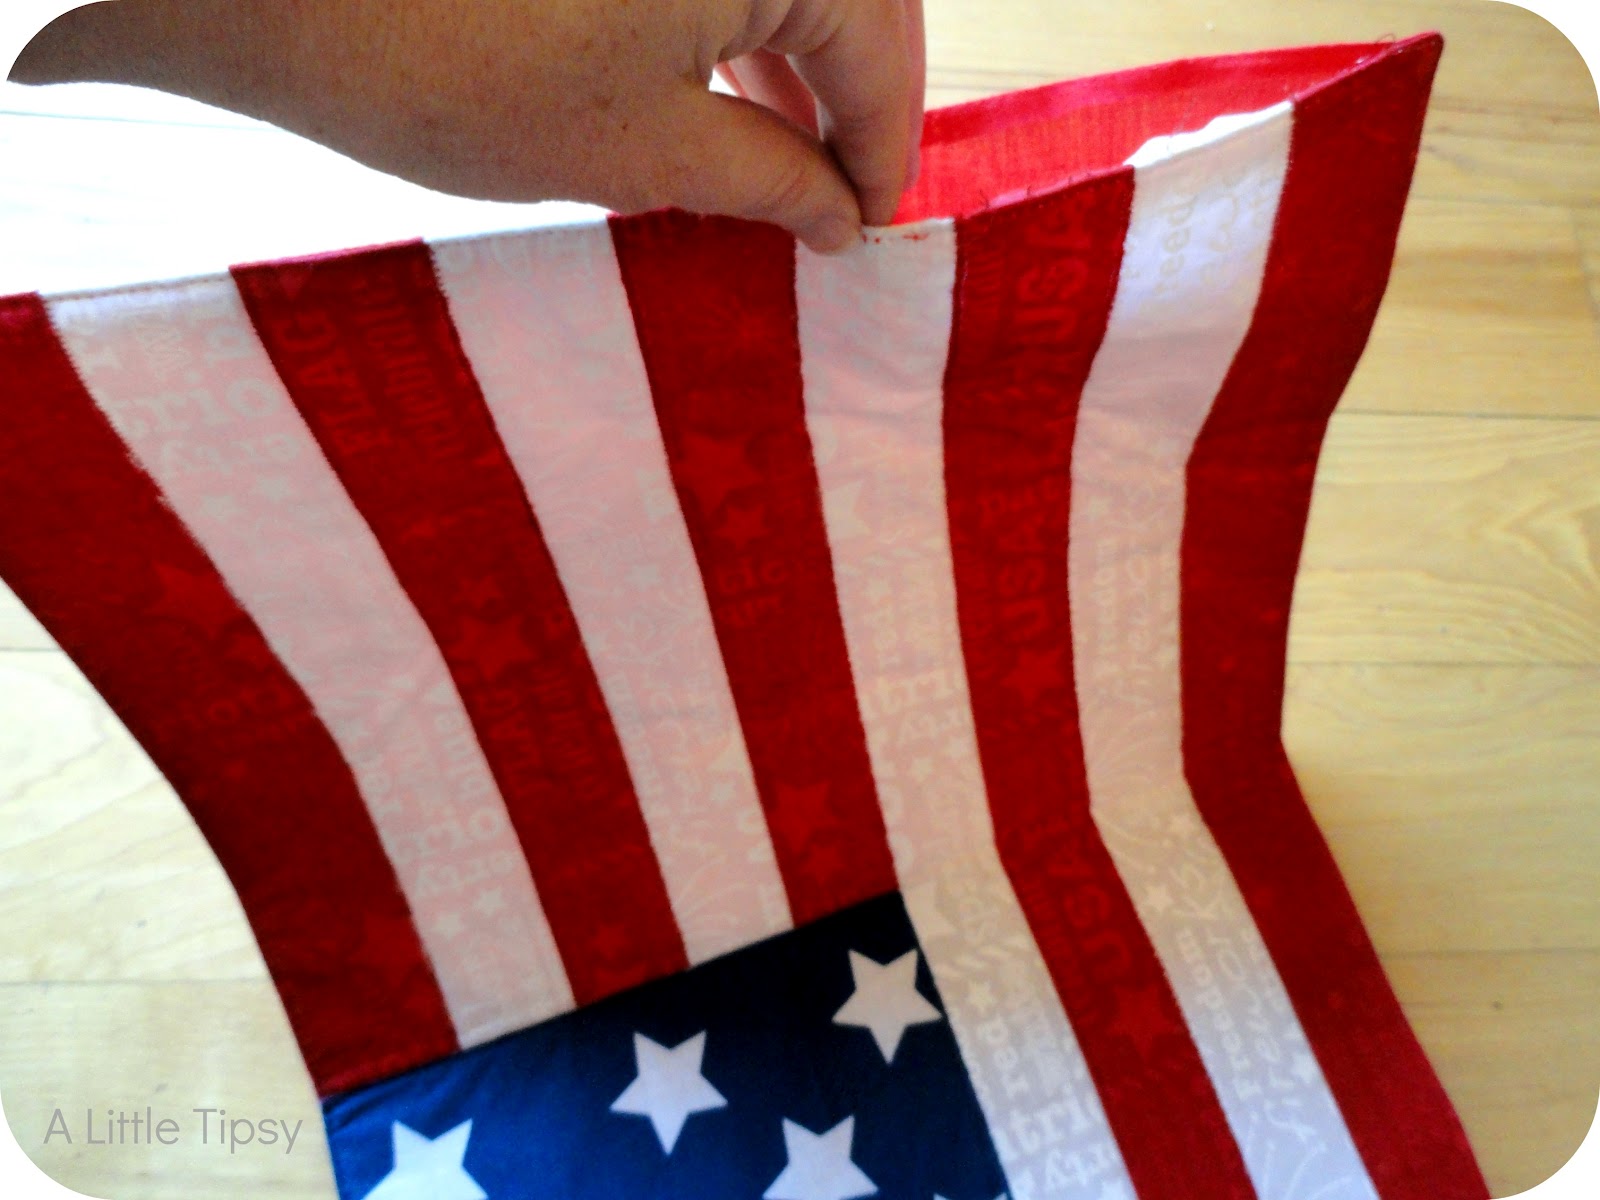
Use the seam ripper to make an opening about half the width of the side of the placemat.

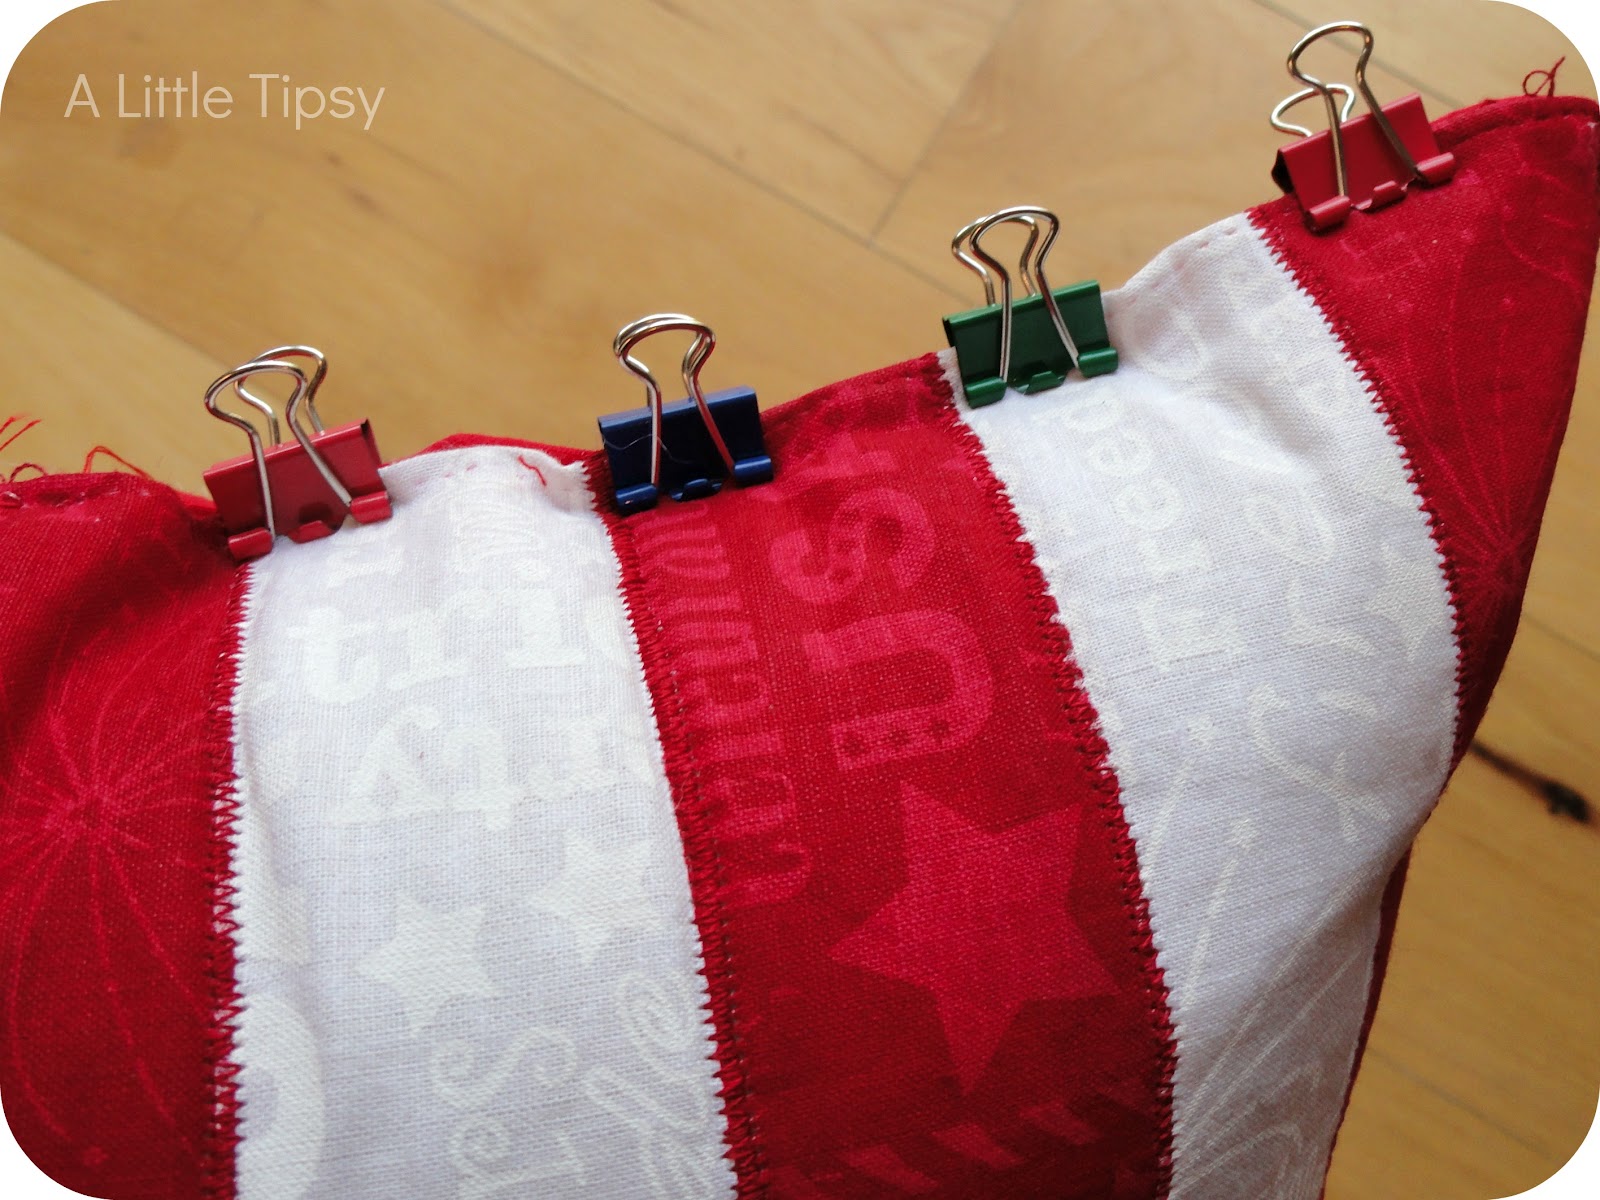
Stuff tight with Polyfil. Hold opening closed with binder clips and stitch closed using the existing holes from the original thread. Slide the binder clips along as you need more space to stitch.

Find the perfect spot for your cute new American stars and stripes pillow!

P.S. Don’t forget to sign up for free Tipsy updates via RSS or email.

We have decided to truncate our feed to help protect against stolen content. I apologize for any inconvenience. Please love us anyway. 🙂

Polka Dot Fruit Stand

May 18, 2012 By Michelle Barneck 15 Comments

I love the fresh produce that comes with summer. We’re trying to eat healthier what better way to do it than having your fruit right on the counter to grab for snacks or even just remember what you have to work with. I have done a bowl in the past, but I wanted a fruit stand that could hold a lot and also add some color and personality to my kitchen.

FRUIT STAND

I love how it turned out, but just in case it is not your style, I have five others for you to choose from! This idea was actually born from a late night snack run with my roommates during Breathing Space Blogger Retreat. We ran to the grocery store, saw these adorable polka dot dishes and thought it might be fun to make stands with them. I love how each bloggers personality shows through a little differently.
Go visit these cute girls to see theirs in more detail:
 Amanda,Whitney, Staci, Leanne, Me,  Kaysi
Want a mini how to?
Supplies:
Dishes
Candlesticks
Spray Paint
E-6000
Spray paint your candlesticks using multiple light coats and letting it dry between coats. Glue it all together with E-6000 making sure everything is centered over each other. Let it dry.
As you can see I put the top candle stick upside down. It fit perfectly within the ridges of the bowl and then left more room on the small plate for fruit or goodies. I decided on a fruit stand because it’s not often that I need a whole display of goodies and it was way to cute to hide in a cupboard. I love how it adds a natural pop of color to my space.
It would also be super cute for chips or veggies and dip! Oooh, or crackers and an assortment of cheese cubes in the top!

P.S. Don’t forget to sign up for free Tipsy updates via RSS or email.

We have decided to truncate our feed to help protect against stolen content. I apologize for any inconvenience. Please love us anyway. 🙂

Paint a Rug

March 20, 2012 By Michelle Barneck 8 Comments

I am loving de-stash month! Not only is it a good form of spring cleaning craft style, but I am surprised at what can come from existing items. I can feel spring in the air and wanted a little something bright on my doorstep so this week I decided to paint a rug.
Wanna see what I started with? 

Sad, isn’t it. I found this at the dollar store a few months ago and thought it would come in handy at some future moment. Well, that future moment is now! 

Supplies to paint a rug:
Rug
Martha Stewart stencil
Martha Stewart High Gloss Acrylic Paint
Sponge brush
Scotchguard

1. Place stencil on one side of the rug and paint the rug dabbing directly up and down with your sponge brush. 
2. Continue aligning and moving the stencil down until you have that whole side done.  
3. Continue aligning the stencil and moving across your rug. The bigger your stencil, the easier it will be since you won’t have to align and move it as much. 
4. Let the paint dry.
5. Spray with a couple coats of Scotchguard to protect.
All in all it took me just over 2 hours. Longer than I anticipated for such a small rug, but I did have to move my stencil A LOT! Really I think it was worth it to put the poor rug out of its bland taupe misery.

 
A fun little springy doorstep for the first day of spring!
 
Are you enjoying The Great De-stash Bash? We have more coming up! I have two refashions: one from my hubs shirt and one from a 5XL shirt, so stay tuned! We’ll also have the guests from our de-stash giveaway with what they made with their prizes.

P.S. Don’t forget to sign up for free Tipsy updates via RSS or email.

We have decided to truncate our feed to help protect against stolen content. I apologize for any inconvenience. Please love us anyway. 🙂

Chalkboard Refrigerator

March 19, 2012 By Michelle Barneck 14 Comments

My poor sweet refrigerator has been around the block. It was a hand me down from grandma and has worn the eye sore title in my kitchen for far too long. Don’t tell her, but I even went out looking for a new one. But, to my dismay found that they don’t even make those french doored beauties to fit my space. I didn’t realize how freakishly small my fridge space is. Alas, I decided that until I get the motivation to move two sets of cabinets to fit my dream fridge I may as well make the best of old Gerta and give her a makeover of sorts. Had I known how easy it would be I would have done this long ago! I present the chalkboard refrigerator.
 
I had seen a lot of refrigerator makeovers using epoxy or paint, etc. But, knowing that poor Gerta is on her last leg I did not want to spend hours moving her outside, doing multiple coats, and letting her dry for days. I needed something quick and this took me about 30 minutes. The secret ingredient? Vinyl.
Chalkboard Refrigerator

 
Here she is in her original almond colored glory. 
I used the 12 inch Silhouette Chalkboard Vinyl. It was the perfect size to go on the front and wrap around the side of my refrigerator door.

1. Measure how big your vinyl pieces need to be. Cut your vinyl accordingly leaving a little wiggle room. It’s better to trim a bit than have it be  too small.
2. Align the vinyl so it will reach the top and bottom, but also be flush to the door handle. Press it down by the handle first and work your way out smoothing out bubbles as you go. Wrap the vinyl around the side of the door by the hinges and trim off any excess.
At this point Gerta was a little reminiscent of Cruella, wouldn’t you say?

3. Grab a piece of patterned cardstock that will tie your two colors together. Cut it to the size of the ice panel, cover with clear contact paper to protect it and place with double sided sticky tape.
Ah, she’s already looking better!
 
4. Now finish it off priming the chalkboard by rubbing it all over with the side of a piece of chalk and erasing the excess. That way your first message won’t be everlasting. Now you’re ready to add your menu, message board, or whatever you want to say!
 

It’s amazing what you can do with 30 minutes and some vinyl!

Disclosure: Silhouette provided the vinyl for this post.

P.S. Don’t forget to sign up for free Tipsy updates via RSS or email.

We have decided to truncate our feed to help protect against stolen content. I apologize for any inconvenience. Please love us anyway. 🙂
« Previous Page
Next Page »

  • Bloglovin
  • Facebook
  • Google+
  • Instagram
  • Pinterest
  • RSS
  • Twitter

Hi there! I'm Michelle. Mother of three little boys and one little princess. Welcome to A Little Tipsy, a place for exploring creativity and sharing inspiration.

Follow on Bloglovin


Visit Michelle Barneck {A Little Tipsy}'s profile on Pinterest.

Tutorials by Category


15 Family Reunion Games

Family Reunion Games Collage

15 Sprinkle Party Ideas

Sprinkle Birthday Party
Creative Commons License

© Copyright 2014 A Little Tipsy · Site Designed by The Fairy Blogmother · Web Hosting by RFE Hosting

This website uses cookies to improve your experience. We'll assume you're ok with this, but you can opt-out if you wish.Accept Read More
Privacy & Cookies Policy