A Little Tipsy

Creative Tips & Ideas

  • home
  • About Me
  • the tipsy top
  • press
  • projects
  • contact me
[print_thumbnail_slider]

Painting Tips for All Experience Levels

August 27, 2013 By Michelle Barneck 1 Comment

Hello, it’s Ali from House Vintage… back again! Summer is over and school has begun.  To celebrate back to school, I am sharing some lessons I have learned about painting furniture.  I have divided these simple tips based on your ability, so even if this is the first piece of furniture you have ever painted, it will turn out great.

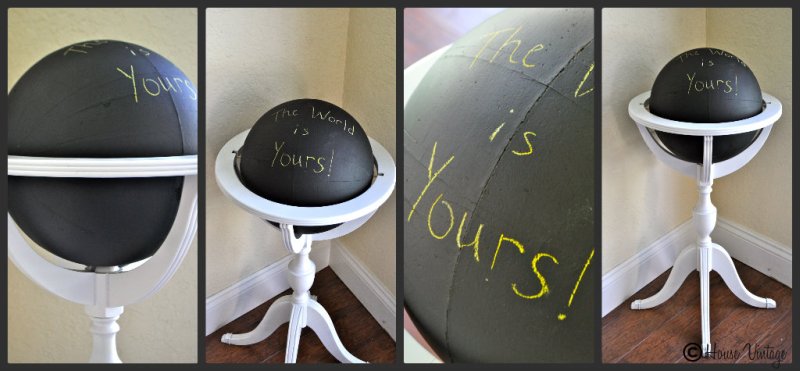
    Estate sale globe painted with spray paint.

Beginner

  • A great finished product, starts with proper preparation.  Sandpaper and a good primer are your best friends.
  • Practice makes perfect.  Buy second hand furniture at garage and estate sales to refine your technique.
  • Pick the right paint.  Spray paint works well for smaller pieces with lots of nooks and crannies. Latex paint is fine for larger pieces.


Intermediate
Once you have honed your skills, try some of these tips to up the ante.
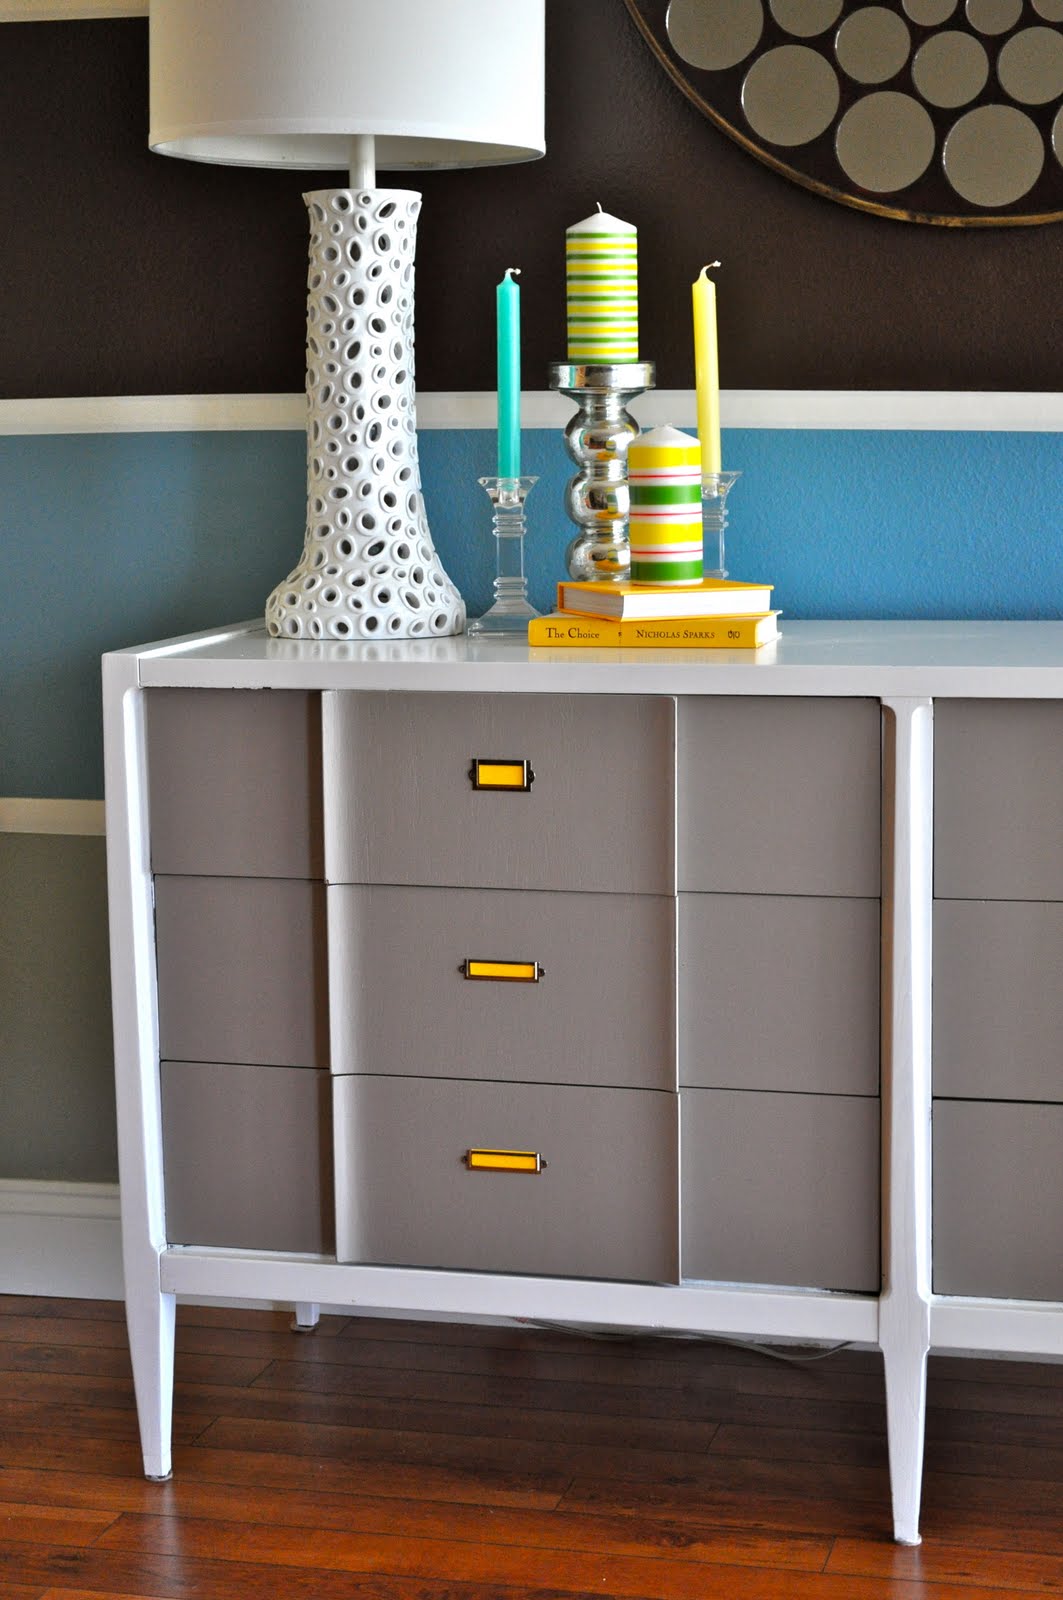
  • Mix your own paint colors.  I like to use leftover latex wall paint to make custom colors for furniture.
  • Try different painting techniques like distressing.  Paint a base color, then a contrasting top coat.  Use sand paper to remove the top color in areas that would typically show wear like corners.
  • Change up the paint finish you are using.  High gloss gives a modern look, whereas a flat finish will look primitive.

Advanced

Now you’re an expert…have some fun.
  • Mix your mediums.  Paint and stain are a great combination, or mix your paint colors for a contrasting look.
  • Decorate with paint.  Try polka dots for a child’s room, or stripes in the entry way.  If you don’t have a steady hand, use painters tape or stencils (buy or DIY).  
  • Try different types of paint like chalk or milk paint.
———————————————————————
Thanks for the tips Ali! I am always surprised how paint can totally transform things!
We have decided to truncate our feed to help protect against stolen content. I apologize for any inconvenience. Please love us anyway. 🙂

Little Star: Highlighting a Child’s Special Day

August 26, 2013 By Michelle Barneck 1 Comment

Whether soccer or art or singing, each child has their own special talent. I wanted to create a fun way to celebrate and make them feel special for their achievement whether it be a report card full of A’s, a successful dance performance, or being in the school play. I decided to create this Little Star crown, badge, and photo book to capture the shining moments of their lives.
They all coordinate and are easy to make with just a few supplies. I will share tutorials for each of items below.

SUPPLIES:
  • Martha Stewart Decoupage Fabric Die-Cuts
  • Martha Stewart Decoupage Durable Oilcloth Finish
  • Martha Stewart Decoupage Brush
  • Martha Stewart Fabric Stiffener
  • Martha Stewart Decoupage Durable Matte Finish
  • #10 Size Can
  • Wax Paper
  • Photo Book

Let’s start with the star crown.
1. Measure your child’s head and using the star fabric die cuts line them up overlapping until you get the correct length. I lined up the large stars overlapping the points about a half inch then layered the medium stars on top, then adding the small stars for embellishment. 
2. Using the oilcloth decoupage as adhesive, glue the small stars to the medium. Then, glue all of the star points that touch like the overlapping points of the large and the five points of the medium to secure. Let dry.
3. Cover a #10 size can with wax paper and lay your stars around it. Secure the last two ends of the stars together with the oilcloth decoupage to form the crown. Glue the top point of each large star to the wax paper to keep it vertical. Let dry. 
4. Using your decoupage brush, paint the stars with a thin layer of fabric stiffener. You want it thick enough to soak through the die-cuts, but thin enough that it will dry clear. Brush away from the points so it does not pool. Let dry.
5. Carefully slide the crown down the can to remove. 

Next up, the photo book. We hardly ever print pictures anymore, so my kids love to see photos of themselves in a book! 
1. Place the stars how you like them and decoupage using the matte finish decoupage and decoupage brush. Cover the back of the star with the medium, place it on the book and then paint over the top. Do a few coats, letting them dry between to make sure the stars are secure and protected.
Now for the cute little star award badge. Who doesn’t like getting  gold star?
1. Layer a yellow shooting star, cream colored burst and blue shooting star. Glue them all together using the oilcloth decoupage. Then, cover with two coats to protect and give it a durable shiny finish. I attached it with double sided sticky tape, but you could easily glue on a pin if you prefer.
Isn’t this little star collection adorable? I love having an extra special way to celebrate hard work and resulting achievements and with the school year starting up there will be more and more on their way!
The full line of of decoupage products is available at Michael’s.
ST_12_months_of_Martha_Logo-1
Disclaimer: Martha Stewart Crafts provided product for review.
We have decided to truncate our feed to help protect against stolen content. I apologize for any inconvenience. Please love us anyway. 🙂

Burg Pediatric Dentistry Review

August 22, 2013 By Michelle Barneck Leave a Comment

Sponsored by Burg Pediatric Dentistry.

According to Wikipedia, It is estimated that as many as 75% of US adults experience some degree of dental fear, from mild to severe. I am one of those many and while mine is mild (the sound of the drill in the next room makes me want to run for the hills) and I go in for my 6 month check ups like clock work I have been terrible at taking the kids. I did not want them to have a dental experience like mine. Lucky for us we live in a place with many more dental choices including pediatric dentists! What I would have given for a place like this as a kid!

We were invited to come visit Burg Pediatric Dentistry for check ups for the kiddos and while Aiden had been to the Dentist before this was Lincoln’s first visit. I prepped them the night before practicing holding mouth open and teaching them how to floss. They were excited to go visit the superhero dentist. Could they be any more perfect for my boys?


They were seriously so adorable with my boys. The kids got to choose something for the hygienist to wear (see necklace and bow tie above) and then chose a paper saying how they had to walk back to the exam room. They drew “dance” and discoed down the hall. By now they were thinking this could be pretty cool. 

Aiden went first donning green zebra sunglasses to show little brother how it was done. He was thrilled with all the toothpaste choices like bubble gum and cotton candy and I swear he loved the little suction device. Lincoln was a little nervous watching at first and was not a huge fan of the suction (he is not a fan of loud noises), but Nicole was so sweet and said he didn’t have to use the suction if he didn’t want to which made him like her even more. Lincoln of course chose blue toothpaste and was digging the movie in the ceiling. He rinsed with a little cup and was good to go for x-rays.

The kids were x-ray champs and they were even able to get the back x-rays on my two year old! Impressive. They were pleased to be rewarded with stickers for holding still. Next up was learning to brush and floss properly. The stuffed animals with teeth were hilarious and a huge highlight. The kiddos picked out fun cartoon toothbrushes and got little bags with mini toothpaste, Toy Story flossers and an adorable tooth brushing timer which has been fabulous to have. They have brushed their teeth for two minutes every night since. 

The dentist came in, let Aiden ride the chair to it’s tallest point (he’s been begging the hygienist to let him try out the elevator chair) and did a quick check up on each of the boys. Then it was on to the toy bin to pick a prize. Lincoln had no cavities so he got a special bracelet and his picture on the wall and for Aiden, well the poor kid got my teeth so he needs some work, but at least he won’t be sad to go back especially since they both left with new superhero capes.

Overall, we had a great experience. I can honestly say that they took every opportunity to make my kids feel comfortable and happy. I was so impressed with all the efforts they made during every step and the fact that they know kids and how they love to be rewarded for things they do right especially in a situation that could make them nervous. We have our 6 month appointments booked for next time. I am so thrilled to have found a good pediatric dentist! 

If only I could go there for my check ups. I think someone should combine dentistry with a spa for adults. Get a pedicure or leg massage while getting your check up. I know I would be more keen on going!
We have decided to truncate our feed to help protect against stolen content. I apologize for any inconvenience. Please love us anyway. 🙂

Framed Feather Art

August 20, 2013 By Michelle Barneck Leave a Comment

Vanessa from OurThriftyIdeas.com 

 Hey guys, Vanessa from Our Thrifty Ideas popping over again today. I’ve been super busy lately, as we found out with less than 30 days notice that we were moving down to St George Utah, and made the big move middle of last month. It was super duper quick, and we are now just settling into life in the hot land, and our new fun house! It’s been crazy trying to decorate a whole new house, as it took over 2 years to get things how I liked them in the last place. But already there’s little details I have incorporated in this new place, that I love so much. Today I am sharing how I livened up my bedside table. When we moved, one of the big decor pieces from this table broke (enter sad meltdown, a slight argument with the hubby, and maybe even a cold shoulder to those helping us move). But I
quicklyslowly got over it, and decided that I needed to just find something new and fun to replace it.

Framed Feather Decor from OurThriftyIdeas.com 

 I had this inexpensive frame from IKEA, and when I saw the feathers for just $1 (after coupon, of course!) at Michaels I knew immediately that they would look fantastic with the new yellow, blue and grey color scheme of our Master Bedroom. I cut a background piece of paper to the size of the frame opening. Then first laid the feathers on the glass in the position I wanted them, layered the background paper, and then closed up the back. It really was that super simple and looks so cute sitting with my other items atop my bedside table!

  Framed Feather Decor from OurThriftyIdeas.com

It is such a simple way to decorate, but makes a great POP for a small space. Hope you liked the little (and quick) piece of decor. I can’t wait to share more with you again soon!

——————————————————-
Thanks Vanessa! It’s always nice to have a quick decor idea up your sleeve!
We have decided to truncate our feed to help protect against stolen content. I apologize for any inconvenience. Please love us anyway. 🙂
« Previous Page
Next Page »

  • Bloglovin
  • Facebook
  • Google+
  • Instagram
  • Pinterest
  • RSS
  • Twitter

Hi there! I'm Michelle. Mother of three little boys and one little princess. Welcome to A Little Tipsy, a place for exploring creativity and sharing inspiration.

Follow on Bloglovin


Visit Michelle Barneck {A Little Tipsy}'s profile on Pinterest.

Tutorials by Category


15 Family Reunion Games

Family Reunion Games Collage

15 Sprinkle Party Ideas

Sprinkle Birthday Party
Creative Commons License

© Copyright 2014 A Little Tipsy · Site Designed by The Fairy Blogmother · Web Hosting by RFE Hosting

This website uses cookies to improve your experience. We'll assume you're ok with this, but you can opt-out if you wish.Accept Read More
Privacy & Cookies Policy