A Little Tipsy

Creative Tips & Ideas

  • home
  • About Me
  • the tipsy top
  • press
  • projects
  • contact me
[print_thumbnail_slider]

DIY Under $5: Holiday Display Ideas

December 14, 2011 By Michelle Barneck 7 Comments

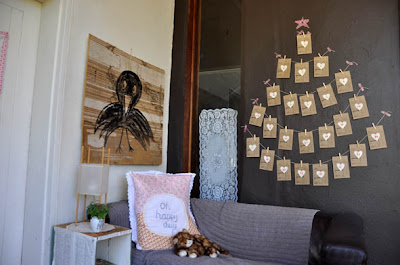
I wanted a little something different for my shelf this year. Using only things I already had (either dollar store, thrift store, or given to me) I created this…
It incorporates a few different holiday display ideas.
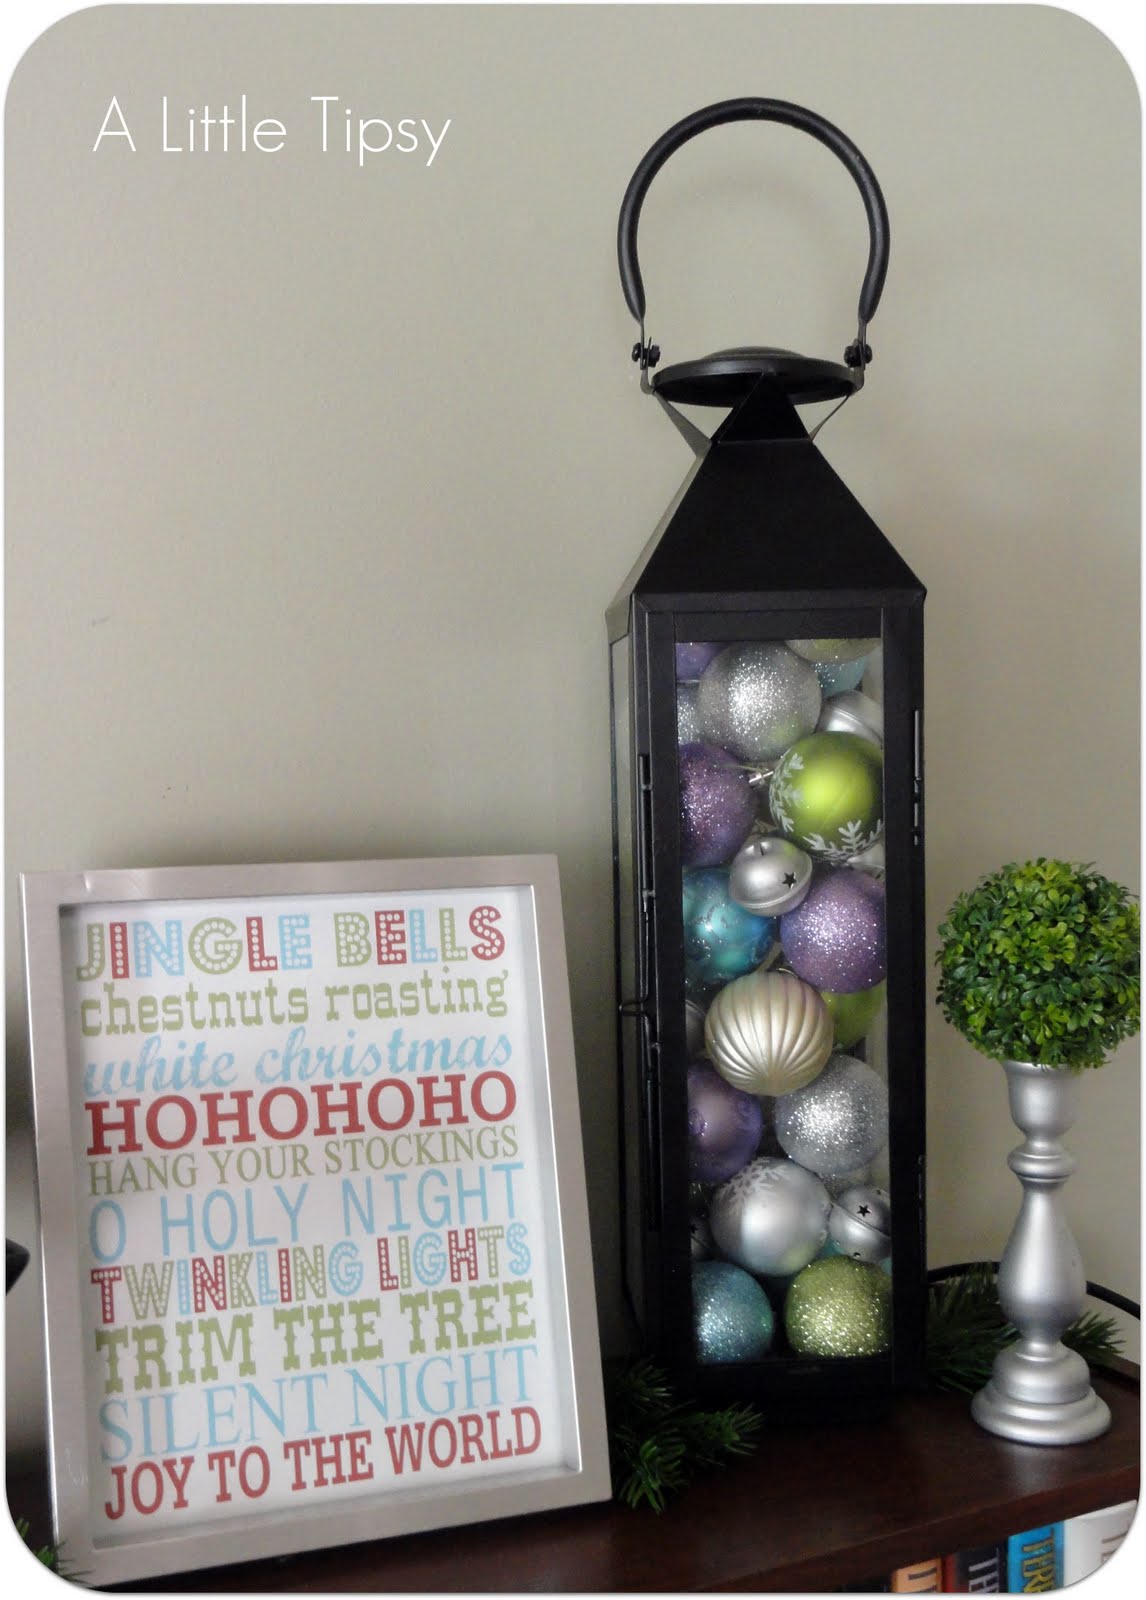
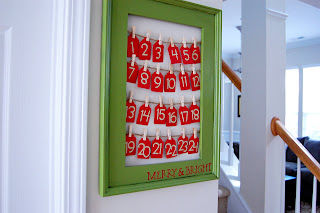
I love this printable from Eighteen25 and it is perfect to tie the colors in my stockings that hang on the fireplace to the right.
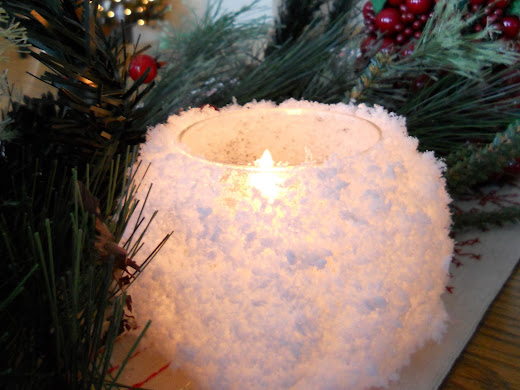
All the ornaments and silver bells are from Dollar Tree and the greenery is pieces that have fallen from my artificial Christmas tree. How’s that for re-use?
I am thinking a spruce garland and some muted red bows on the silver candlestick and the goblet would be just the right touch. All in all I am pleased with how it turned out! Not bad for free right?!
Now let’s see what you’ve been up to!


I enjoy so much your $5 projects that I decided to add an addition link section for anything under $15! That’s right. It will open up a place to show additional projects that can’t be purchased with an Abe Lincoln, but are still totally affordable! I can’t wait to see more from you!

Please remember:

  • Only link to your own projects that cost you $5 or less (price does not have to include items you had on hand) or $15 or less in the 2nd section.
  • You can link past projects that fit the dollar limit, but please only link each project one time to one DIY Under $5 party. Do not link the same project week after week.
  • No linking giveaways or items for sale
  • Please link back so others can join the party and so you have the opportunity to be featured on Saturday!


DIY under $5


Projects under $5

Projects under $15

P.S. Don’t forget to sign up for free Tipsy updates via RSS or email.

We have decided to truncate our feed to help protect against stolen content. I apologize for any inconvenience. Please love us anyway. 🙂

HANDmade Christmas Tree

December 13, 2011 By Michelle Barneck 2 Comments

HeLlO hElLo A Little Tipsy readers!!! I am Angela, the voice behind Love Sweet Love, and I am super-duper EcStAtIc to be here doing a guest post for the fantastic Michelle today! I first found Michelle’s blog through her DIY under $5 linky party and just fell in love with her cute, fun personality and blog!

A Little Tipsy is one of my favorite daily reads so it was a HUGE honor to have Michelle ask me to be here today!! Eeeeek!!

I use my little corner of the blogging universe to share my creative ideas that involve easy DIY projects for the home, craft ideas for kids, thrift store makeovers like this and this, organization ideas, and holiday decorating (the reason I started blogging!). My life is over-flowing with Sweet Love and I needed a place to share it!!

Being that I link up to Michelle’s DIY under $5 linky party religiously every Wednesday-what can I say I LOVE finding ways to make things pretty on the cheap!– I thought I would share a quick, fun, cute idea for a Christmas gift for the grandparents that you can get those cute kiddos to help with and that’ll cost ya less than a Lincoln!

HANDmade Christmas Tree:

I love creating. I LOVE spending time with my 2 littles (4 & 2 years old). They love painting. Ergo perfect Christmas activity! So let’s go!


Supplies:
-8×10 canvas ($3.99 for pack of 2 from Hobby Lobby. I used a 40% off coupon so they were $2.40 which means they cost $1.20 a piece-awesome!)
-foam brush
-Green paint-for tree
-assorted paint colors-for ornaments
-brown paint-for tree trunk if you want one 🙂
-Star sticker
-red paint pen
-ribbon (optional)
-cute little hands you could hold forever (mandatory)

Steps:
1.paint both of their hands green

2. Place their hands-one at a time-down onto the canvas. My tree has 3 layers…my 4 year olds’ hands are the bottom *branches*, my 2 year olds’ hands are the middle *branches* and then I did one of my 2 year olds’ handprints for the top of the tree, overlapping handprints as we went.

3. Then have them dip their fingers in different colored paints and place them on the tree to make ornaments.
3.5 Try not to be controlling and tell them where it looks *good* to put another ornament or what colors to use and let them have fun and decorate the tree as they want to!! (SOOOO hard for me! haha!)

4. Place a sparkly silver (or any color you want!) foam sticker on the top!

5. I wanted to add some meaning to our gift, so I included a quote from one of our favorite Christmas movies-How the Grinch Stole Christmas that used the words ‘HANDS’ to tie in the handprints. I just used a red paint pen to write it on.

“Christmas day is in our grasp so long as we have hands to clasp.”-Dr. Seuss

6. And just because I have to have a little embellishment on anything I do :), I added a few bows I tied from some red ribbon I had on hand and used a glue dot to attach them to the canvas.

7. When I was putting my red ribbon away, my jar of green ribbon was sitting right next to it, and this ric rac was just begging me to use it, so I obliged her.

Because there was already a lot going on on the front, and I didn’t want to distract from the kids work of art, I used the ric rac on the top and outer sides of the canvas and along the bottom of the quote.

I think it frames the picture nicely!

8. Lastly I tied a ribbon around the front of the canvas-for gift giving purposes :)-and was done!

Your very own HANDmade Christmas tree!

Merry Christmas!!!!

Thank you SOOOO much Michelle for having me today and thank YOU for reading along! Stop by my place anytime, I’d love to meet ya!

———————————————————-
OK, this is just too funny!
I am guest posting over at Sumo’s Sweet Stuff today where we’re getting hands on with a Christmas art project! Ha, ha. Great minds think alike! I sent this post over to her a couple of weeks ago so I laughed when I got Angela’s post! Ours is a little different a it uses hands from the whole family.

P.S. Don’t forget to sign up for free Tipsy updates via RSS or email.

We have decided to truncate our feed to help protect against stolen content. I apologize for any inconvenience. Please love us anyway. 🙂

Christmas Card Ideas with My Insanity

December 12, 2011 By Michelle Barneck 2 Comments

Hello, my Tipsy friends (not drunk, right?)! My name is Kendra, and while I may not be tipsy, I AM crazy–hence the name of my blog–My Insanity.

When Michelle and I talked about doing a blog swap this month, we thought it might be nice to pick our Top 5 holiday ideas to share. At the moment, I have Christmas cards on the brain pretty heavily–mainly because mine aren’t done, yet! Each year, the Christmas card is a perfect opportunity to show the world how crazy I am, so today I am sharing with you my Top 5 most insane Holiday cards–not counting this year’s–which is sure to be right up there!

#1-

2010
Upon a Midnight Clear

In earlier years I’ve tried to hand make all of my cards, scrapbook-style. But as the years have progressed, and the recipient list has grown, it has become less realistic to do so. I’ve switched to more digital/some-assembly required, type cards. That means the insanity transfers to the photography and design of the cards. I was so excited to do this shoot last year since I had a little baby boy. There was a fair amount of photoshopping involved, as you can imagine with kids this age (notice the grumpy angel?), but I was enamored with the idea and the result. If you haven’t figured out how I made my angel fly, check out my inspiration over at Design Mom.

#2-

2009
Home for the Holidays

This card was crazy for a few reasons. I combined the digital insanity with assembly. That Christmas was about everything homey! The Christmas cookie you see on the front, is actually one that I had decorated and photographed. It was a little tricky to get everything to line up just right.

I used an exacto knife to cut out lift-up flaps on the windows and door. Then that card was glued on top of the folded card, and my exacto cut windows revealed photos of members of our family peeking out the window or welcoming you in our front door.
The inside featured some photos of our family around the fireplace, looking cozy, and being goofy. By the silly one you read “Oh there’s no place like home for the holidays!”, and our main greeting says “Wishing you all the comforts of home this holiday season!”

#3-

2008

Partridge in a Pear Tree


2008 front
At first glance, it looks just like a cute digital photo card using recolored elements by Rhonna Farrer @ 2peas. But wait….
2008 inside
…there is more! The card is actually made of two postcards. One oversized, and one standard sized. The small postcard (where you see the graphic of the bird), lifts up to reveal the accordion fold insert, glued at the other end over half of the large post card.

For the insert, I used 11 x 17 paper (that I had had on hand for the last 8 years), and had two inserts printed/per sheet. If you can’t read, it, here is what it says (with lots of pictures to illustrate the lyrics):

The Year 2008

(To the tune of the 12 days of Christmas)
The year 2008, brought the H—- family:
12 weeks of preschool
11 months of insanity (with the URL to my blog)
10 pounds of Tessa
9 years of marriage
8 days of paintball
7 gourmet meals
6 teeth-a-missing
5 years of work (with my husband’s company)
4 days on a boat (Lake Powell)
3 birthday parties (for the kids)
2 camping trips
and our new home in Laveen.
I liked that the card tied in with my Christmas theme (that no one really knows about, but it makes me happy). But I also liked that I was able to give a bit of news, without writing a formal newsletter. In recent years, I have been directing people to our family blog for an update, rather than writing a lengthy letter.

#4-

2004
(Blue Snowflake Newspaper)


2004 was a particularly newsy year! New home, new baby, etc. And it was in the P.B.E. (pre-blogging era), so I felt a newsletter would be appropriate. Only ours was a full blown newspaper–complete with engagements, crossword puzzles, sports and arts sections.
I had a great time writing it and sharing with family and friends. Assembly was easy, but composing the whole thing was a little crazy.

#5-

2000

The Beginning of the Insanity!

I was pregnant with my first child and quite sick for several months. I spent way too much time watch Martha Stewart and other crafty people on TV, while I tried really hard not to puke. For some reason this idea from the Martha Stewart magazine, seemed doable and so clever.

Pop-up Christmas cards!

They are very clever, and doable if you want to make a few, but I am sad to say, that most of these never got sent, because with all of the embossing and assembly, I never completed enough to send to everyone on my list. I still love the concept! Maybe I’ll try them again with the kids sometime…in limited quantities.

There are even more insane Christmas cards on my blog, and the one I am currently working on will be no exception. So tell me, am I the only crazy one? Or do you send crazy Christmas cards, too?

———————————————————————-
Wow! Kendra those cards are amazing! I hide my cards from years past in shame next to those!

P.S. Don’t forget to sign up for free Tipsy updates via RSS or email.

We have decided to truncate our feed to help protect against stolen content. I apologize for any inconvenience. Please love us anyway. 🙂

DIY Under $5 Features

December 10, 2011 By Michelle Barneck 4 Comments

Today’s features are a fantastic round up of holiday goodness! I am so happy it is December! There is something about the lights and music and season that just makes everything happier! Did you know that when people were asked what one of their least favorite things about the holidays was they said, “having to be nice.” Ha! Hilarious, but I’ll take it. Go ahead and be forcefully nice to me. 😉
So here are some of my favorites. Tis the season to be jolly.
Snowball Votives from Just Another Hang Up
There are no words for how much I love these and they are sooo easy!
DIY Advent from Creative Chaos
Beautiful and made from things she could find in Namiba! Creativity at its finest!
Advent Calendar from Southern Lovely
Love that apple green! This would look lovely next to my sweater stockings!
Holiday Card Holder from Sugar Bee Crafts
Did you notice a trend in those last few? I have a slight obsession with clothespins right now.
This next one is a great gift idea! It would be fun to put the ribbon marking the nativity story in the bible! A great way to dress up the affordable paperback scriptures to make them look nice. My little guy might be getting some of these boyified of course.
Personalized Scripture Covers from G-rated
Last but certainly not least, the highest clicked post:
Bathroom Cleaning Tips from Joyful Homemaking
I mean who doesn’t want to speed up that job?!

Be sure to grab your A Little Tipsy featured button here.

P.S. Don’t forget to sign up for free Tipsy updates via RSS or email.

We have decided to truncate our feed to help protect against stolen content. I apologize for any inconvenience. Please love us anyway. 🙂
« Previous Page
Next Page »

  • Bloglovin
  • Facebook
  • Google+
  • Instagram
  • Pinterest
  • RSS
  • Twitter

Hi there! I'm Michelle. Mother of three little boys and one little princess. Welcome to A Little Tipsy, a place for exploring creativity and sharing inspiration.

Follow on Bloglovin


Visit Michelle Barneck {A Little Tipsy}'s profile on Pinterest.

Tutorials by Category


15 Family Reunion Games

Family Reunion Games Collage

15 Sprinkle Party Ideas

Sprinkle Birthday Party
Creative Commons License

© Copyright 2014 A Little Tipsy · Site Designed by The Fairy Blogmother · Web Hosting by RFE Hosting

This website uses cookies to improve your experience. We'll assume you're ok with this, but you can opt-out if you wish.Accept Read More
Privacy & Cookies Policy