Hello A Little Tipsy Readers! My name is Bev and I blog over at Flamingo Toes. I’m so excited to be here visiting today!

At Flamingo Toes I love sharing sewing and jewelry projects – as well as things I make for my home. We just moved across the country this summer from California to Tennessee so I am having a lot of fun setting up our sweet little farmhouse and exploring the area. I am so ready to experience our first real Fall – we don’t exactly get much of a season change in CA.
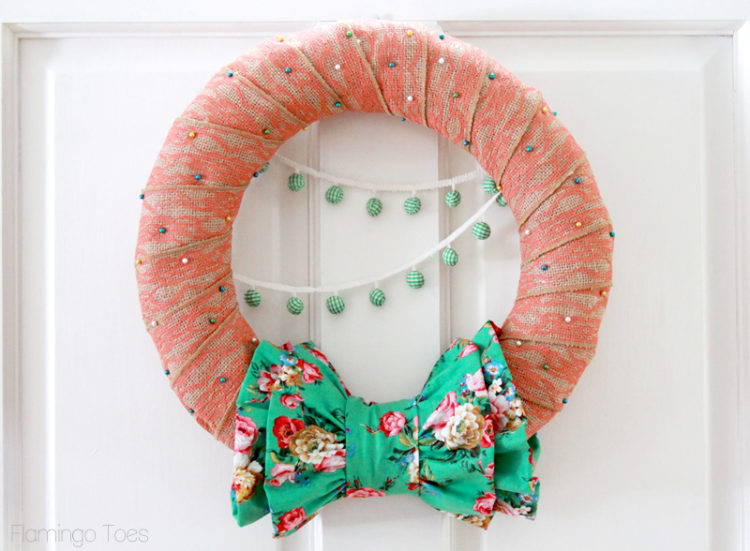
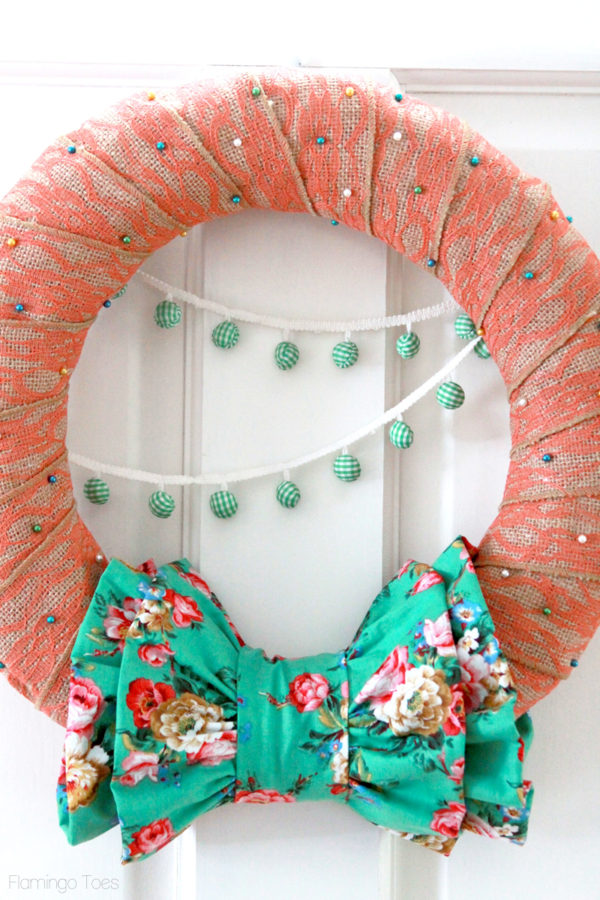
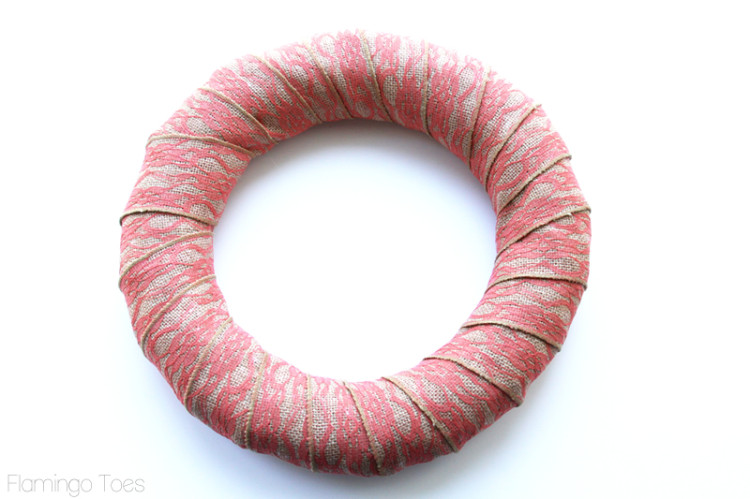
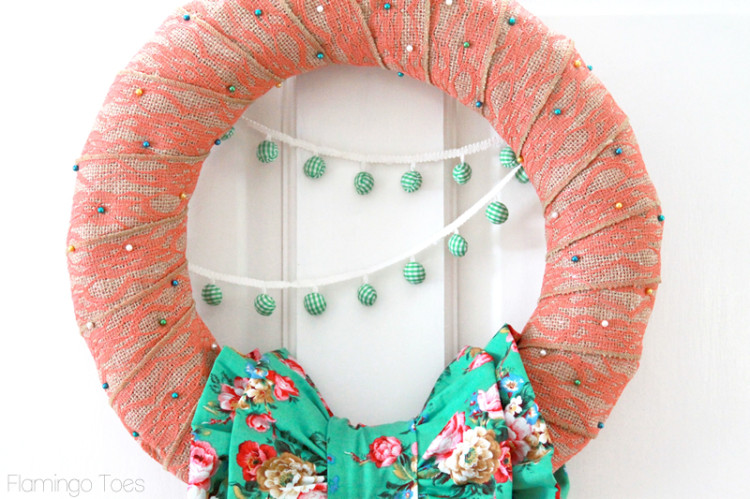
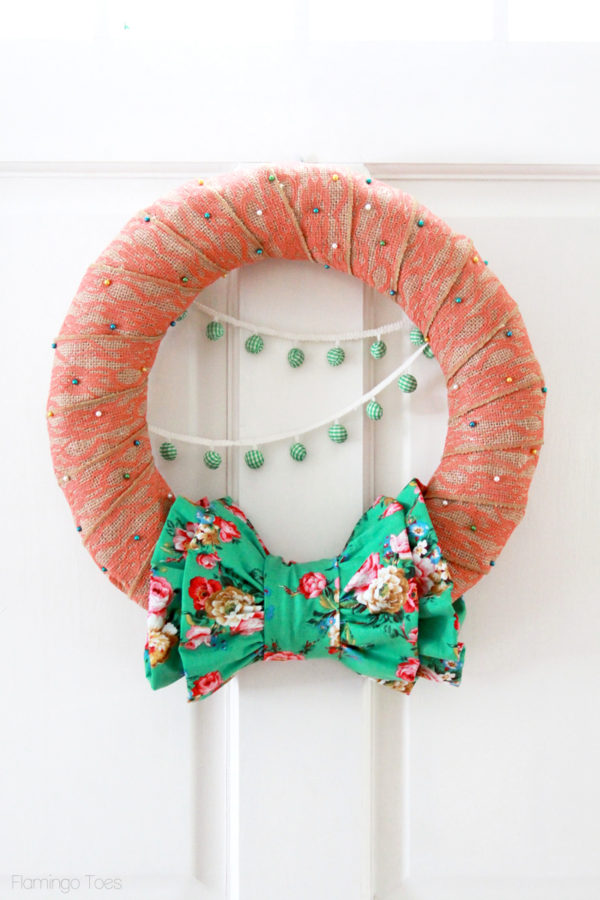
Today I’ve made up a Ruffles and Burlap Fall Wreath, inspired by the colors of Fall and all these pretty pots of mums I am seeing everywhere. I think I’m going to get some for our front porch!
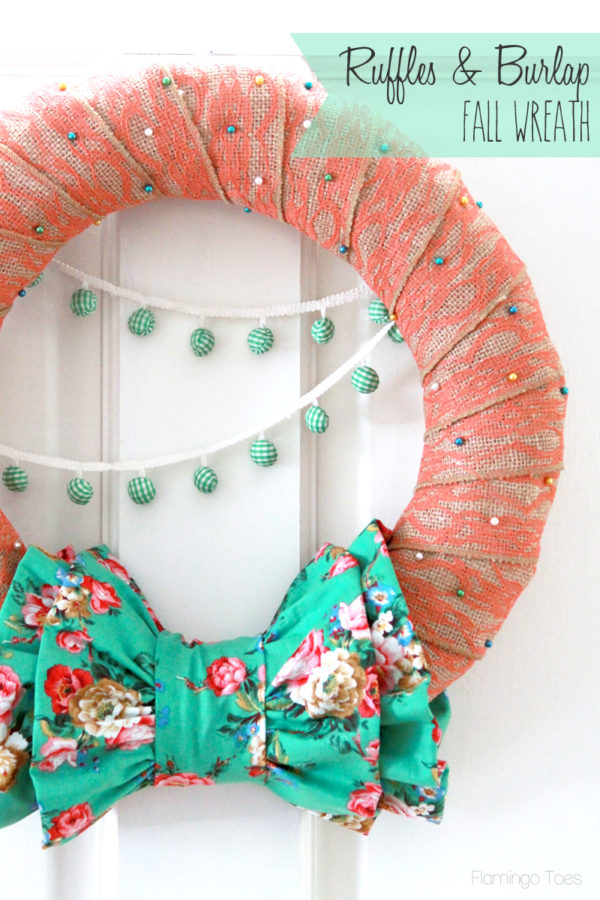
Isn’t it fun? I paired up some fun fabric ruffles with this super cute lace covered burlap ribbon that I picked up at Walmart. The whole thing is so easy to put together, and since I’m kind of fickle with my decor, I’ve made it so it’s super easy to change up whenever you want!
Won’t it look pretty with some pots of mums around the door?
So let’s get started. Here’s what you’ll need:
- Straw Wreath (mine is 14″)
- Burlap Ribbon – I used 1 1/2 spools
- Fabric for ruffles
- Needle and Thread
- Pearl head pins in different colors
- Gingham ball trim, or something similar
Begin by wrapping the burlap ribbon around the wreath. I left the plastic wrapper on but you can take it off.
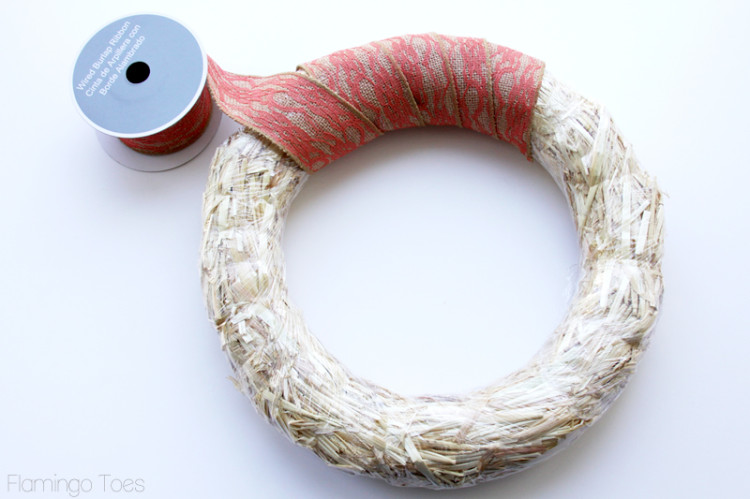
Continue until the entire wreath is wrapped. Pin the ends in place on the back, or you can hot glue it.
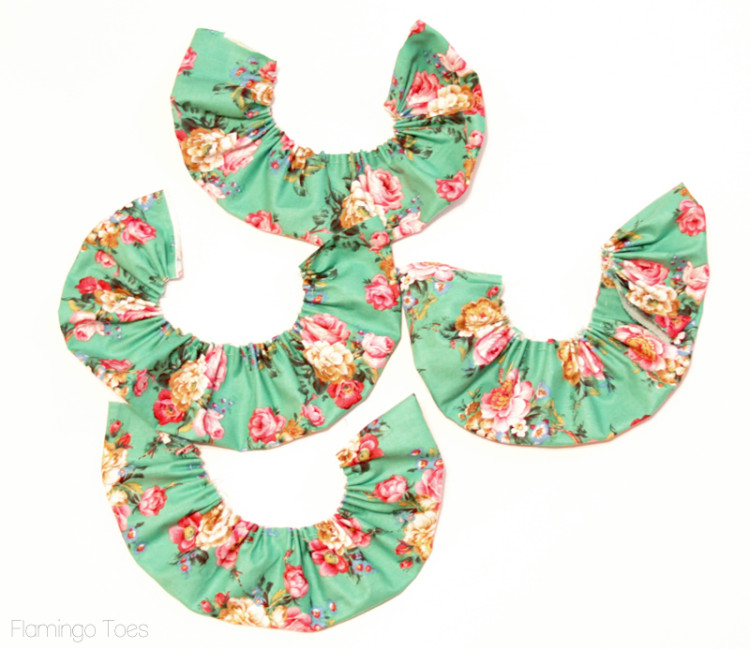
Measure around the wreath, then double that amount. Cut four pieces of fabric 5″ x that measurement – so about 5″ x 10″ or so. Fold the fabric pieces in half, then sew a running stitch along the top raw edge. Gather up the fabric ruffles so they fit around the bottom of the wreath.
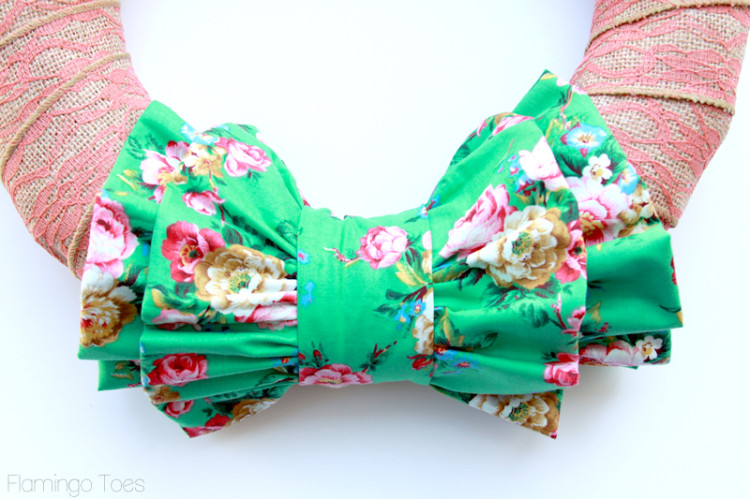
Wrap the ruffles around the bottom section of the wreath as in the picture, leaving a space of about 2 inches between the middle two ruffles. Pin in place. Cut a piece of fabric about 3″ wide and long enough to wrap around the center of the wreath once. Fold the long sides in and wrap this around the middle of the wreath, covering up the raw edges of the two inside ruffles. Pin the piece in place on the back.
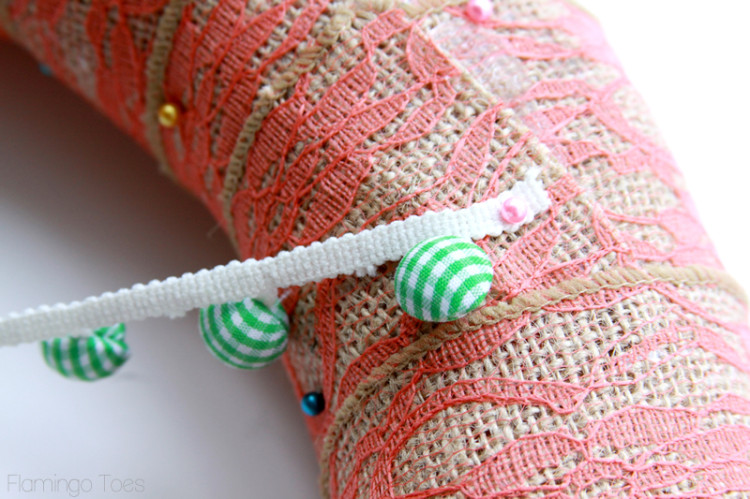
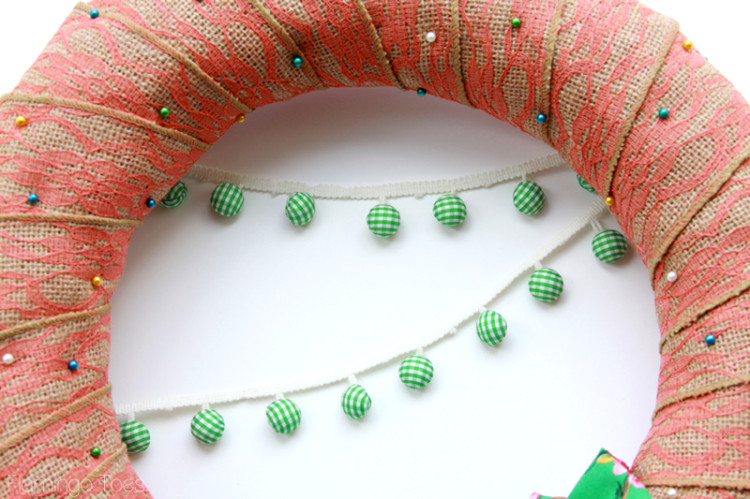
Add some decorative touches by placing pins in the burlap.
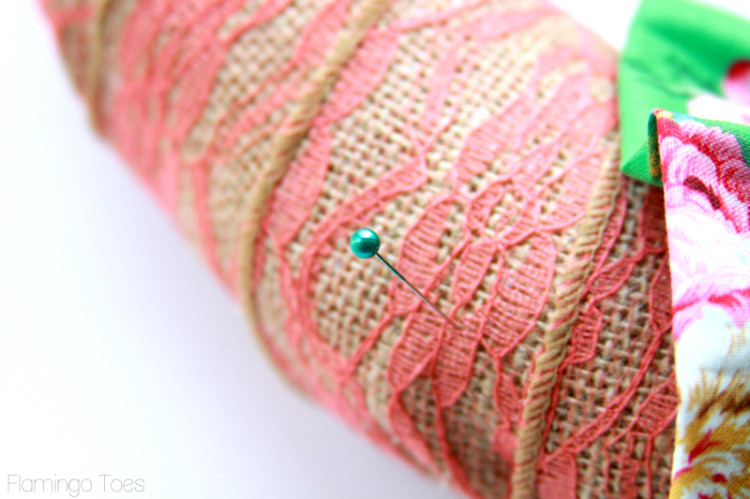
Mix and match your colors and scatter them around the wreath.

Add a couple of little strands of cute gingham pom pom trim, or something else that looks great with your fabric. Pin it in place in the back of the wreath.
I love that since the pieces to the wreath are all pinned in place, you can easily change it out if you want to update it or just make something else entirely. You can definitely glue everything down though if you want something more permanent.
That’s it! So easy right?!
I hope you give it a try!
I’d love for you to come visit Flamingo Toes sometime! Here are some of my other favorite projects!

Thanks for having me Michelle!
Leave a Reply