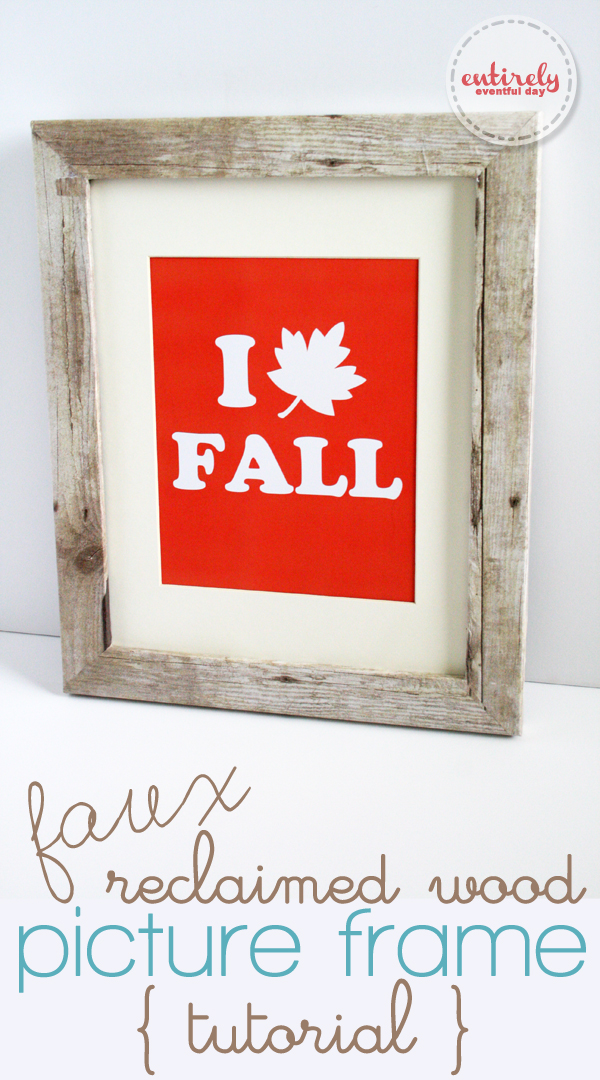
Hello again Friends! It’s Aly from Entirely Eventful Day. I hope you love Fall like I love Fall! Today I am sharing a project perfect for Fall, or anytime of the year. It’s a faux reclaimed wood picture frame. We all know how “in” reclaimed wood is right now. But I don’t have time to go out and reclaim wood, do you? Didn’t think so. That’s why I created this little beauty for you.
If you would like to fill your DIY wood picture frame with this cute I “leaf” Fall printable, come on over to my blog and download it!
Start with any ol’ picture frame. Mine was painted red from this Valentine project.
You will also need wood printed wrapping paper, Mod Podge (I used gloss), scissors, and a brush.
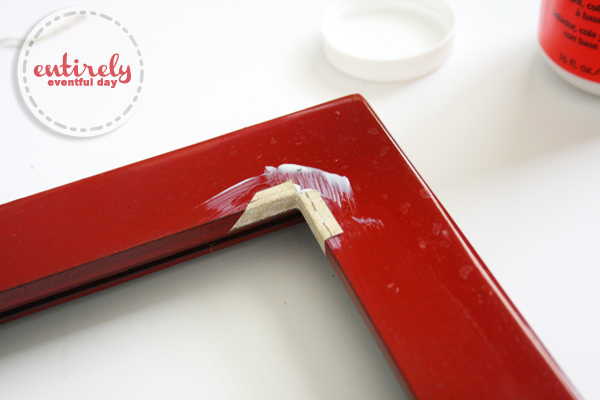
The first thing I did was apply some scrap pieces to the corner. I wanted a miter cut look and it was apparent that I wasn’t going to be able to get the perfect in the corner. So I cheated. It worked perfectly, couldn’t tell at all.
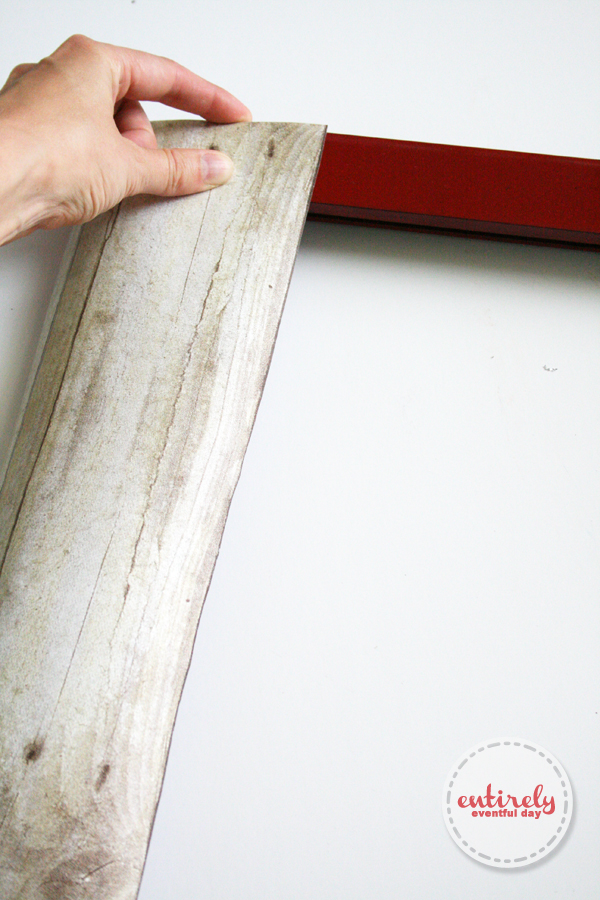
Then I lined up my paper, making sure I had the right amount to fold into the inside, and cut the angle.

Follow the directions on the Mod Podge bottle to apply the paper. You want to apply it both under and over the paper.

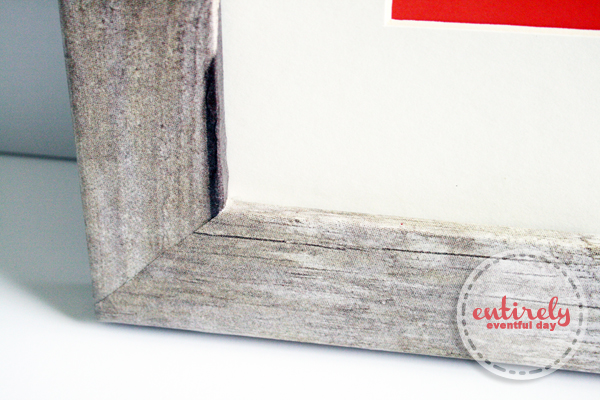
When it was time to do another corner, I simply made sure that the miter cuts overlapped and my red frame didn’t show.
I found this particular wood print paper at Hobby Lobby.

I hope this project starts your Fall off right. I can’t wait for apple cider and falling leaves!
You will also LOVE…


We have decided to truncate our feed to help protect against stolen content. I apologize for any inconvenience. Please love us anyway. 🙂
Tip for beautiful mitering: cover the two short sides first and leave it rectangle all the way to the edge rather than cutting the miter. Then cut the mitered corners on the long sides, attach, and you won’t end up with any accidental gaps.
This idea will work perfectly for our living room! Thanks for sharing!