A Little Tipsy

Creative Tips & Ideas

  • home
  • About Me
  • the tipsy top
  • press
  • projects
  • contact me
[print_thumbnail_slider]

DIY Fall Decor with Not Just a Housewife

September 26, 2014 By Michelle Barneck Leave a Comment

Hello! I am Stacy and I blog over at Not Just A Housewife. I am so excited to be guest posting for one of my favorite people in the world…. Michelle! Isn’t she amazing?! And I am so happy to be help out a little so she can snuggle that sweet baby a little more.

I love Fall! I wish it lasted longer. I love decorating for Fall and doing fun things with my kids. Here are some of my favorite DIY Fall decor projects from the past couple of seasons.

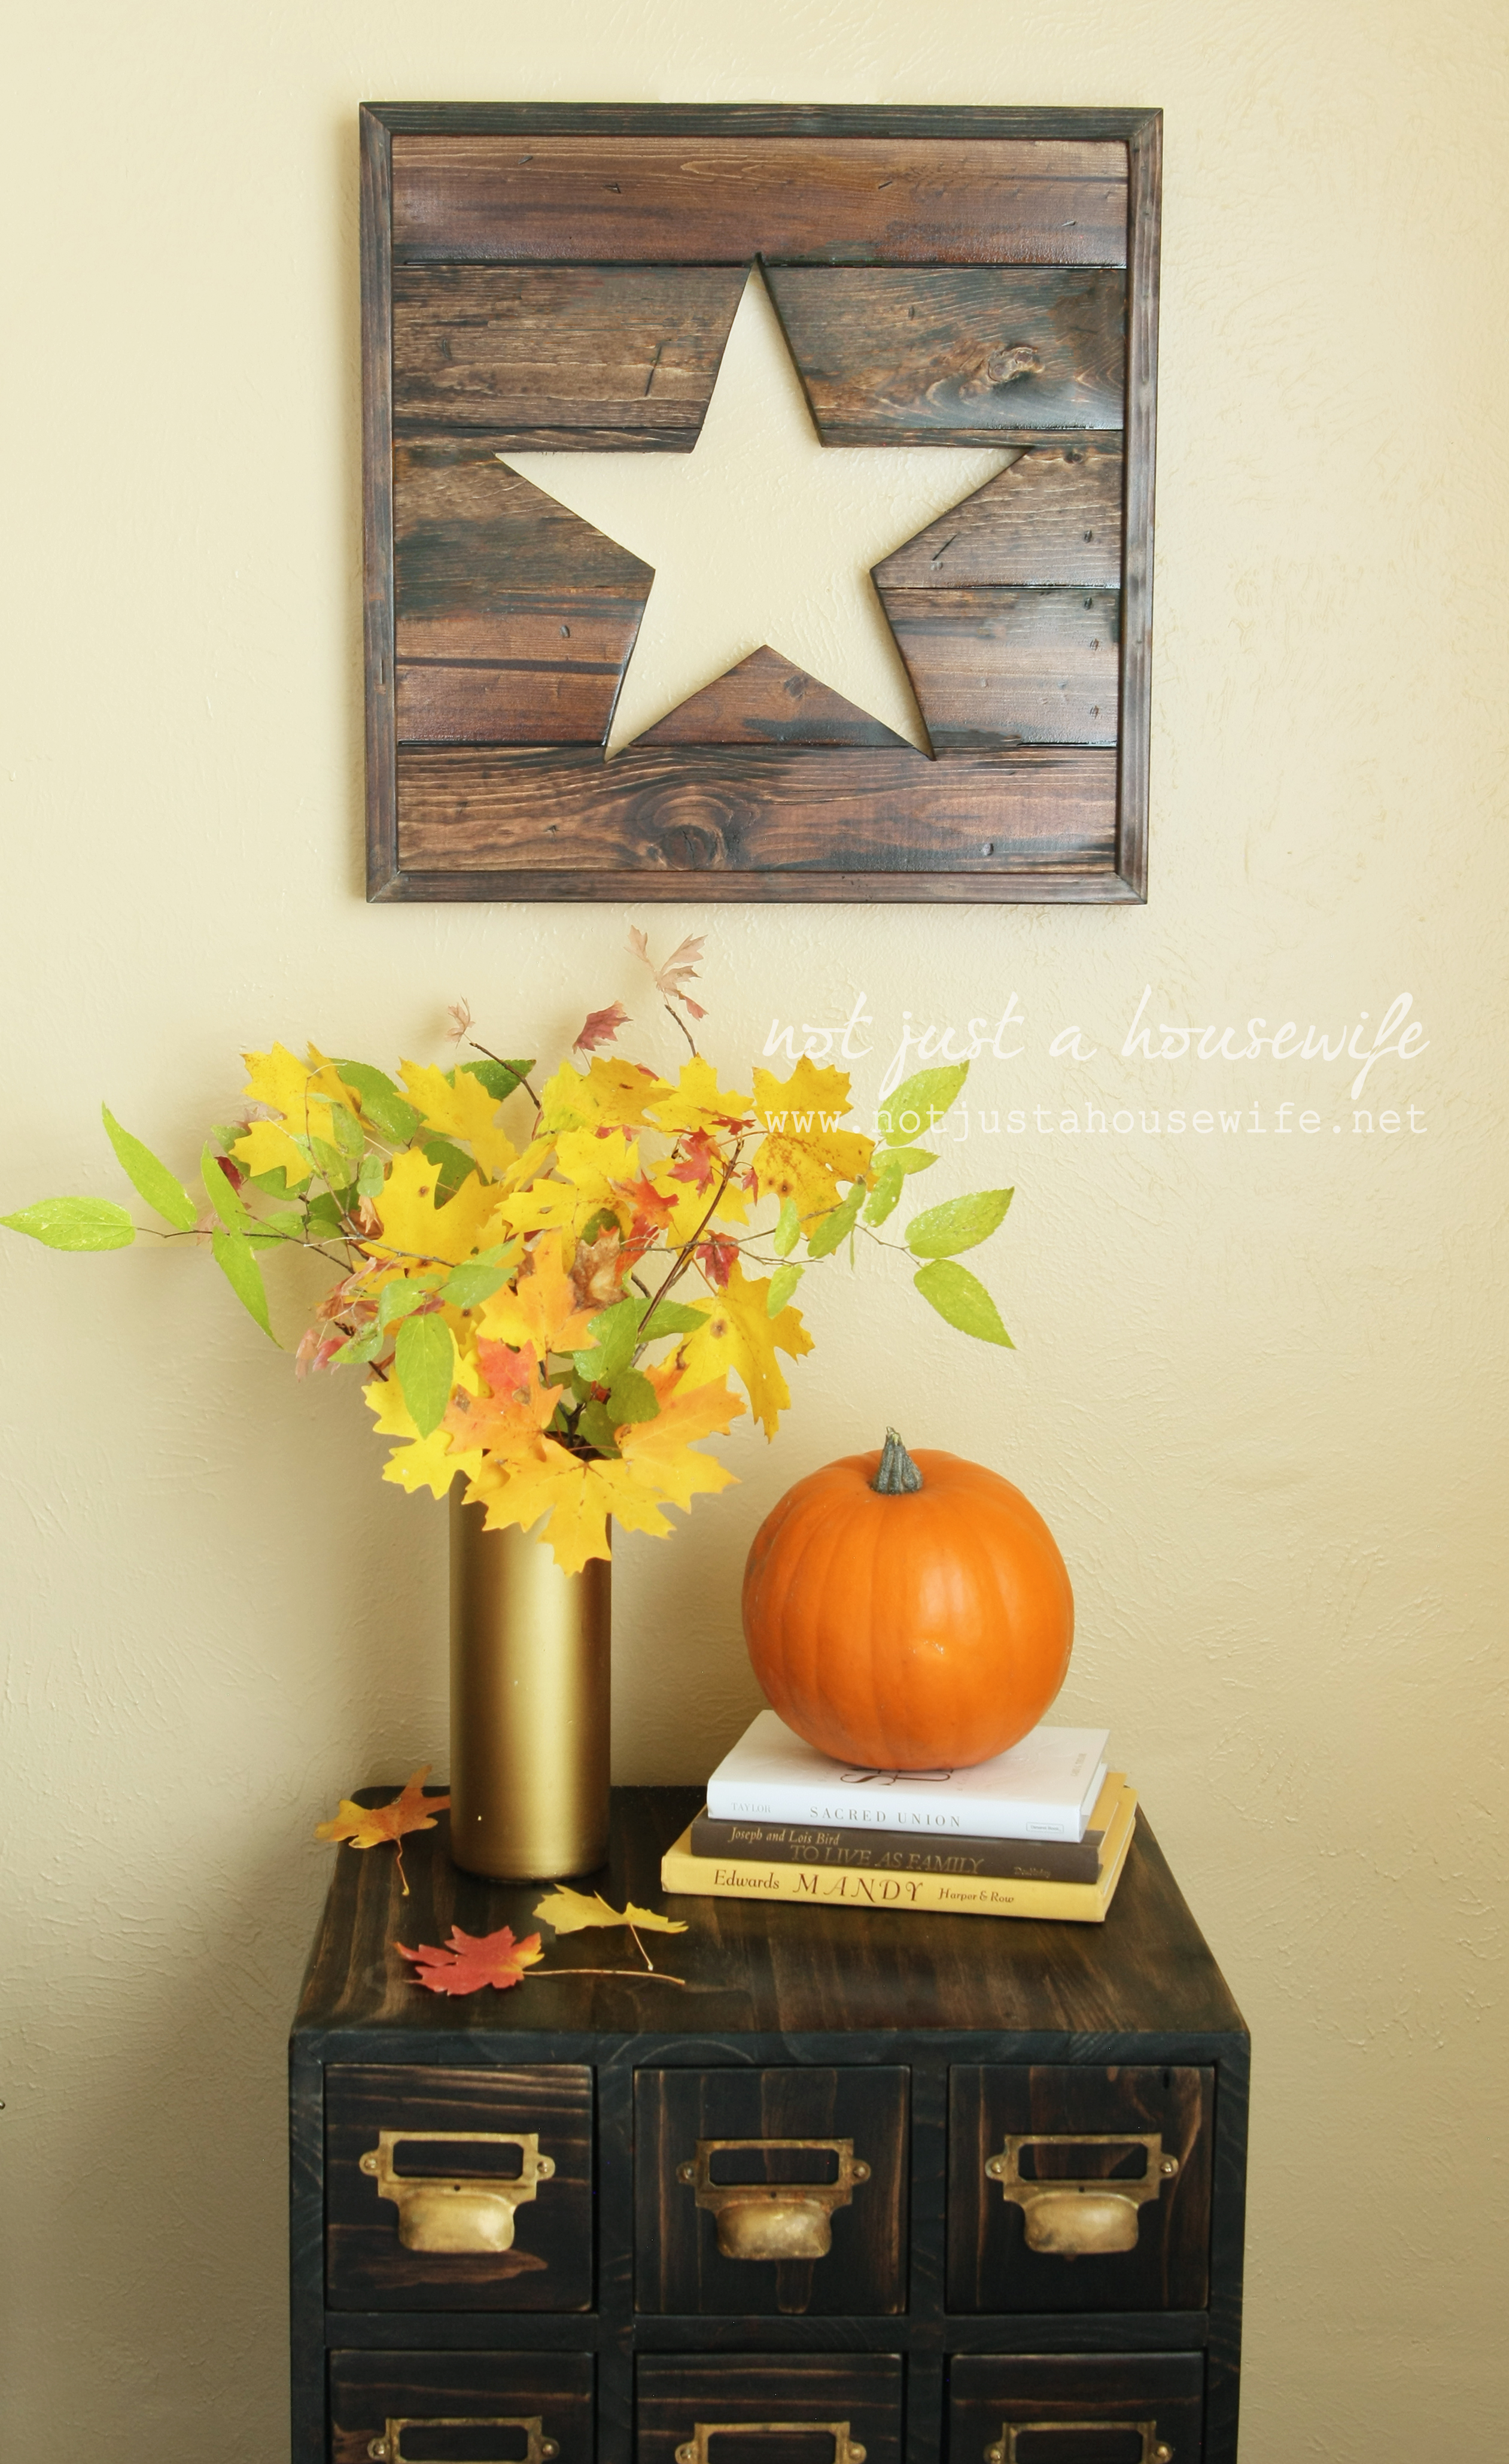
As part of a knock off challenge, I made this Pottery Barn star sign. It was easier than you might think. The full tutorial is on my blog.

star_edited-3


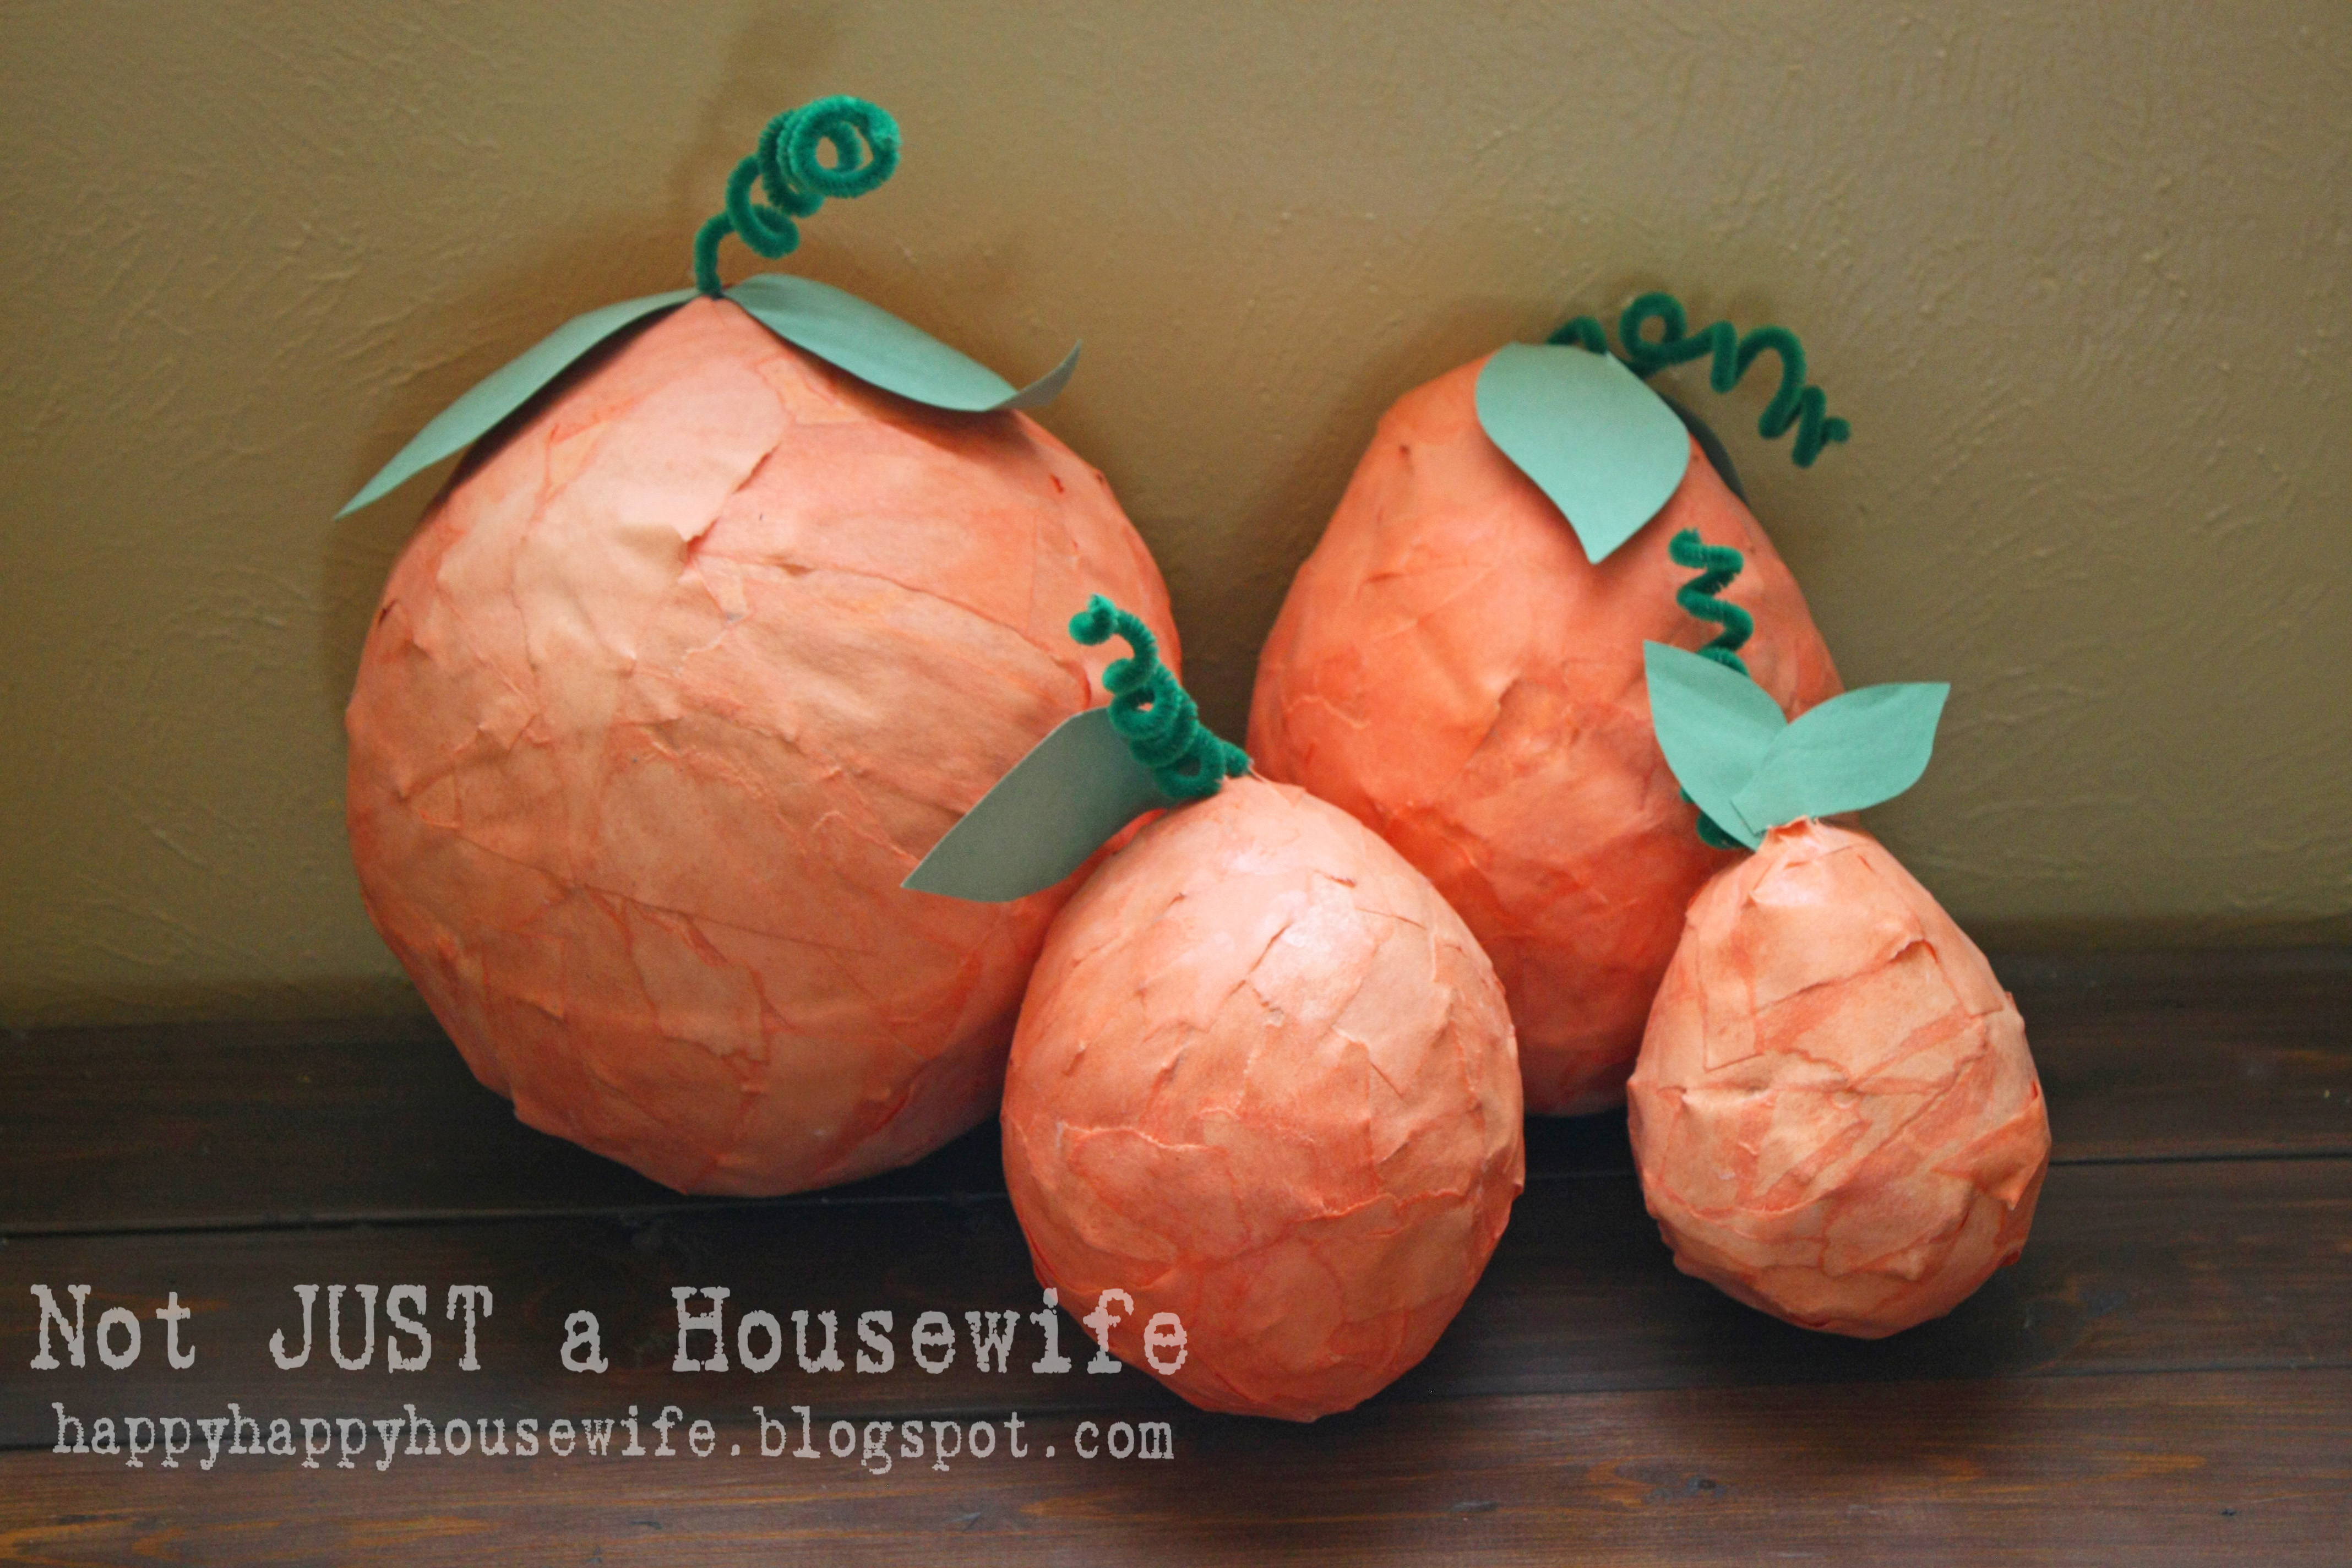
This was a fun, albeit a little messy, project we did for family night one year. We just added watered down Elmer’s glue to a paper bowl and ripped strips of construction paper that then got dipped in the glue. We placed the paper over balloons and let them dry. A little more construction paper for leaves and some pipe cleaners for the stem and Voila! A paper mache pumpkin 🙂

papermachepumpkins
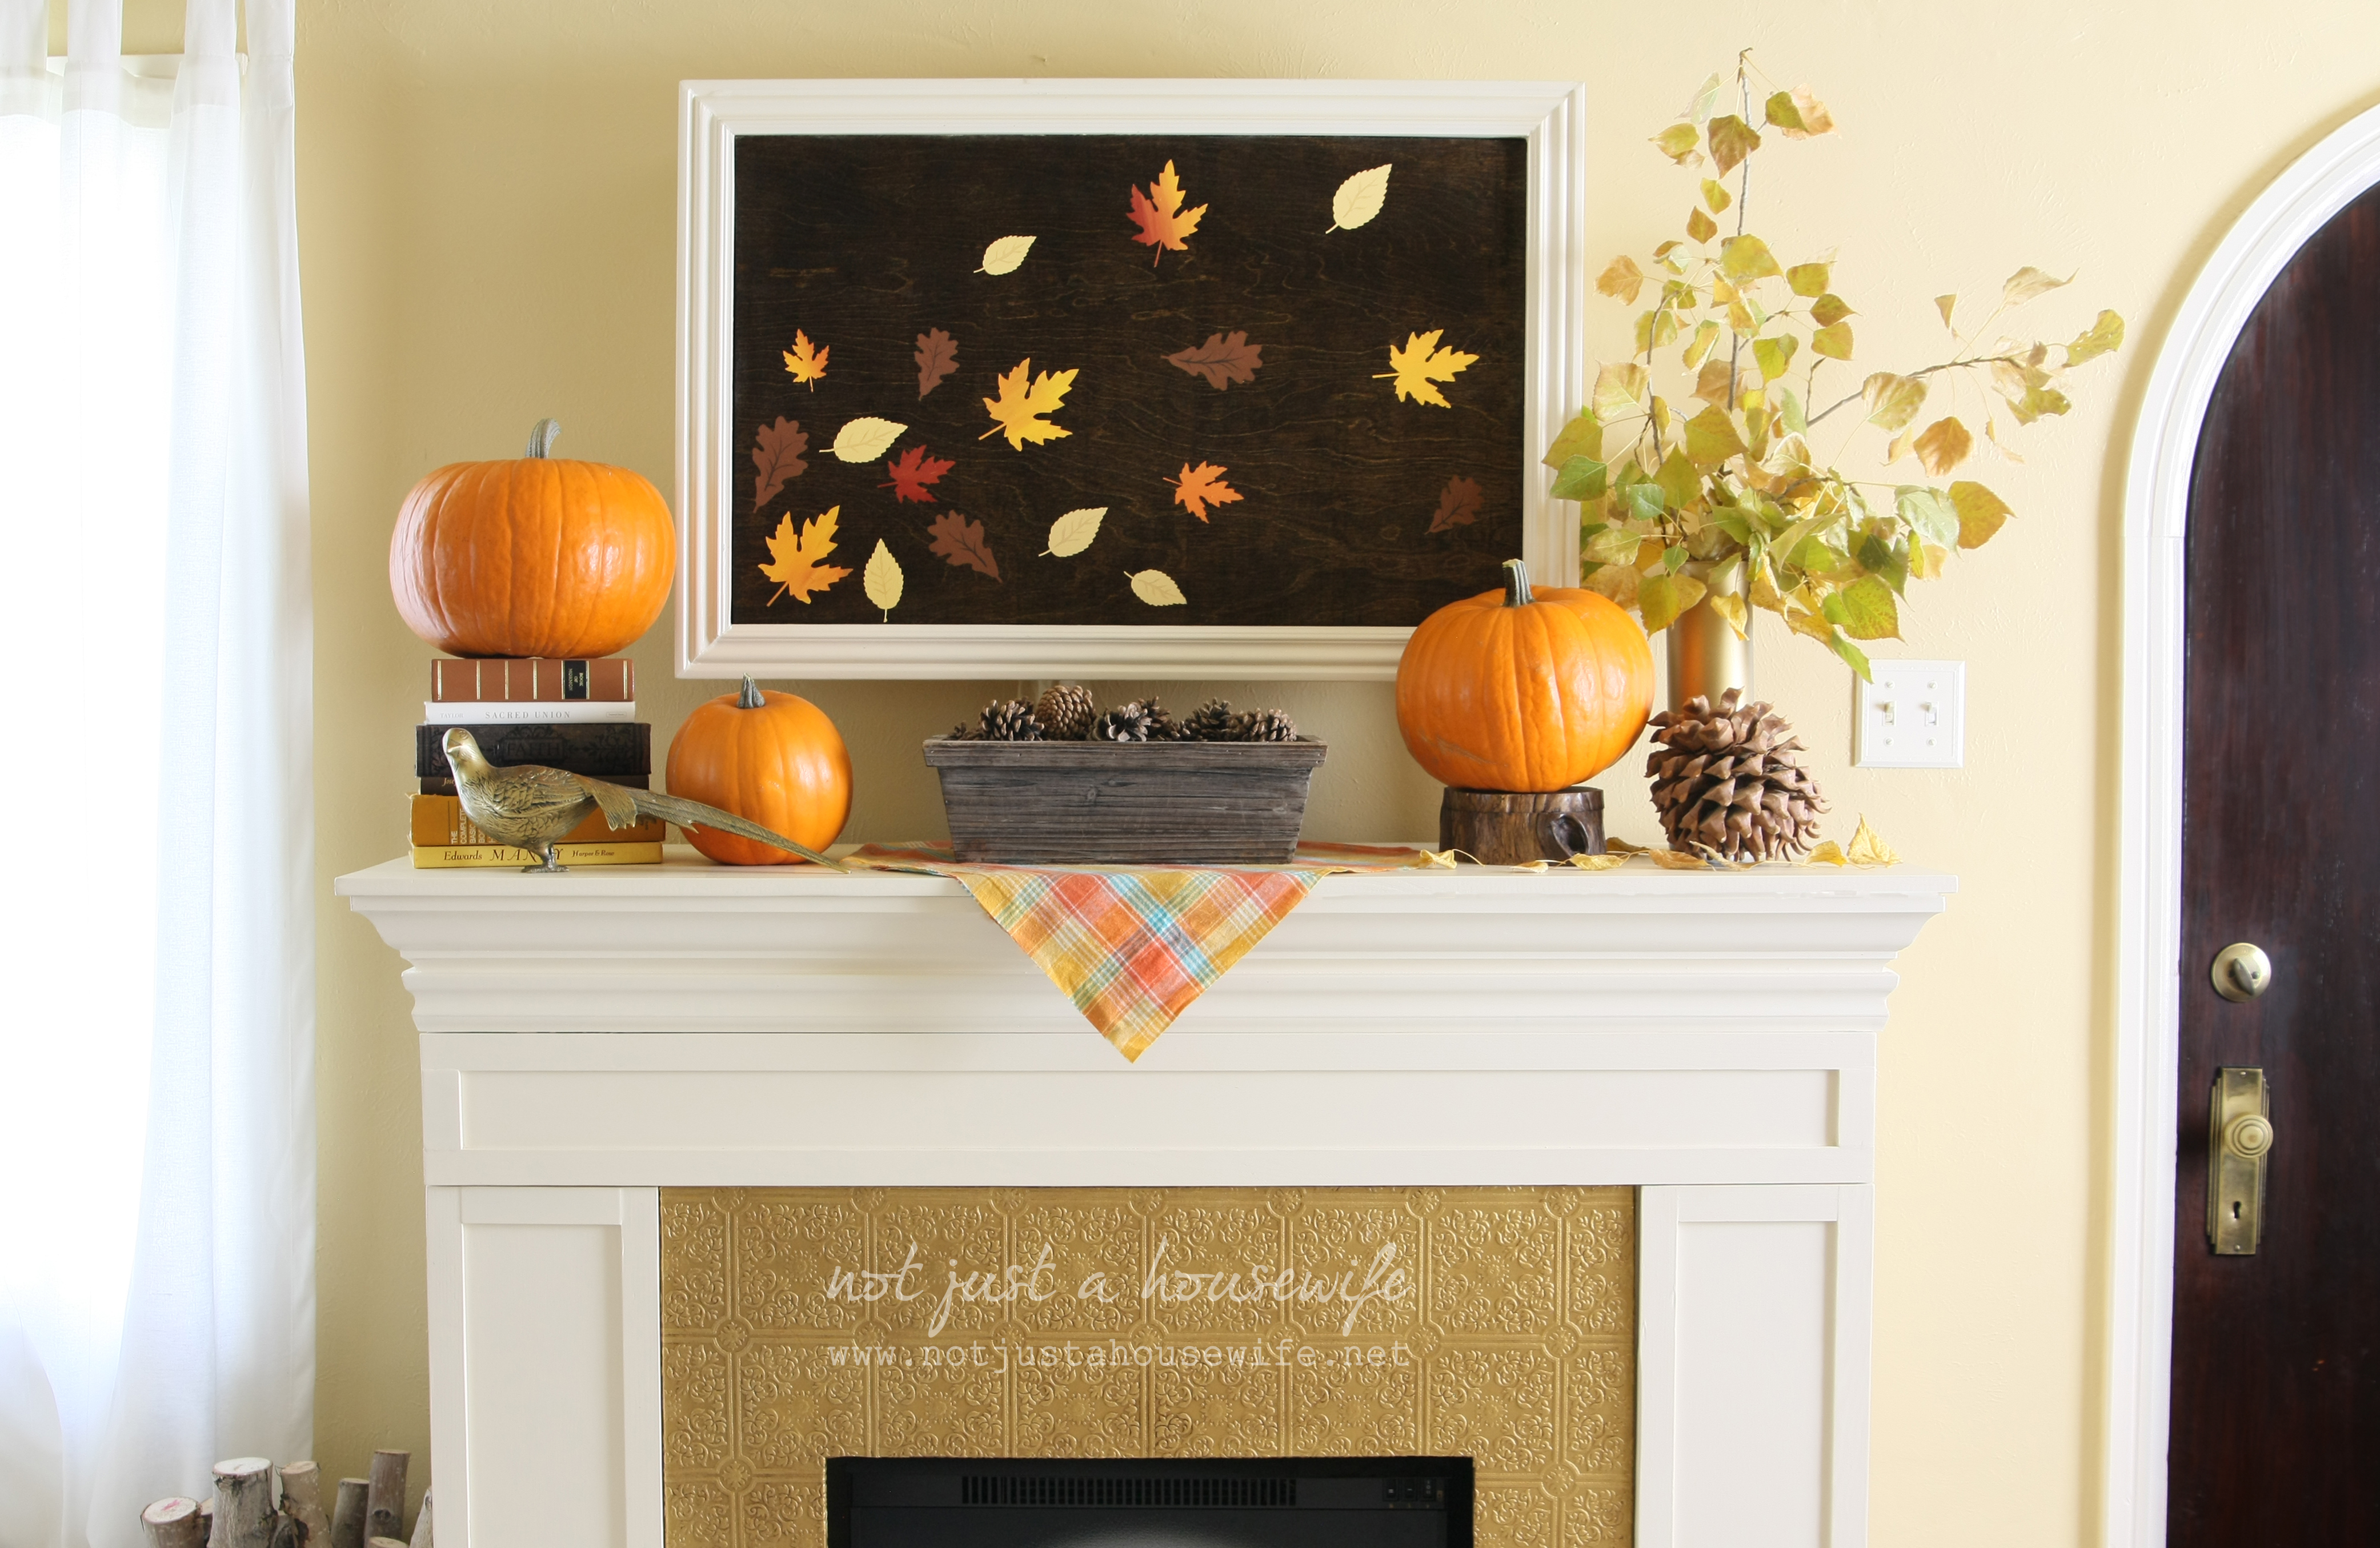
I usually have a foam board that I painted with chalkboard paint that covers up our TV when not in use. But last year I made this simple fall art using 1/8 plywood, stain, and a little paint. The full tutorial is on my blog. Super easy!

fall-mantel


I was challenged to decorate a table for fall last year and I had so much fun! You will have to click over to see all the details up close and for where I got all the products. Those plates are still my favorite!

fall-table-setting


I am not big “scary” Halloween decor type of person but I try to add some Halloween items and not just Fall things. This pumpkin topiary was one of the things I made. My kids loved it!

1


I hope you all have a wonderful Fall season this year and enjoy the cooler temperatures, the crisp air, and the changing leaves. Come on over to my blog sometime and say hi. I would love to have you check out some of my other projects too.


Pumpkin Pecan Loaf from Cooking with Ruthie

September 24, 2014 By Michelle Barneck Leave a Comment

Hi everybody… It’s Ruthie from Cooking with Ruthie.

I hope you’re having a totally fabulous morning and Happy Autumn! Oh my. It’s Pumpkin season and that’s one of the BEST times of the whole entire year 🙂

My Pumpkin Pecan Loaf with Orange Glaze will put you in the mood for some fall baking for sure! Yummmm.


Pumpkin Orange Pecan Loaf on www.cookingwithruthie.com

You maybe thinking that pumpkin and orange isn’t supposed to go together but I’m here to tell you that in these little loaves- it’s magic.

Delightful. You’ve just gotta give them a try and then you’ll see exactly what I mean 🙂 Everyone that sampled them could nothing but rave about how much they liked the pairing.


Pumpkin Orange Pecan Loaf
Recipe Type: Bread
Author: Ruthie
Prep time: 20 mins
Cook time: 50 mins
Total time: 1 hour 10 mins
Serves: 2
Ingredients
  • 3 eggs
  • 1 (15oz) can pumpkin puree
  • zest of one orange (approx 3 Tbsp)
  • juice of one orange (approx 1/2 C)
  • 1 1/2 C sugar
  • 1/4 C canola oil
  • 3/4 C fat free vanilla greek yogurt
  • 1 Tbsp vanilla
  • 2 C flour
  • 1 tsp ground cloves
  • 2 tsp cinnamon
  • 1/2 tsp nutmeg
  • 1 1/2 tsp baking soda
  • 2 tsp baking powder
  • 1/2 tsp sea salt
  • 3/4 C pecans, chopped
  • Orange Glaze:
  • 1/4 C butter, softened
  • 2-3 C powdered sugar (depending on the thickness you desire)
  • 2 Tbsp orange zest (approx half an orange)
  • Juice of one orange (approx 1/2 C)
Instructions
  1. Preheat oven 350 degrees.
  2. Coat 2- 9×5 loaf pans or 4 mini loaf pans with cooking spray.
  3. In large mixing bowl combine eggs and sugar; cream.
  4. Add oil, orange juice, orange zest, greek yogurt, vanilla; mix to combine.
  5. Add all dry ingredients, mix until 80% incorporated.
  6. Add pecans, mix just until combined.
  7. Don’t over mix.
  8. Divide batter between loaf pans.
  9. Bake mini loaf pans 25-30, full size 45-50 or until toothpick inserted in center removes clean.
  10. Cool 5 minutes in pans, remove to cooling rack.
  11. Orange glaze:
  12. In a small mixing bowl, cream butter, add 1 C powdered sugar; mix.
  13. Add orange zest and orange juice; mix until creamy.
  14. Add remaining powdered sugar 1/2 C at a time until desired consistency is reached.
  15. Drizzle on cooled loaves and enjoy!
3.2.2807

*adapted from www.mountainmommacooks.com


Pumpkin Orange Pecan Loaf on www.cookingwithruthie.com

AND to inspire your Autumn Baking alittle bit more…

Pumpkin Pancakes with Caramel Syrup by www.whatscookingwithruthie.com

Pumpkin Pancakes with Caramel Syrup

www.cookinwithruthie.com

Apple Pumkin Strudel Muffins

Pumpkin Spice Whoopie Pies1

Pumpkin Spice Whoopie Pie with Nutella Cream Cheese

Enjoy the Pumpkin Season with all of these yummyilicous recipes!

I hope you have a fabulous day and thanks so much for having me over to visit.. I’d love to have you stop by anytime over at my place.

Catch up with me at www.cookingwithruthie.com or on Pinterest, Google+, Facebook, Twitter and Instagram.

Happy Baking!

xoxo~ Ruthie

Wine Cork Pumpkin with That’s What {Che} Said

September 15, 2014 By Michelle Barneck 7 Comments

Hello everyone! I’m Cheryl! I live over at That’s What {Che} Said…

Facebook Twitter Pinterest Instagram Google+ RSS Bloglovin That's What {Che} Said... About Cheryl About Image Map

I just had my third boy this past July so I am extra thrilled to be here while Michelle gets to spend some extra time with her new little man! Today I am sharing this really easy and fun wine cork pumpkin project!

Cork Pumpkin Project at thatswhatchesaid.com

Supplies Needed:

  • 34 Corks
  • Orange Paint
  • Green Scrapbooking Paper
  • Green Washi Tape
  • Thin Craft Wire
  • Raffia
  • Hot Glue Gun/Glue Sticks
  • Newspaper
  • Paper Plate
  • Scissors

Pumpkin 1

I started out by spreading out a sheet of newspaper, then I used a bit of orange paint and dabbed one end of the cork into to the paint. If it’s on too thick, simply daub the cork down a few times to remove the excess. Repeat this for all corks.

Pumpkin 2Pumpkin 3
Lay all the corks out on the newspaper to dry.

Pumpkin 4

While those are drying, I cut a few leaves from some scrapbooking paper/green cardstock.

Pumpkin 5

Once the corks are dry, start assembling with your hot glue. Start out with a row of 5 corks, next row is 6 corks, next row is 7 corks, then top with 6 cork layer, and then a 5 cork layer and finish with a 4 cork layer. Then I added another cork as the stem. You can also make a cute curly-Q with some washi tape and wire! You can find out how I made that stem here.

Pumpkin 6

Next I bent the paper leaves slightly to give them some dimension and glued them into place.

Pumpkin 7

Pumpkin 9

I thought it needed something else to finish it so I added a raffia bow by simply tying a string or two of raffia in a bow!

Pumpkin 8

Cork Pumpkin

There you have it! A super cute little pumpkin to adorn your mantel or table top! If you like this pumpkin project I welcome you to hop over and see how easy it is to make these cute Clay Pot Pumpkins!

Clay Pot Pumpkins at thatswhatchesaid.com

If you love pumpkin everything like I do then be sure to grab this Pumpkin Tiramisu Recipe

Pumpkin Tiramisu Recipe at thatswhatchesaid.com

or perhaps this all-time favorite Pumpkin Gooey Butter Cake Recipe or 3-Ingredient Pumpkin Dip. Both recipes scream fall!

Pumpkin Gooey Butter Cake 3 Ingredient Pumpkin Dip at thatswhatchesaid.com

My door is always open and I love to make new friends! Please stop by and say hello! I’d love to connect on social media as well! You can find me below!

Facebook Twitter Pinterest Instagram Google+ RSS BlogLovin Image Map


Fall Burlap Subway Art Printable with My Daylights

August 27, 2014 By Michelle Barneck 8 Comments

FallBurlapSubwayArtPreview

Hi there! I’m really excited to be a guest here at A Little Tipsy. I’m Jennifer from My Daylights where I share a little bit of everything-recipes, crafts, a little DIY, thoughts, book reviews, and my very favorite thing, Printables.

Walking down the aisles at craft stores and some retail stores, I have to honestly say that I breathe a sigh of relief to see the fall items on the shelves. While there are definitely some fun aspects to summer, I am honestly not in love with it! I am not a fan of the heat. At all! Which is why Fall is amazing. It’s beautiful, it’s crisp, it’s cooler, and it has one of my favorite holidays-Halloween. My husband is always joking each year that we can’t possibly add one more fall decoration to our home and I take great pride in proving him wrong!

One of the easiest ways to decorate is with printables. Just print them out, throw them in a cute frame, and voila! Instant decor that’s easy to change out and move around. I have loved seeing all of the burlap items around the stores.

Fall Subway Burlap Printable At mydaylights.net

Burlap has such great texture and adds a special charm to any decor. Because I love it so much, I decided to create a printable that looks like it’s burlap. It’s easier than painting or getting the little burlap fibers everywhere.

_DSC1502

The printable has some of my favorite words for fall, including a fun pumpkin.

_DSC1501

It’s an 8×10 and works best being printed either on premium photo paper or premium presentation paper.

Download the Fall Burlap Subway Art Printable Here.

I hope it’s a nice compliment to your Fall Decor this year. If you like this, pop on over to my blog for more fun posts like the ones below! Click on the pictures to be taken to the posts.

OneHourDinnerRolls

Easy Homemade Dinner Rolls

BackToSchoolMapPreview

Back to School Treasure Map Printable

Chalkboard Key Holder 1

DIY Chalkboard Key Holder

Next Page »

  • Bloglovin
  • Facebook
  • Google+
  • Instagram
  • Pinterest
  • RSS
  • Twitter

Hi there! I'm Michelle. Mother of three little boys and one little princess. Welcome to A Little Tipsy, a place for exploring creativity and sharing inspiration.

Follow on Bloglovin


Visit Michelle Barneck {A Little Tipsy}'s profile on Pinterest.

Tutorials by Category


15 Family Reunion Games

Family Reunion Games Collage

15 Sprinkle Party Ideas

Sprinkle Birthday Party
Creative Commons License

© Copyright 2014 A Little Tipsy · Site Designed by The Fairy Blogmother · Web Hosting by RFE Hosting

This website uses cookies to improve your experience. We'll assume you're ok with this, but you can opt-out if you wish.Accept Read More
Privacy & Cookies Policy