A Little Tipsy

Creative Tips & Ideas

  • home
  • About Me
  • the tipsy top
  • press
  • projects
  • contact me
[print_thumbnail_slider]

3D Scan and Print Owl Bookmarks with HP Sprout

October 20, 2015 By Michelle Barneck Leave a Comment

My husband used to say that 3D printers would soon be in houses everywhere. I would humor him with a nod and think how it was still a ways off. Then, a couple months ago I got an email from HP with an offer to try out their HP Sprout with what?! 3D scanning and printing capabilities. Seriously? I thought. This is a sure fire way to become the coolest wife ever. So I agreed and our journey started.

I am so excited about the possibilites this has opened up. I started with something fun for fall and embarked on my first 3D scan and print project, owl bookmarks. Are they not the cutest?

3D scan and print Metallic Owl Bookmarks

Wanna see what they started from? I had this quirky thrift store owl I had purchased a while ago gathering dust on the shelf just waiting to have a purpose. He fit the recommended guildelines (matte, fits within capture stage, light colors, etc.) for optimal 3D scanning with the Sprout and I thought he would be really fun printed tiny for jewelry or bookmarks.

HP Sprout 3D scanning with stage how to

So, how do you get from your inspiration object to being ready to print? I made this little video to show you the steps and tips I learned along the way for the best experience with 3D scanning. It will show you all you need to know to be on your way. You can learn even more at sprout.hp.com.

If your first scan does not work perfectly, don’t worry! I found objects can easily take six cycles or more to get a full 3D capture for a print. Like a lot of new technology it has a learning curve, but once you have it down the possibilities are endless! With software like Meshmixer and others you are not limited by what you can scan, only by what you can imagine!

Now, once you have your object scanned and changed to an .OBJ file you are ready to make your 3D print. I used the Dremel Idea Builder and man is it cool! See the printer in action on my Facebook page. My little owls only took 15 minutes each! Here’s one still in the printer.

3D print Owl using HP Sprout and Dremel Idea Builder

Once I had all three printed, I painted them with liquid guilding to give them a metallic sheen. I love how they look in silver, brass, and gold! Then, I just glued them to some paper clip style bookmarks and that was that!

3D Print Owls for Bookmarks using HP Sprout

3D Scan and Print Metallic Owl Bookmarks #HPSprout

It has been so fun playing with 3D scanning and printing as well of the other features of the HP Sprout like the 2D capture and touch mat for editing. And now that the cat is out of the bag my husband is chomping at the bit to get his hands on it. He already has a line up of projects planned including printing a replacement leg for his keyboard that broke.

Check out more projects created with the HP Sprout by clicking here.

Fall Gratitude Printable

October 8, 2014 By Michelle Barneck Leave a Comment

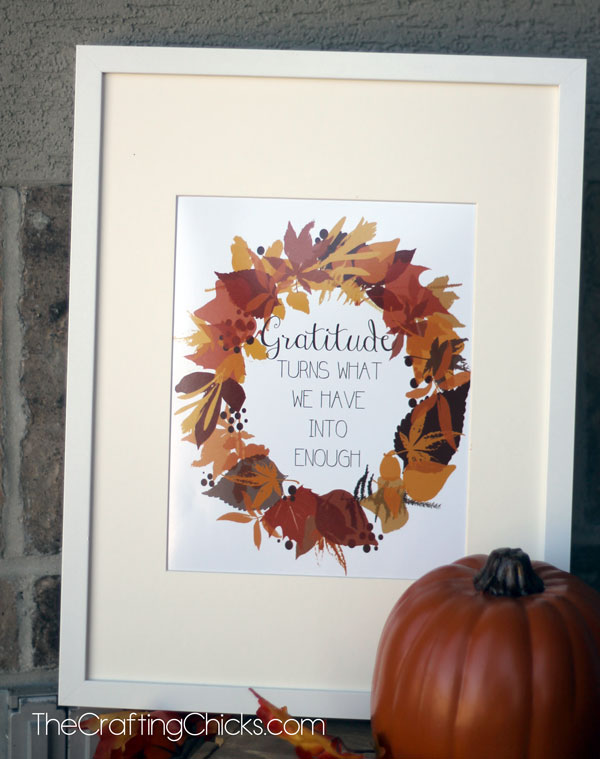
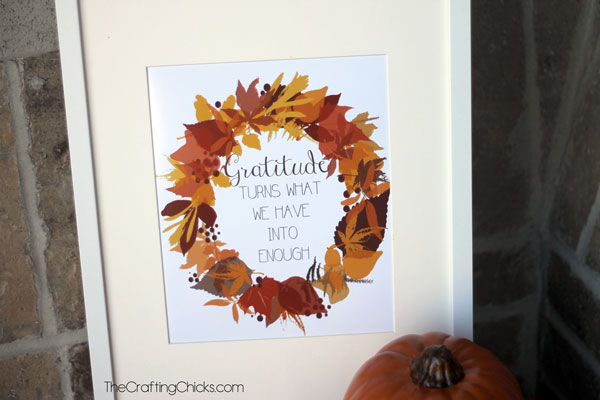
Hello A Little Tipsy readers. I’m Becky from The Crafting Chicks, where we like to share inspiration for your everyday life. I’m so happy to be here with you and can’t wait to share a fun fall gratitude printable I cooked up.

Fall-gratitude-printable

I love Autumn and all the fun that comes with it. But one of my favorite things about this season, is the opportunity to reflect on what I’m grateful for. This quote helps me remember that I have enough and I should be grateful for everything I do have.

Gratitude-Fall-Print

I hope you enjoy it too. Download the free printable for yourself below.

cc_download

Serving Up Autumn with Tea Rose Home

October 3, 2014 By Michelle Barneck 1 Comment

Hello everyone! I am Sachiko from Tea Rose Home where I share sewing, refashioning and craft projects. I am so happy for Michelle and her family for their new bundle of joy. I met Michelle in person a few years ago, and I really loved her warm down to earth manner. She is the type of person that when you meet her once you will consider her your friend. I am excited to share my autumn craft tutorial with you today.
I usually don’t like over-the-top seasonal decorations (except Christmas), but it is fun to have some items here and there to get the feel of the season.
I found a unique plastic plate at Hobby Lobby the other day. It is covered with burlap and get this… it was only $2.99. I had a light bulb moment and knew exactly what I wanted to create with this.

{You will need}
Plate
A few fall stems
glue gun
{How to}
1. Separate the small branches off the stems. I chose the ones in the picture, but you can choose something completely different and create your own look. Right now, fall stems are on sale for 40% off at most of the craft stores.

2. Start gluing them onto the plate. It is so much easier to create a perfect circle with a plate. All you need to do is to glue the stems along the inner edges of the plate.

3. Keep going until you connect the ends. Make sure that there is no glue showing. Add some branches to those spots to make it pretty.

The great thing about this Wreath on a Plate is, you can decorate in two ways.
I used a plate stand to prep the plate. Now, I can enjoy the small ‘Wreath’ on my buffet chest.

or, I can lay it flat and put candles and such to decorate the space.

I love versatility. 🙂
Thank you for having me here today, and I hope you enjoyed my post. Please come visit me and explore other sewing/craft posts such as these:
Dollar store find to a ring display case;

If you like sewing, you might like my She Carries flowers bag…

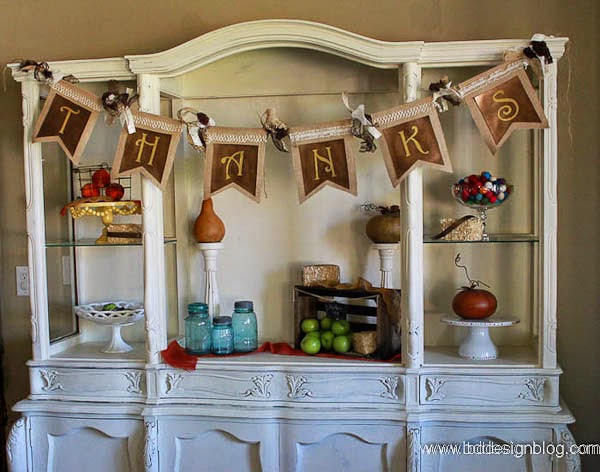
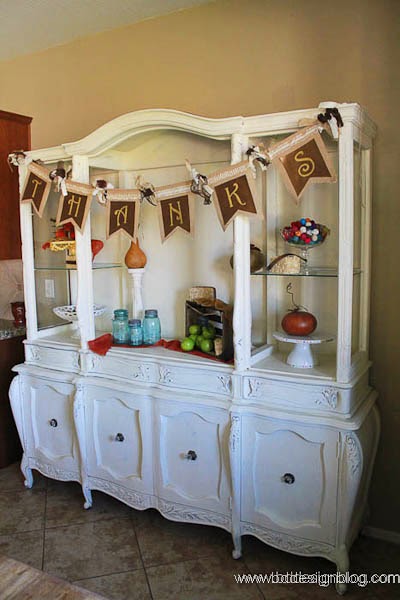
Burlap and Leather Thanks Banner from BD Design

October 1, 2014 By Michelle Barneck Leave a Comment

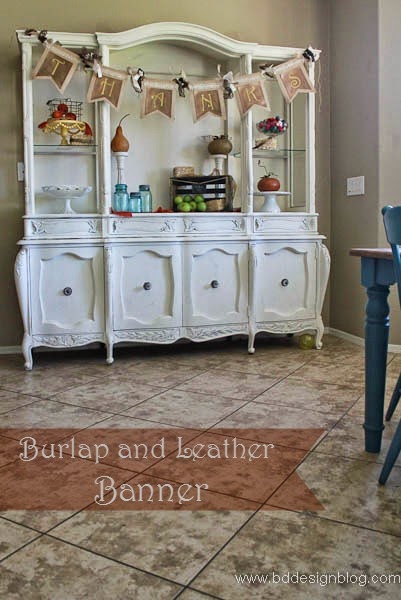
Hello Tipsy friends. I am Brandy and I’m the author over at BD Design, a blog providing ideas and inspiration for home decor, simple DIY crafts, and home improvement projects mixed with a little bit of real life! Today I’m sharing a quick tutorial for a burlap banner that is perfect for Thanksgiving.

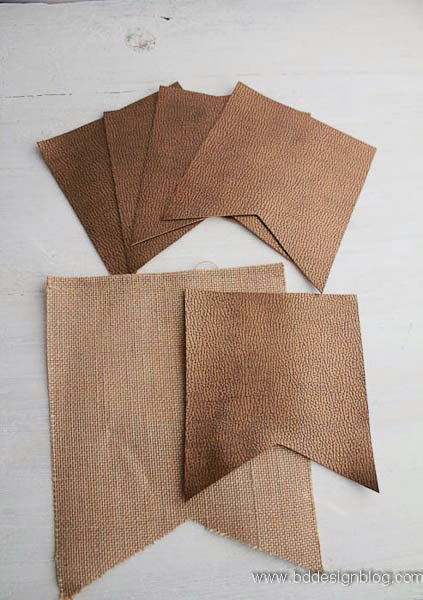
 Right now I am loving LEATHER! I thought I would dress up the usual burlap banner by adding some texture with these fantastic leather pieces.
I found this gorgeous metallic bronze leather at Hobby Lobby and cut out the shape a little smaller than my banner pendant. Isn’t it SO pretty?

I wanted more texture on top of the leather so I sent a cereal box through my Silhouette and cut out the letters T-H-A-N-K-S. Cereal boxes make the best chip board! Instead of throwing them away, cut the boxes up and use them for future projects! If you don’t have a Silhouette than you can just buy chip board at your local craft store. Then I painted the letters GOLD.

I attached the pendants together with rich colored ribbons and lace. You can embellish as much as you want. I knew I would be hanging this banner on my hutch that already has a lot going on so I wanted to keep it clean and simple.
There you have it!

Be sure to check out more home decor tutorials or holiday ideas on FB, Insta, and Pinterest like my Fall Porch Ideas, or my Gold and White Striped Painted Napkins, or my traditional HARVEST MIX.


Michelle, THANK YOU so much for having me today! Happy Fall everyone! xoxo.

Next Page »

  • Bloglovin
  • Facebook
  • Google+
  • Instagram
  • Pinterest
  • RSS
  • Twitter

Hi there! I'm Michelle. Mother of three little boys and one little princess. Welcome to A Little Tipsy, a place for exploring creativity and sharing inspiration.

Follow on Bloglovin


Visit Michelle Barneck {A Little Tipsy}'s profile on Pinterest.

Tutorials by Category


15 Family Reunion Games

Family Reunion Games Collage

15 Sprinkle Party Ideas

Sprinkle Birthday Party
Creative Commons License

© Copyright 2014 A Little Tipsy · Site Designed by The Fairy Blogmother · Web Hosting by RFE Hosting

This website uses cookies to improve your experience. We'll assume you're ok with this, but you can opt-out if you wish.Accept Read More
Privacy & Cookies Policy