A Little Tipsy

Creative Tips & Ideas

  • home
  • About Me
  • the tipsy top
  • press
  • projects
  • contact me
[print_thumbnail_slider]

From Spooky to Sports

October 22, 2014 By Michelle Barneck 2 Comments

I am a budget loving kind of gal. When I make a large purchase I want it to be something that is going to be able to be styled multiple ways so when I change my mood or when the trend winds shift I can easily alter small things to make big impact without having to make big purchases.

A few months ago, my boys moved in to the same room and needed more clothing storage. We received this Sauder chest of drawers and I dressed it up to match their paleontologist room.

Well, my six year old decided he is too big for a dinosaur room now and wanted a sports room. We have been racking up the little league trophies so I thought it would be the perfect way to meet his request and have a place to store them all. This transformations cost me nothing. Just grabbed gear and awards we had on hand.

It turned in to a nice display of all his hard work and achievements and my three year old is so proud of his soccer trophy right in the middle.

We even put together a fun way to display his karate belts and the first board he ever broke signed by his Hanshi Darren Cox, now 13 time World Champion.

You’d think they would be over the moon at this point, but they LOVE Halloween and just a few days later decided the needed some spooky fun in their room. Lucky for me it is super easy to swap out their dresser decor, so out when the baseball and in came the Halloween Decor.

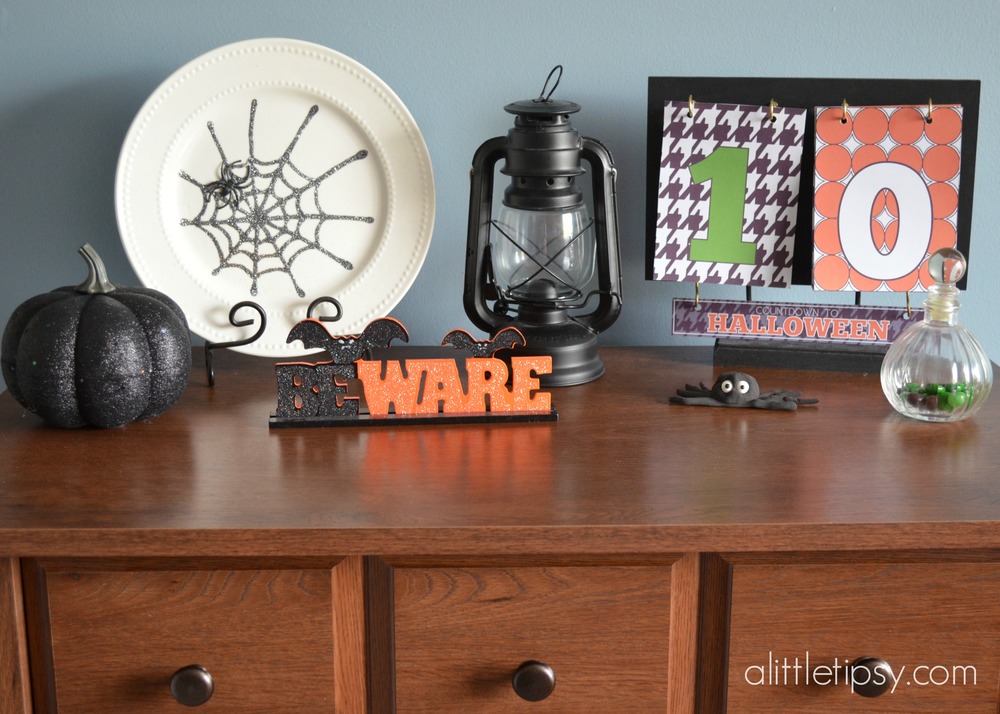
With them being six and three we did not want anything that would give them nightmares so we went with glittery bats, pumpkins, and spiders. We set up a countdown for fun and a little spider my son made from clay and frosting eyes. Again it cost me nothing as I just took from my existing decor stash.

I’m loving how easy it is to switch up the look of their room by having staple pieces and simply changing out the accessories.

For more versatile furniture ideas and inspiration, check out our Multi-functional Furniture Pinterest board!

This is a sponsored conversation written by me on behalf of Sauder. The opinions and text are all mine.


Family Movie Night with #IntelAIO

September 30, 2014 By Michelle Barneck Leave a Comment

#spon: I am in a partnership with Intel. Through this partnership I gain access to content, product, or other forms of value.

I am all about creating traditions. I remember as a kid watching movies Sunday night and having popcorn and apple juice with my family. Sometimes my brother would even make treats one of his specialties being fried cheerios. We now carry this on having family movie night with my little family. The boys love it and look forward to it all week! We watch a different movie each week and I make or buy a special treat for us to enjoy that night.

Family Movie Night with #IntelAIO

With the weather cooling down we took advantage of a warm evening and had a special movie night with the kids outside. They thought it was the coolest. We set up blankets and pillows and snuggled up in the backyard with our popcorn and treats. Our Intel AIO made it so simple to set up! We simply took it outside (we have a strong wireless signal) and opened up Amazon to stream a movie. The screen was just the right size. Big enough for everyone to see, but small enough to be easily portable and take no time to set up.

We have gone through quite a few movies since we started family movie night. We have built up quite a list of movies for families with small kids. Here are a few of our favorites that aren’t the obvious choice of the latest cartoon:

25 Movies for Families with Little Kids

  • The Sandlot
  • Anastasia
  • A Little Princess
  • Savannah Smiles
  • Charlie and the Chocolate Factory (the original)
  • Pippi Longstocking
  • Pete’s Dragon
  • An American Tale
  • Bedknobs and Broomsticks
  • E.T.
  • Never Ending Story
  • The Wizard of Oz
  • Mary Poppins
  • Where the Red Fern Grows
  • The Parent Trap
  • Freaky Friday
  • Honey, I Shrunk the Kids
  • Flight of the Navigator
  • Heavyweights
  • The Game Plan
  • Little Rascals
  • Cheaper By the Dozen
  • The Absent Minded Professor
  • Swiss Family Robinson
  • Tooth Fairy

What are some of your favorite family friendly movies?

We love family movie night and the fact that our Intel AIO let’s us easily move it outdoors!

Arm Warmers from Brassy Apple

September 5, 2014 By Michelle Barneck Leave a Comment

DIY arm warmers REfashion - BrassyApple.com

Fall Fashion is my favorite time of year! Over on Brassy Apple I love upcycling and RE-fashioning items for me and my kiddos to wear! Take the chill off of the winter season without over roasting your kids in a bulky sweater or too many layers. Or if you kids are like mine they are cold one minute and “So HOT” the next they are running to change into a tank top! Here’s the solution – pair a t-shirt up with some inexpensive arm warmers made from tube socks! So easy to slip them on and off quickly.
The basic shape and construction are SUPER easy to do and anybody can do it!
DIY arm warmers REfashion - BrassyApple.com
SUPPLIES:

A pair of long socks (or tube socks) Pick out your favorite pattern/color, etc
Sewing Machine
Scissors
Thread
measuring tape (optional)

EMBELLISHMENTS:

Buttons
Rhinestones
grommets
scrapbooking brads
ribbons – all different widths
lace
rep gathered ruffles
tulle
ric rac
zippers
pre-made appliques
faux fur
jingle bells
rosettes
snaps (if you want to change out your embellishments)
etc., etc., etc.
Step 1: Pick out your favorite pair of socks. They can be Holiday, solid colored, patterned etc. Make sure to buy the Knee Length or Tube Sock style.
Step 2: Measure the length you want your arm warmers to be. You can measure out how long you want them to extend up your child’s arm by placing the sock on their arm and eyeing it out. You want the sock to reach to or just past their first knuckles. Or you can measure with a tape.
diy arm warmers - BrassyApple.com #refashion #fashion #kids
Step 3: Measure and cut off your socks to the desired length. Be sure to cut from the toe end. We want to keep the other finished end intact.
Step 4: Turn your socks inside out and find the “heel” spot. *(note: some socks are made without a built in heel. If yours do NOT have a rounded heel in them please proceed to step 7)* Pull the heel up as shown in the picture making sure the other sock fabric is separated. We will be sewing and cutting the heel out to create one long tube.
Step 5: Pin the heel area as close as you can to the “bottom” of it to create a straight “tube” when it is sewn together and cut off.
diy arm warmers

Step 6: Sew a straight line across the bottom of the heel to close this section and cut off the excess.

Step 7: Turn your socks right side out and lay them flat placing the “heel” seam on the underside. This will ensure that the seam isn’t on top of their arm when they wear the warmers. Cut a small slit for the thumb. **One slit on the right inside and one slit on the left inside.

Cut your slits on opposite side of each other so the heel seams remain on the underside.

diy armwarmers for kids - BrassyApple.com

The basic shape and function of the arm warmers is done. Now it’s time to EMBELLISH!!! (if you want to) You can add embellishments to any part of the arm warmers you’d like to – the top, the bottom, along the top or all over!!! Just have fun with it! This is a great project to do with your girls or a group of girls too! Here are photos of some I created to give you a jump start with your own ideas! If you create some – tag me on Instagram (@BrassyApple) so I see your creations!

diy embellished arm warmers or kids - brassyApple.com

Make them Different lengths too! Full length, 3/4 sleeve and even wrist cuffs!

DIY arm warmers for kids - BrassyApple.com

And these make great baby LEG warmers!

DIY baby leg warmers - BrassyApple.com

Your girls will be the trend setters and look adorable in their chic yet inexpensive new accessory!

DIY girls arm warmers from socks - BrassyApple.com

Check out my other RE-fashion tutorials plus lots of NO SEW options too on BrassyApple.com!

Refashion tutorials - BrassyApple.com

Printable School Notes with Kiki and Company

August 11, 2014 By Michelle Barneck 1 Comment

This week our little guy will be making his debut and I am excited to introduce a new series including some of my favorite bloggers! Through September I have recruited the best of the best to share a favorite fall idea so get geared up for some fun new fall themed crafts, recipes, printables, and more! Without further adeiu let’s start things off with Kiki and Company!

——————————————————–

I am so excited to be here today at A Little Tipsy to kick off fall. I don’t know about you, but when I think of fall, I think of SCHOOL! I’m Kiki from Kiki and Company. With 5 little munchkins, I know how those back to school days can be filled with stress and anxiety to get everything ready, but also how exciting and exhilarating it is for our kids as well!

Today, I thought I’d make a fun little printable that you can use as lunchbox notes or for a note to the teacher. I love sending my kids off with little notes placed in random places (like a backpack or the book they are reading) to let them know I am thinking about them while they are away! I also know that I have days that I just want to write a quick thank you to my kid’s teachers and having these ready will make that a piece of cake!

To download these free School Notes, click on the link below:

School Notes

I hope your fall starts off great and that your kiddos have a great school year!

…..

To find other free School printables at Kiki and Company, check these posts out:

11 Free Sets of Lunchbox Laughs and Notes:

Free Smile Catcher (Back to School Edition)

Back to School Photo Cards and Interviews:

« Previous Page
Next Page »

  • Bloglovin
  • Facebook
  • Google+
  • Instagram
  • Pinterest
  • RSS
  • Twitter

Hi there! I'm Michelle. Mother of three little boys and one little princess. Welcome to A Little Tipsy, a place for exploring creativity and sharing inspiration.

Follow on Bloglovin


Visit Michelle Barneck {A Little Tipsy}'s profile on Pinterest.

Tutorials by Category


15 Family Reunion Games

Family Reunion Games Collage

15 Sprinkle Party Ideas

Sprinkle Birthday Party
Creative Commons License

© Copyright 2014 A Little Tipsy · Site Designed by The Fairy Blogmother · Web Hosting by RFE Hosting

This website uses cookies to improve your experience. We'll assume you're ok with this, but you can opt-out if you wish.Accept Read More
Privacy & Cookies Policy