A Little Tipsy

Creative Tips & Ideas

  • home
  • About Me
  • the tipsy top
  • press
  • projects
  • contact me
[print_thumbnail_slider]

Holiday Ornament Appliqued Kitchen Towel

November 19, 2013 By Michelle Barneck 1 Comment

Hi everybody.  Ali here from HouseVintage.  I have a great little project to share with you today.  It only takes a few hours and would make a special handmade holiday gift.

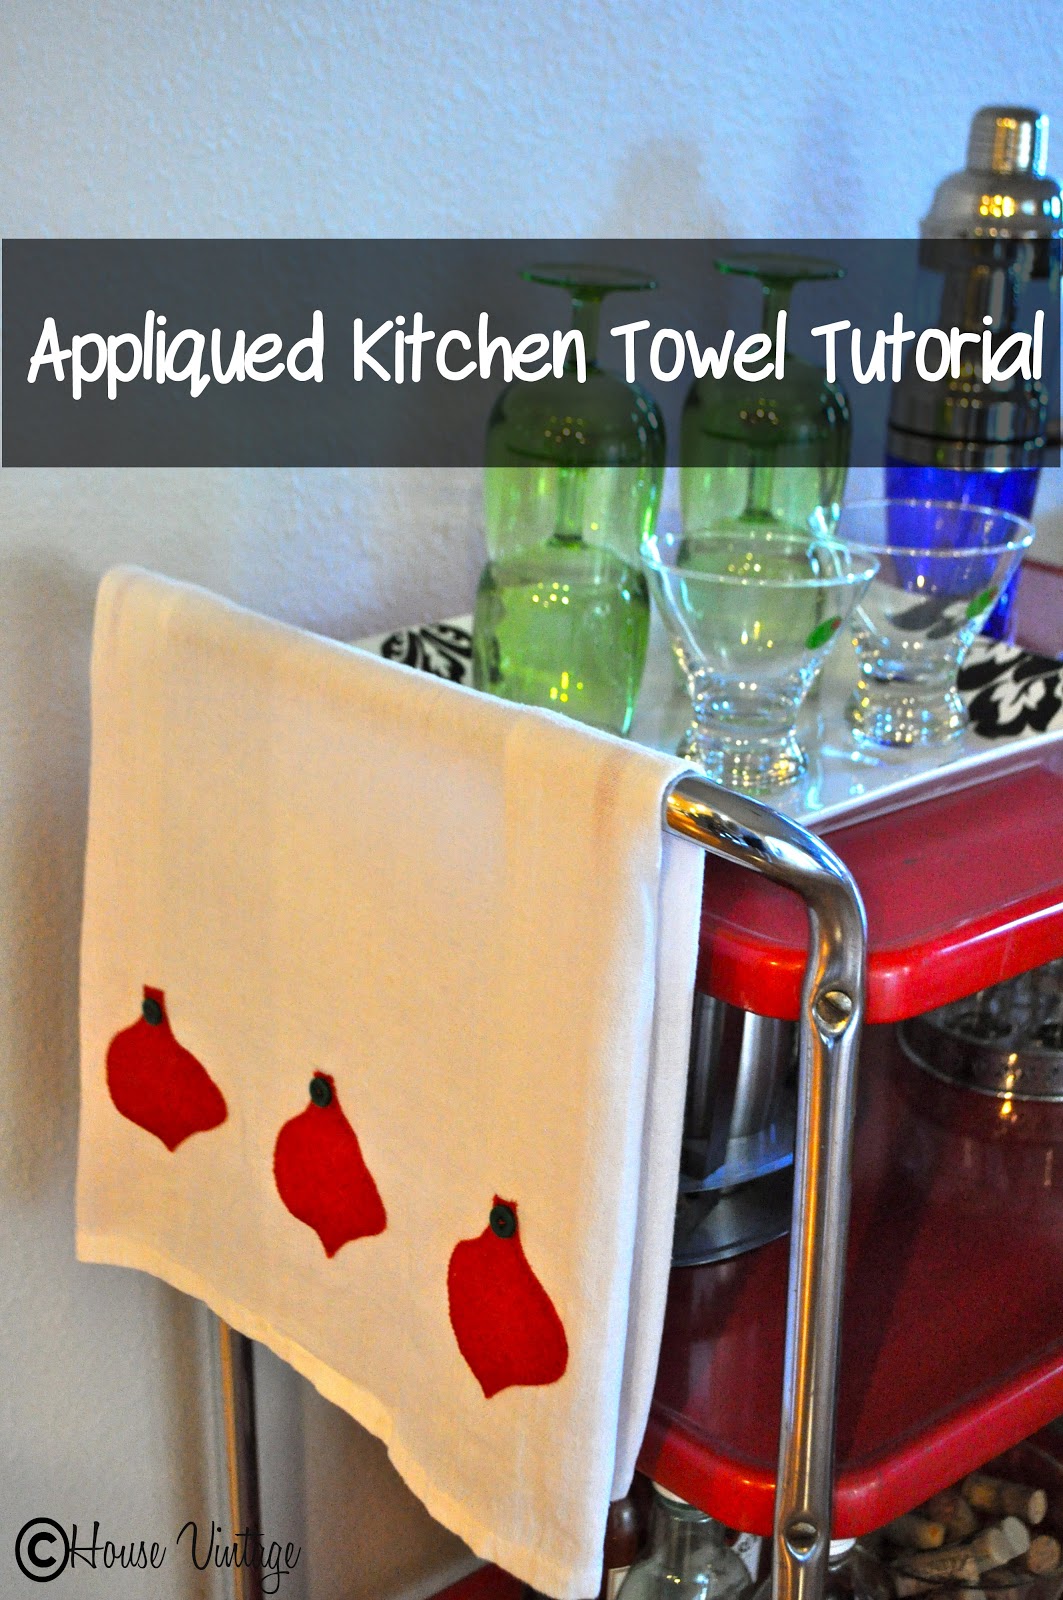
See full holiday towel tutorial.

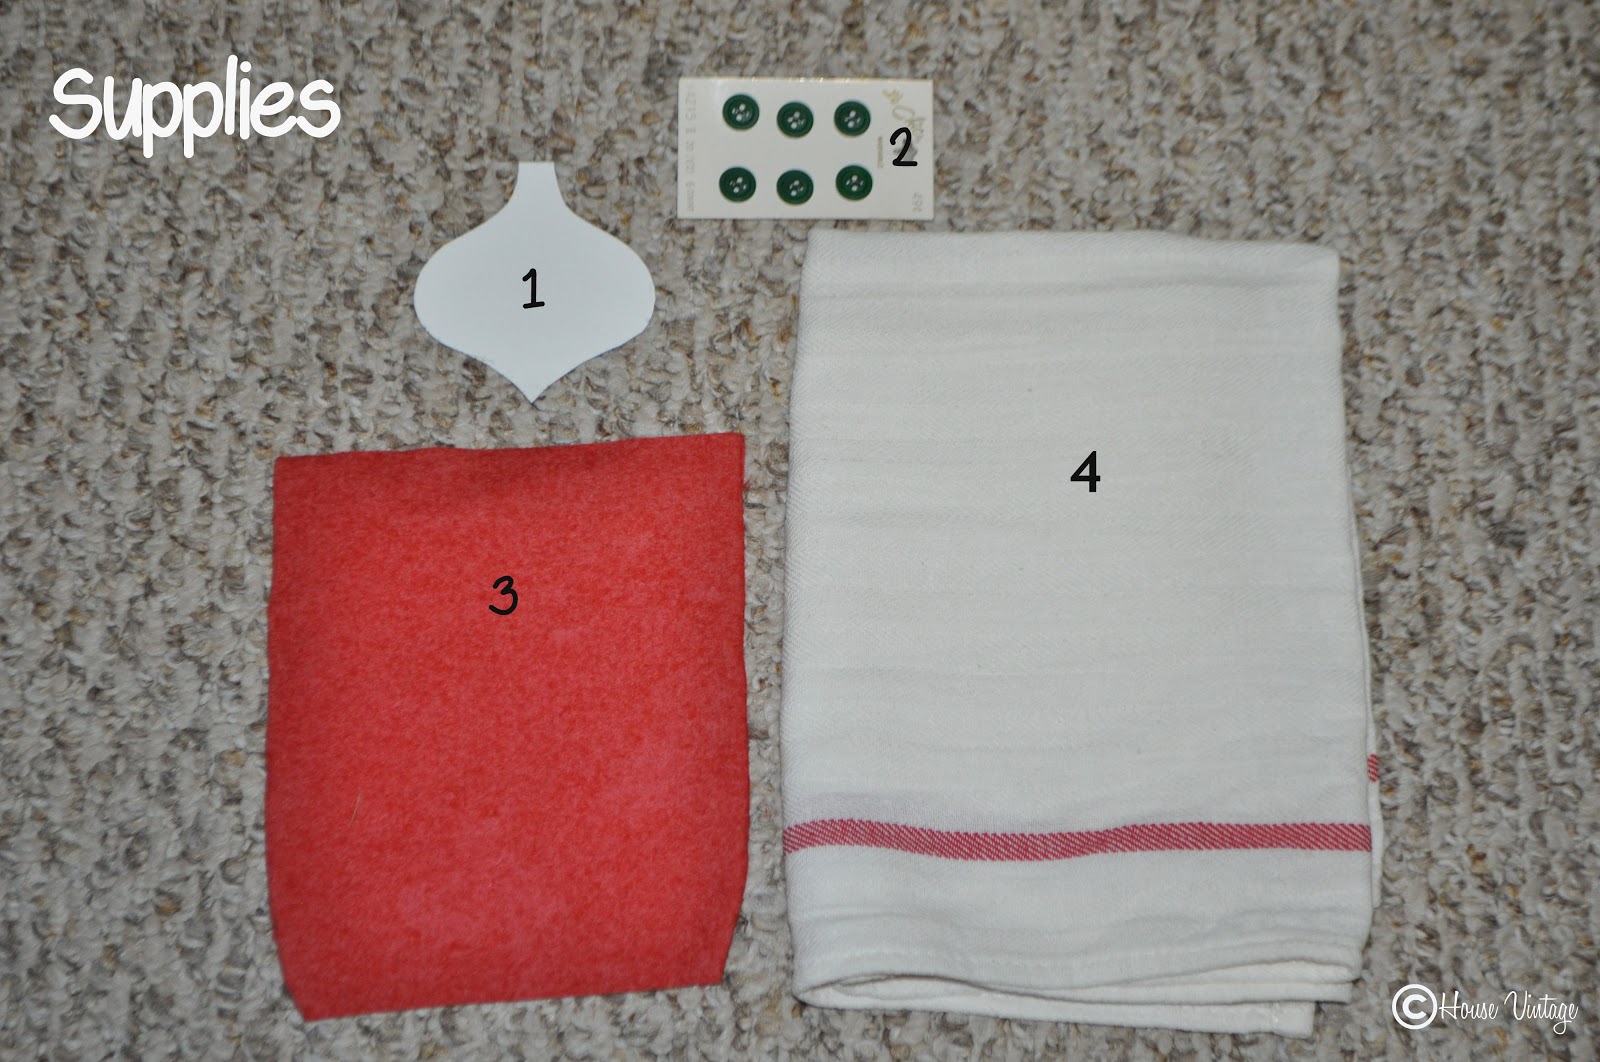
Here is what you need:
  1. Ornament template- I used this one from Martha Stewart.  Print it and cut it out.
  2. Buttons- I used some vintage buttons from my stash, but whatever you have on hand will work.
  3. Felt- This is a great use up for a scrap of felt.
  4. Kitchen Towel- Feel free to sew your own.  I bought this one from IKEA.

I decided to line up my three cutouts.  I then used a zigzag stitch on my machine to sew around the outside edge.  Go slow, and make adjustments, so you stay close to the edge.  If you don’t have a sewing machine, you could use an iron-on adhesive and skip the sewing all together.  
Position and hand sew on your buttons.
You are done!  Iron your towel, and it is ready to display or give as a gift.


———————————————————————-

Thanks Ali! These are the perfect way to spruce up your holiday kitchen or such a fun neighbor gift!

We have decided to truncate our feed to help protect against stolen content. I apologize for any inconvenience. Please love us anyway. 🙂

Thanksgiving Place Setting

November 1, 2013 By Michelle Barneck 7 Comments

November is here and soon it will be time for Thanksgiving! A holiday all about family, food, and giving thanks? I’m there! It’s fun to have a beautiful table and even better to have one that does not break the bank. Here’s a pretty place setting using simple items like paper, ribbon and stickers to take your Thanksgiving table up a notch.

Supplies to create place setting:
  • Silverware
  • 12×12 patterned paper*
  • Plate & Bowl
  • Orange Fabric Napkin
  • Brown Satin Ribbon
  • Gold Leaf Stickers*
  • Glittered Goblets
  • Brown Cardstock
  • Rounded Leaf Circle Edge Punch*
  • Circle Edge Punch Starter Set*
  • Gold Acorns (Plastic ones from Target dollar spot painted with brass liquid guilding*)
  • Orange Cardstock
  • Gold Edged Labels*
  • Glitter Markers*

*Martha Stewart Crafts Products 

1. Place a 12×12 paper at each place. Top with plate and bowl and place silverware on the sides. Put brown ribbon around orange napkin and embellish with a gold leaf sticker. Place napkin on top of bowl.

2. Make the place card by cutting a rectangle out of brown cardstock. Fold it in half to make it stand up. Cut a strip of orange cardstock to make a stripe. Write names on gold labels with orange glitter marker. Place the label on the orange stripe. Surround with gold acorns made by painting plastic acorns with gold liquid guilding.

3. Make the paper coaster by punching brown cardstock with the rounded leaf circle edge punch on the 6 inch setting. Place the glittered glass on the coaster and surround with more gold acorns.

A little extra effort can go a long way for your Thanksgiving table! And the best part is that much of it can be thrown away after dinner. No washing stains out of placemats!

Disclosure: Martha Stewart Crafts provided product for this post.

We have decided to truncate our feed to help protect against stolen content. I apologize for any inconvenience. Please love us anyway. 🙂

Halloween Spooky Front Porch Arrows

September 24, 2013 By Michelle Barneck 3 Comments

Hi, it’s Amy again, here from The Happy Scraps.  I’m so excited to share my Halloween Front Porch with you today.  These arrows are one of my very favorite ways to decorate for different Holidays and Seasons.

Let me show you how I did this.  I started by painting the face of my arrows, the color that I wanted my letters. Then I put vinyl lettering on the arrows. Next, I painted over the lettering, with the color that I wanted the arrow.  On the Mummy Tomb one, after the white paint dried, I used painters tape to make it look like a mummy, and painted the small lines gray.  Once the paint was all dry, I peeled up the vinyl.  My arrows were looking pretty good, but I finished them off my sanding them, and distressing the edges. 

Once they were distressed, I added ribbon to them, and attached them to the stake. 

I also added some cob webs. 

Seeing this by my front door is getting me really excited for Halloween!!

I hope you’ve enjoyed this tutorial!  If you’d like to see more Halloween Projects, come on over to The Happy Scraps and check them out.

 
———————————————————————-
Thanks Amy! These are the perfect way to add some spook to your porch! I love how you added the mummy feel with the painters tape!
We have decided to truncate our feed to help protect against stolen content. I apologize for any inconvenience. Please love us anyway. 🙂

1 Hour Kitchen Sink Makeover

September 23, 2013 By Michelle Barneck 3 Comments

This post is sponsored by Delta via Glam Media.

You know that saying, “everything, but the kitchen sink” well I’m changing that to everything about the kitchen sink. You spend so much time prepping, washing, and filling using it, so why now take a few minutes to make it the sink area you really want? In just over an hour, we transformed our Kitchen sink area into a utility mecca and I could not be more pleased with the changes!
Ok, so the before and after in the photo is kind of like one of those “spot the differences” games, but the difference in real life rock my socks so I made this little video so I could “show and tell” my makeover and you could see all my favorite changes in detail.

If you’re not much of a video person, here’s what we did…

  • Upgraded to Delta Touch2O Cassidy Faucet – 
    • Turns on and off with a touch anywhere on it, even with your arm,  giving cross contamination a run for its money. 
    • Reaches further out in the sink so my 5 year old no longer needs a stool to wash his hands!! 
    • Pull the nozzle out to rinse the sink or fill a pot on the counter and it has a magnet feature to help it stay put when attached. Our old nozzle would start to slip down, so we can appreciate this.
    • High quality finish. The finish on our old faucet began to peel, not cool.
    • I had my plumber friend install it as it is a bit more complicated than your standard faucet, but like it says in the title, it took only about an hour.
    • Powered by batteries which I thought was odd at first, but quickly realized was nice when we had the power off to install the outlets. I want water when the power is out, don’t you? 🙂
  • Replaced sink caddy – the old one was grody mcgrodes. It is the perfect holder for the veggie brush and sponge so they drain in to the sink, not on the counter.
  • Added Utility Drain Guard (visible in video) – keeps silverware and small items from falling in to the garbage disposal. Also has a silicone scraper on the end to help clean pans. 
  • Added soap and scrubby tray – gives things a home. Covered the soap dispensers with shelf paper to give them a uniform look in a fun pattern.
  • Changed outlet covers and light switch – Almond to white is always a nice clean update.
Overall, I could not be happier with the update and the fact that it was so fast makes it that much better! And just for fun, you have got to check out this Delta Touch2O video, it’s one of the best ads I’ve seen. 


Delta Faucet

Embed


Delta Touch2O Technology for your kitchen and bathroom is precisely in tune with your every touch. Take the quiz to learn which faucet style best describes you at deltafaucet.com

Disclosure: Compensation was provided by Delta via Glam Media.  The opinions expressed herein are those of the author and are not indicative of the opinions or positions of Delta.

We have decided to truncate our feed to help protect against stolen content. I apologize for any inconvenience. Please love us anyway. 🙂
« Previous Page
Next Page »

  • Bloglovin
  • Facebook
  • Google+
  • Instagram
  • Pinterest
  • RSS
  • Twitter

Hi there! I'm Michelle. Mother of three little boys and one little princess. Welcome to A Little Tipsy, a place for exploring creativity and sharing inspiration.

Follow on Bloglovin


Visit Michelle Barneck {A Little Tipsy}'s profile on Pinterest.

Tutorials by Category


15 Family Reunion Games

Family Reunion Games Collage

15 Sprinkle Party Ideas

Sprinkle Birthday Party
Creative Commons License

© Copyright 2014 A Little Tipsy · Site Designed by The Fairy Blogmother · Web Hosting by RFE Hosting

This website uses cookies to improve your experience. We'll assume you're ok with this, but you can opt-out if you wish.Accept Read More
Privacy & Cookies Policy