I never had a great solution for jewelry. I had things in jewelry boxes, drawers and scattered around. I wanted something to not only keep it organized, but where I could see it all: rings, necklaces, bracelets and earrings together to coordinate quickly and easily. On a trip to Ikea I found some things that I thought would be perfect for a DIY jewelry organizer, in the kitchen and garden areas of all places.
{I apologize for the pictures. It’s impossible to get a good picture of the back of the door in a room with no windows.}

I thought hard about where to store my collection. Once I started gathering it all I realized what a collection it really was. We don’t have a lot of counter or wall space in our master bath nor did I really want a big mass of jewelry out on display which is why I chose the back of the bathroom door. It gave me a big area to work with which could be in plain site or could be completely hidden away. It was perfect!
SUPPLIES:
(most found at Ikea)
- Bygel rails
- Bygel wire basket
- Bygel plastic s-hooks
- Socker Plant pots
- Ring holder
- Thin ribbon scraps
- 3/4 inch flathead screws
- Drill
Just purchase as many as you need to fit your jewelry.
I used three bars: two for necklaces and one for the basket. I used about six packs of s-hooks, one wire basket, and two buckets. I got everything for under $20.
DIRECTIONS:
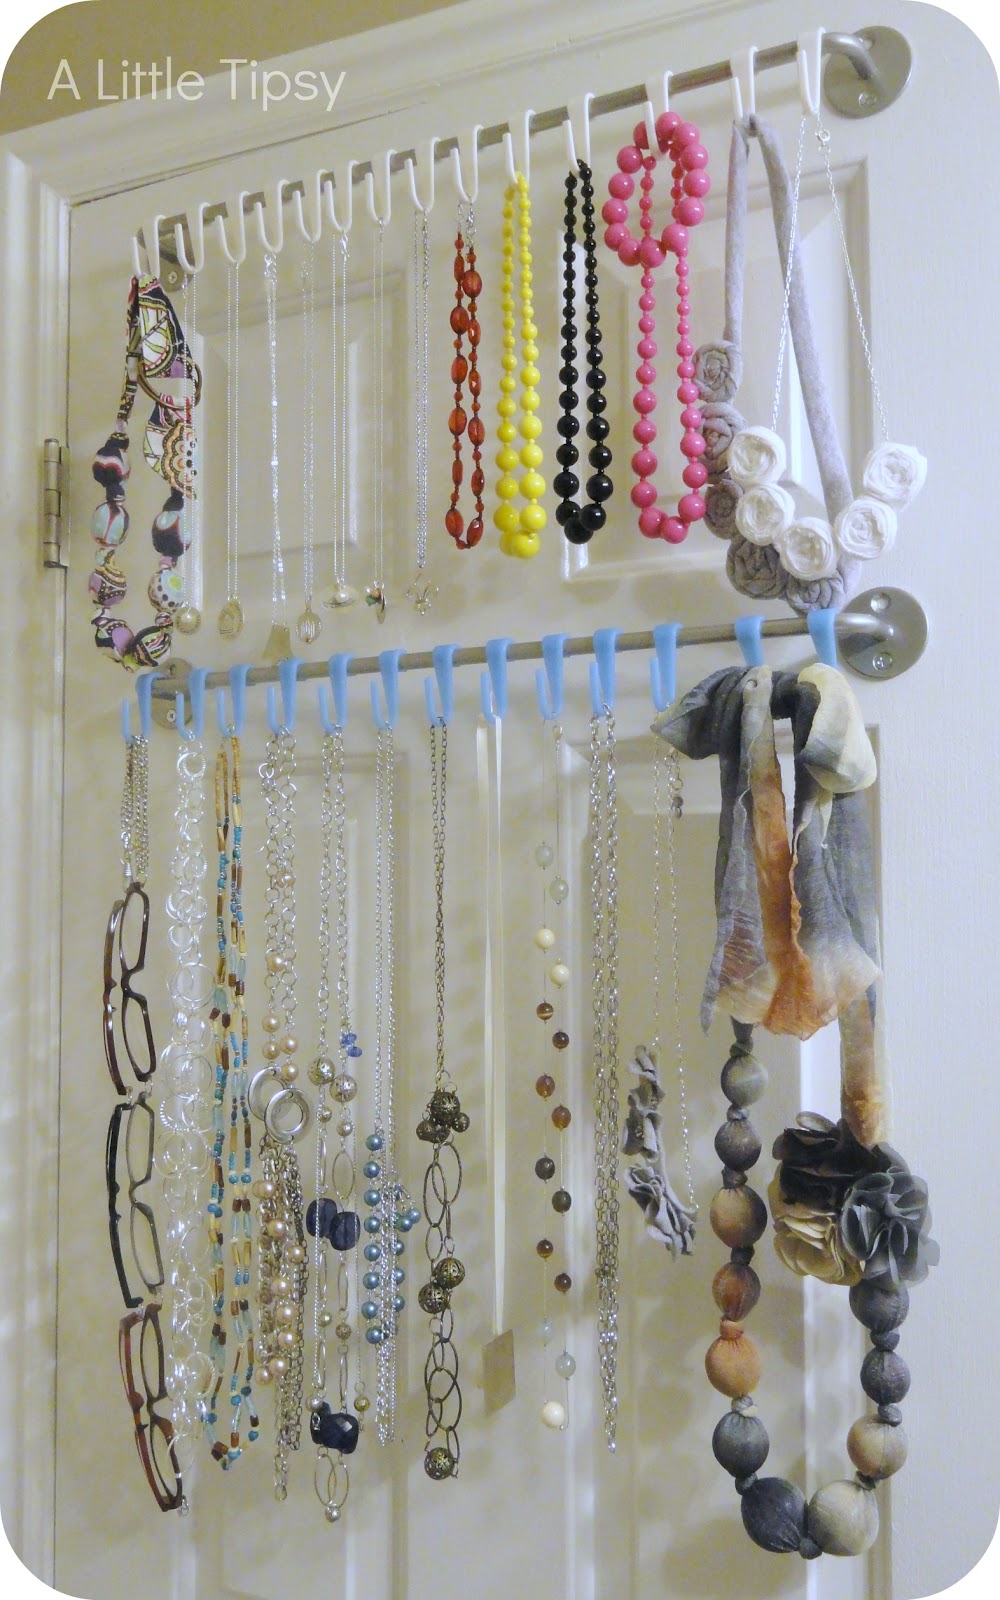
Figure out the configuration on your door. I did short necklaces on top, long necklaces in the middle and buckets for bracelets down lower so I could see easily into the buckets. That just worked out with the panels on my door.
Install your bars on the door using the flathead screws and drill.
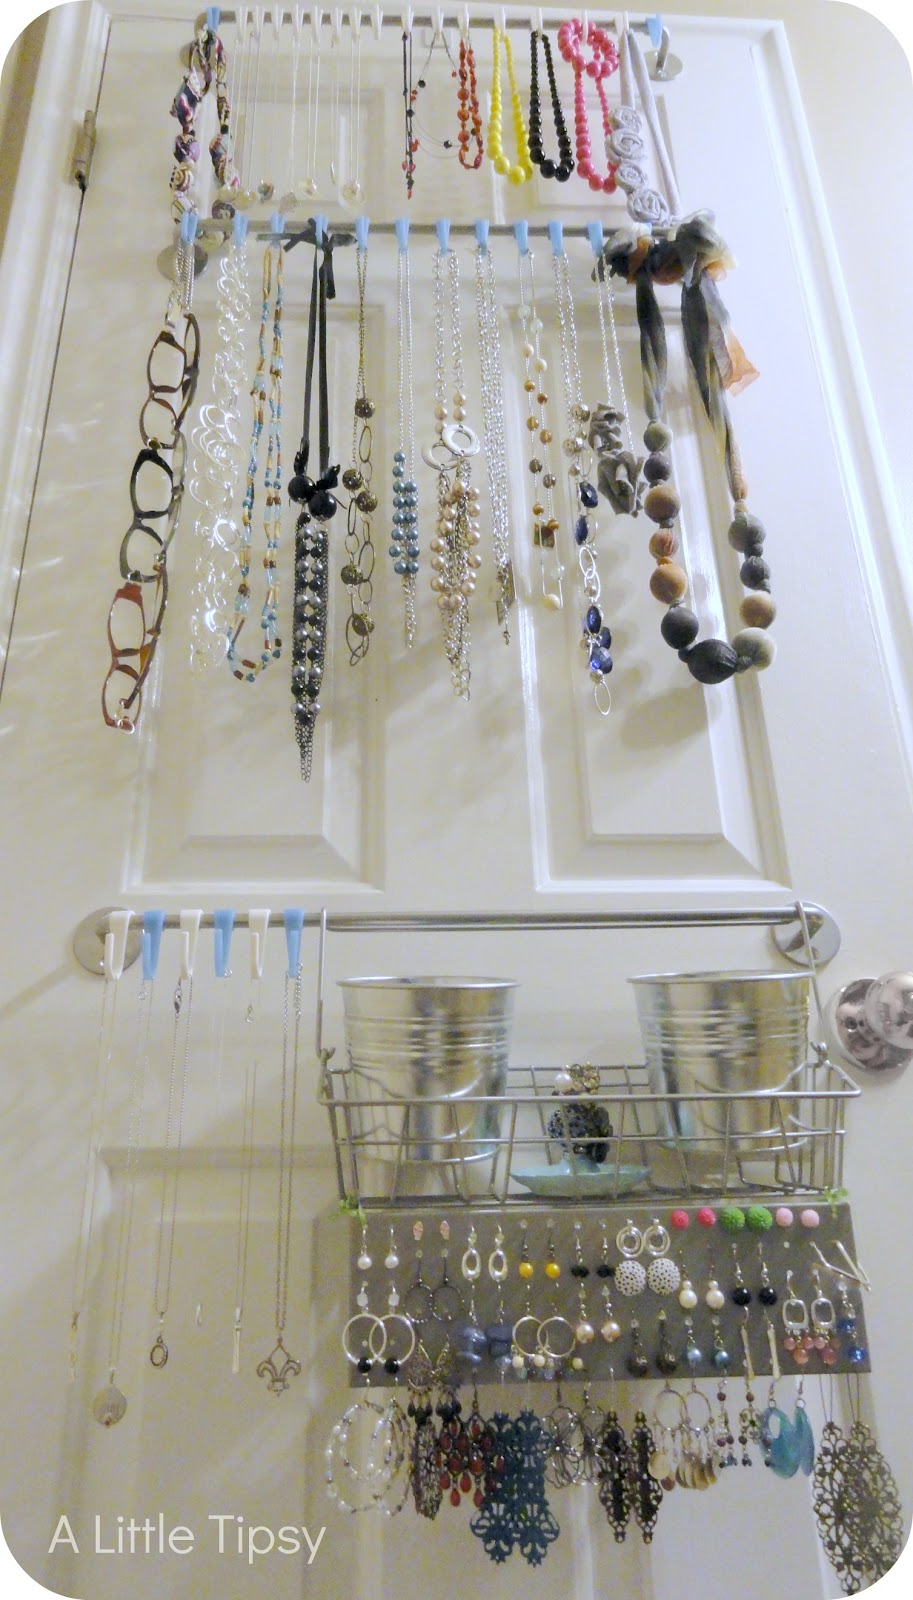
Now start assembling. Attach the wire basket to the bar and remove the metal sheet with the holes from the bottom. Attach it to the bottom of the basket by tying it on with tiny ribbons. Place the buckets in the basket. They won’t go all the way to the bottom now that you removed the metal piece, but that didn’t bother me. Fill your buckets with your bracelets. I have nicer bracelets in little jewelry boxes so they don’t get tangled with the others.

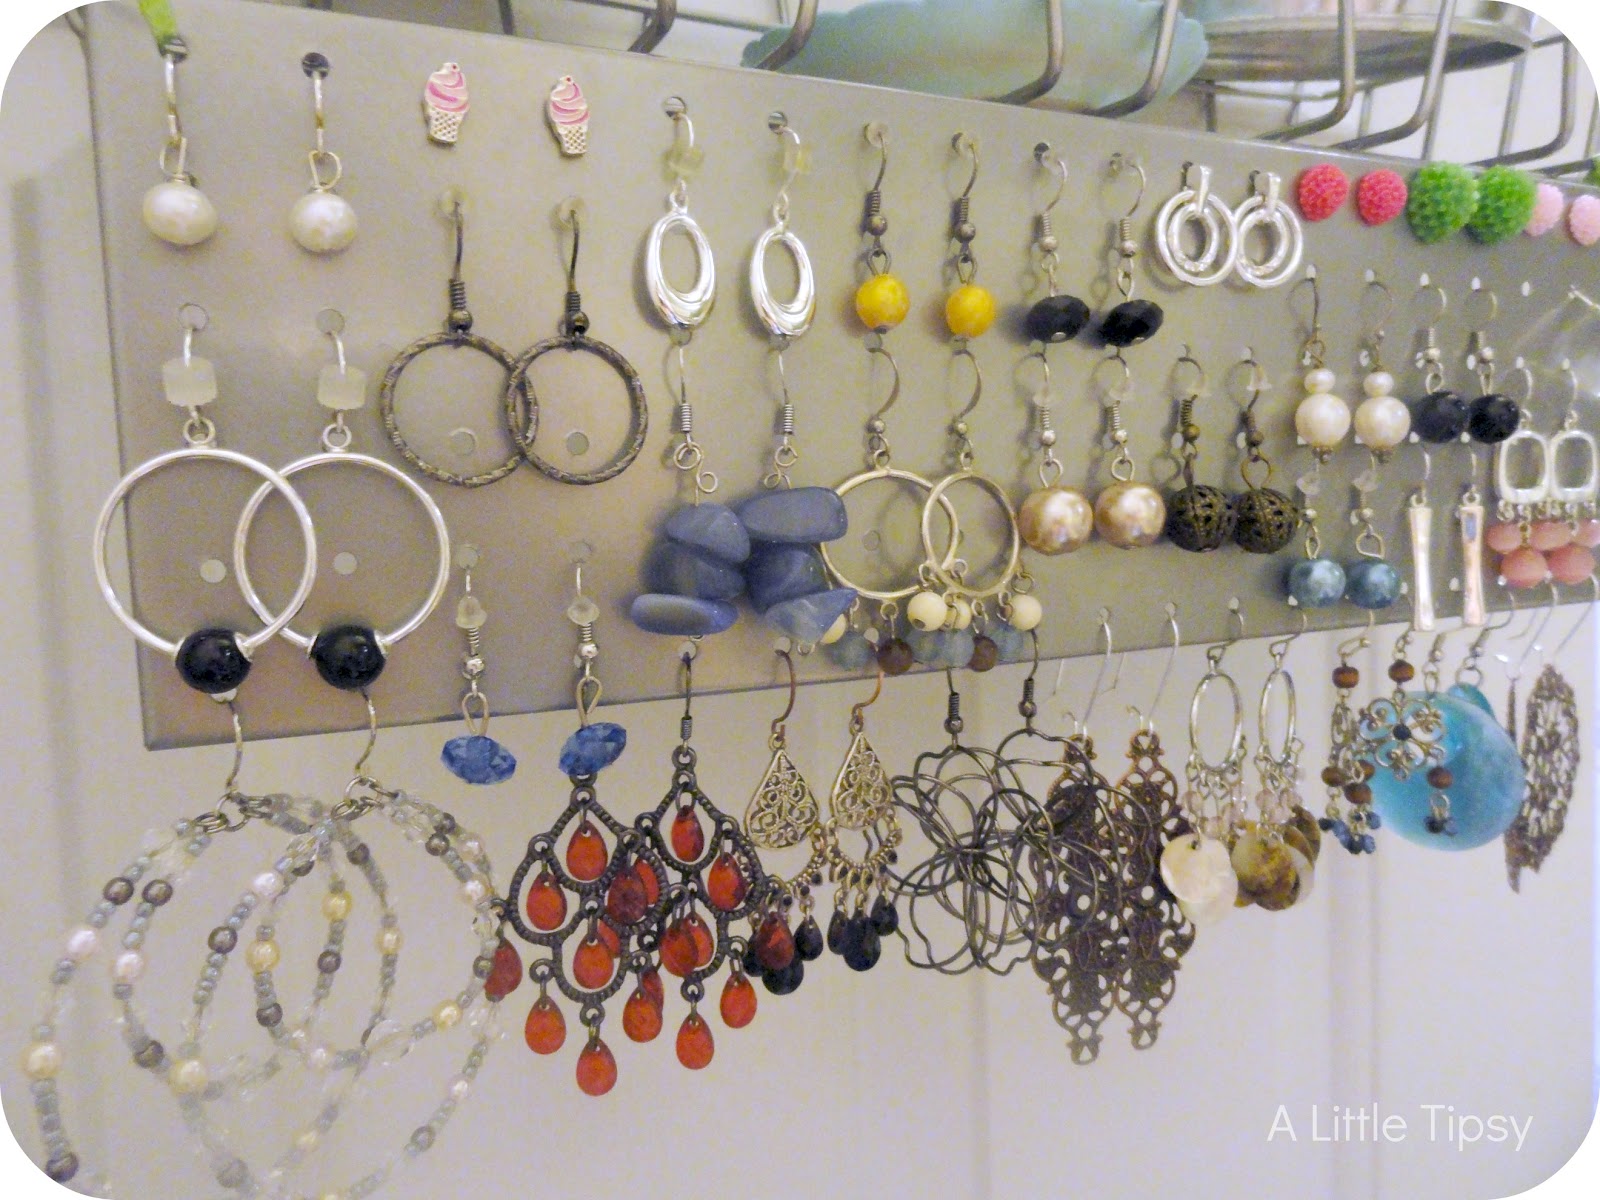
Attach your earrings to the metal piece. Just push the backs all the way to the front if they are hook earrings and will stay on the organizer by themselves.
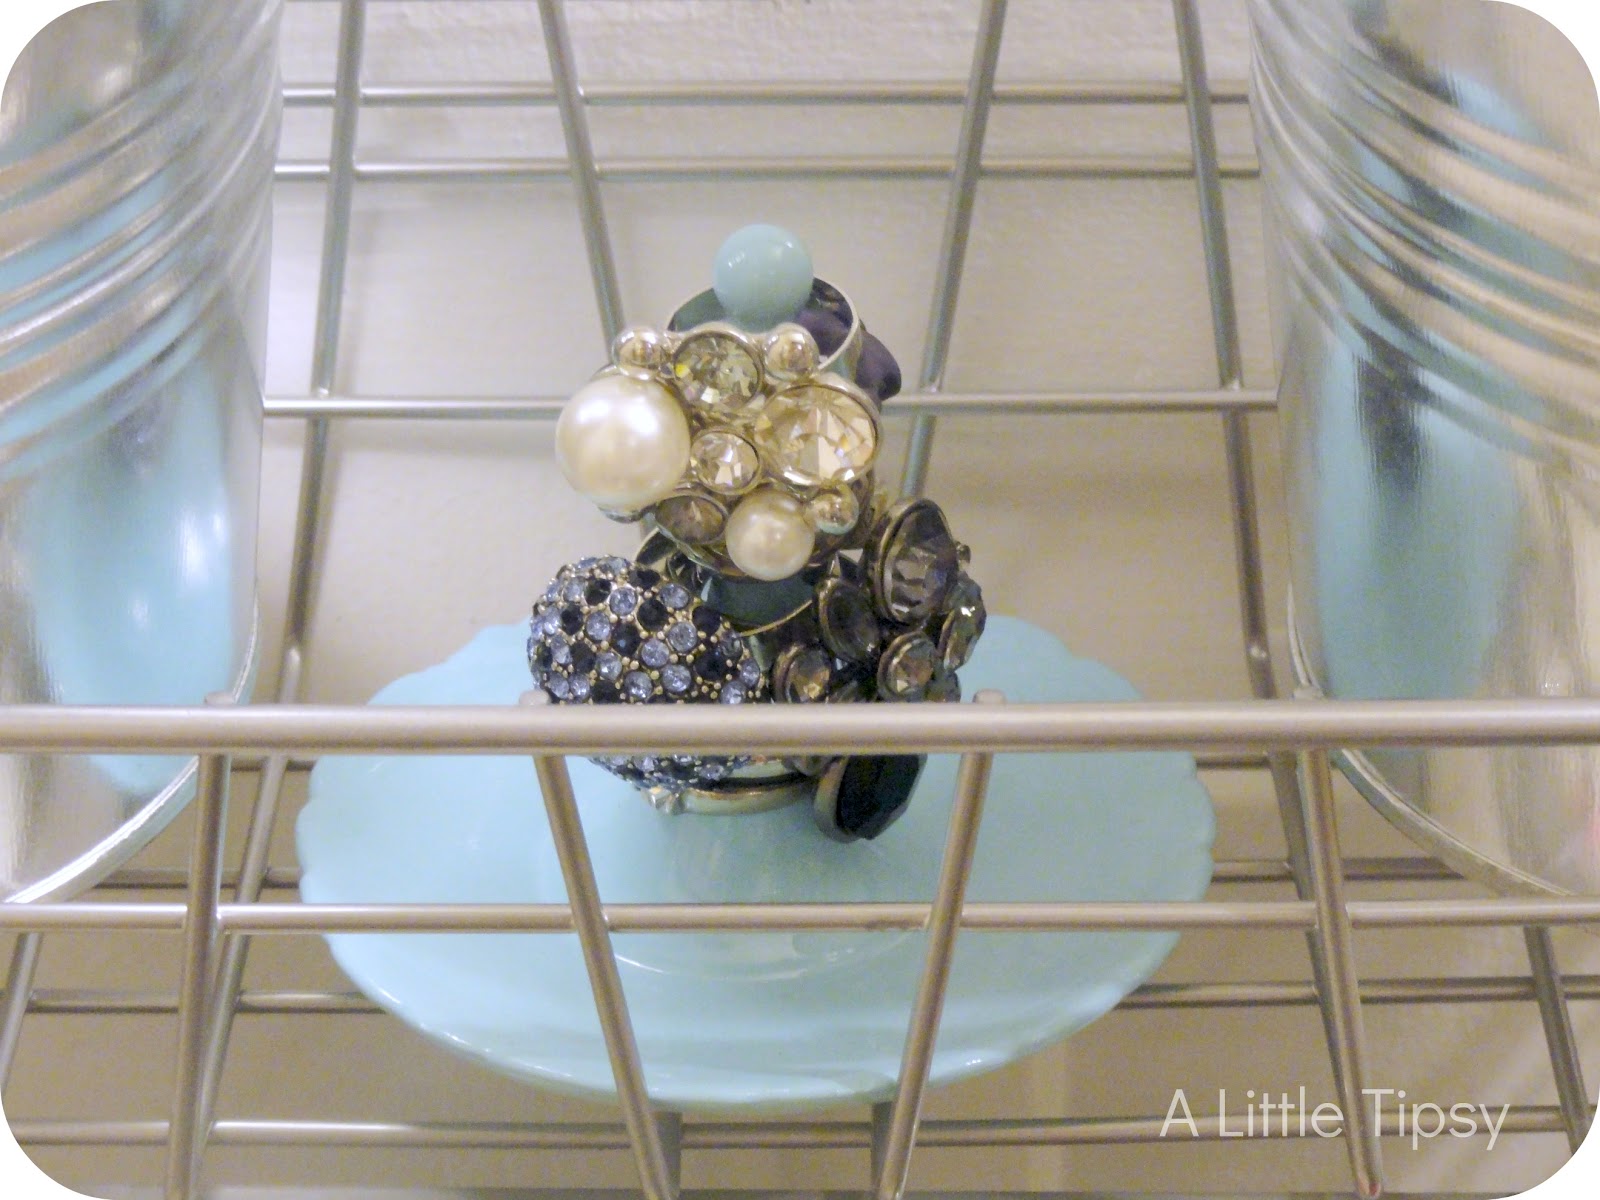
Place a small ring holder (found mine at the thrift store and painted it) between the buckets and fill with rings.
Attach the s-hooks (buy the plastic ones, NOT the metal ones so they don’t swing everywhere) to the bars and fill with necklaces. I have two colors of hooks because I ran out and had to buy more and they didn’t have the same colors.
I made this a few weeks ago and have loved it! Having my jewelry hidden away I had forgotten about a lot of it. This way I can see exactly what I have quickly and easily. I have been wearing it a lot more and got rid of some I was ready to part with.
P.S. Don’t forget to sign up for free Tipsy updates via RSS or email.
We have decided to truncate our feed to help protect against stolen content. I apologize for any inconvenience. Please love us anyway. 🙂
What a great way to organize all your jewelry. It looks great hanging there too.
What a CLEVER idea! Great job! I would love something like that for me. 🙂
This is awesome!!! Right now all of my necklaces are on a hanger…. not the best way.
Cute and easy! Perfect! What did you use for the earrings? Did I miss it?
@engarde99 It’s in the post, but it’s just one sentence so it may be hard to find. It is part of the bygel wire basket. It comes in the bottom, so I just took it out and tied it on with ribbon.
Wow, this is amazing, I’m am so going to do this when I’m an adult. I’ll probably make it on my bedroom wall though.
This is awesome Michelle! All my jewelry is stuffed in a drawer, so I hardly ever wear it. I need to do this!
It is an awesome idea! I have had the experience of my jewelry tarnishing when stored in the bathroom……I hope this doesn’t happen to you! Our bathroom is not huge, but it’s not really small either. I was very sad when I had to move my collection out of the bathroom. Keep an eye on the backs of the earrings. 😀
Jeanne V Austin, Texas
I found this post via Pinterest. Love this storage idea! I have a funny question… In the last picture, you’ve got a really cool statement necklace hanging on the right. Did you purchase that in a store, or make it, or what? I really love it and would love to buy one/make one! 🙂 Thanks!
If you just need a place to store necklaces, I bought an expandable wooden coat rack, then opened it as far as it would go, then turned it sideways IE: it’s tall instead of wide. I then hung it on one nail, just inside my closet, beside some of my wall-mounted shoe racks. My bead necklaces are hung on each peg according to color pallette 🙂
Guess I’m taking a trip to Ikea this weekend. Thanks for the idea!
This is a great idea! I was wondering where you got the metal plate to hang the earrings?
@Theresa Albon I got the metal plate out of the bottom of the Bygel basket. Everything I used was from Ikea.
wow, fantastic, just love it 🙂
I just today found this post via pinterest recommending it. VERY well done and I am so amazed all for less than $20. The IKEA closest to me is out of the way; I’ve been there just once and was overwhelmed. Brava for you to find the components in an unexpected department, visualize how to use them, design and install this clever solution. Looks so very nice, too. I currently don’t have a space for this type of installation, but I will rethink my space use to consider this solution. Thank you!
Wonderful Idea!!!! I was so excited to make mine I got on Ikea right away. Any reason why you went with the plastic hooks vs. the metal “S” hooks. I just saw metal are 10/$0.99 while the plastic are 6/$0.99.
If I remember right, I thought the S hooks would swing while the plastic ones were tighter and would stay stationary. The necklaces swing on their own when you open and shut the door, so I wanted to minimize the noise. The S hooks would totally work especially if you are putting the bars on a wall where they won’t be moving.
Where did you buy your plastic colored hooks.. Have everything, but cant find the hooks.
The hooks are at Ikea as well. The would be near the bars they hang on.
Michelle. I love your idea on hanging jewelry!!!!! I been looking a long time on the best way to hang necklace. Did you get the plastic hook at ikea ??? Thanks you!
Yes the plastic hooks are at ikea. You can get a pack for about a dollar.