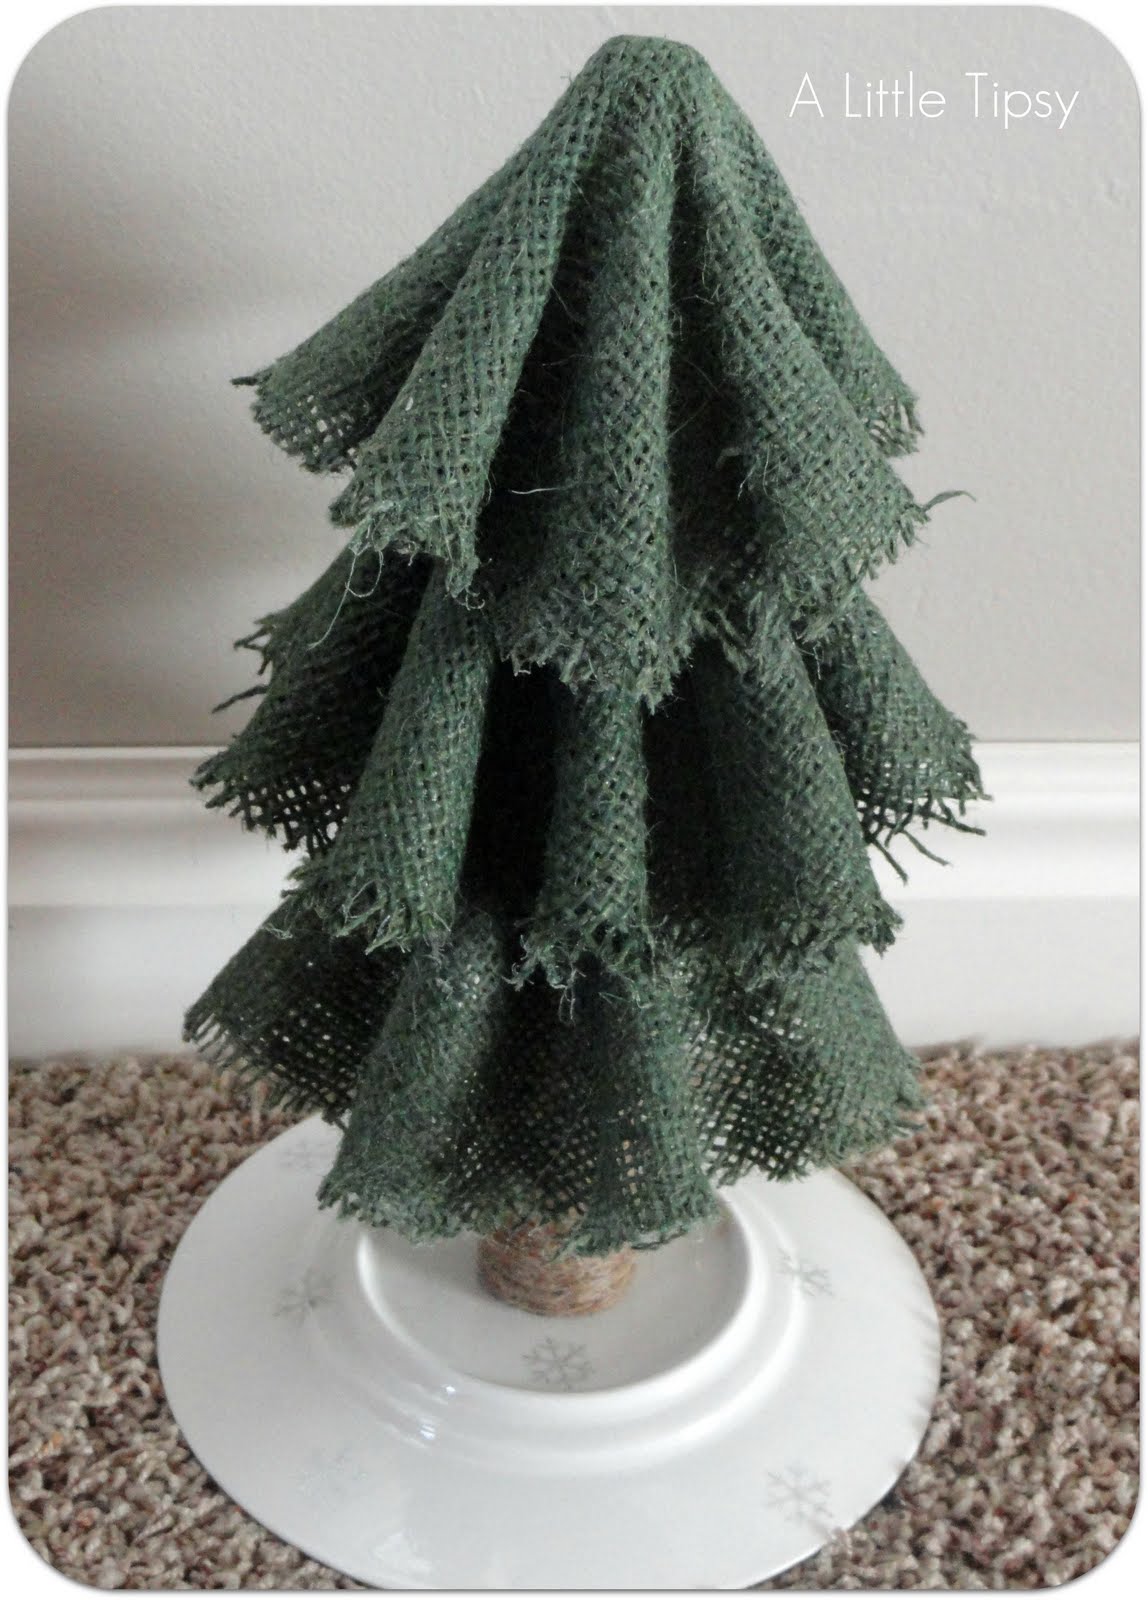
With snow on the ground holiday creating is in full force and I am so excited to share this Christmas DIY project! The Christmas decor in my front room is a little more rustic so I thought a burlap Christmas tree would be the perfect addition.

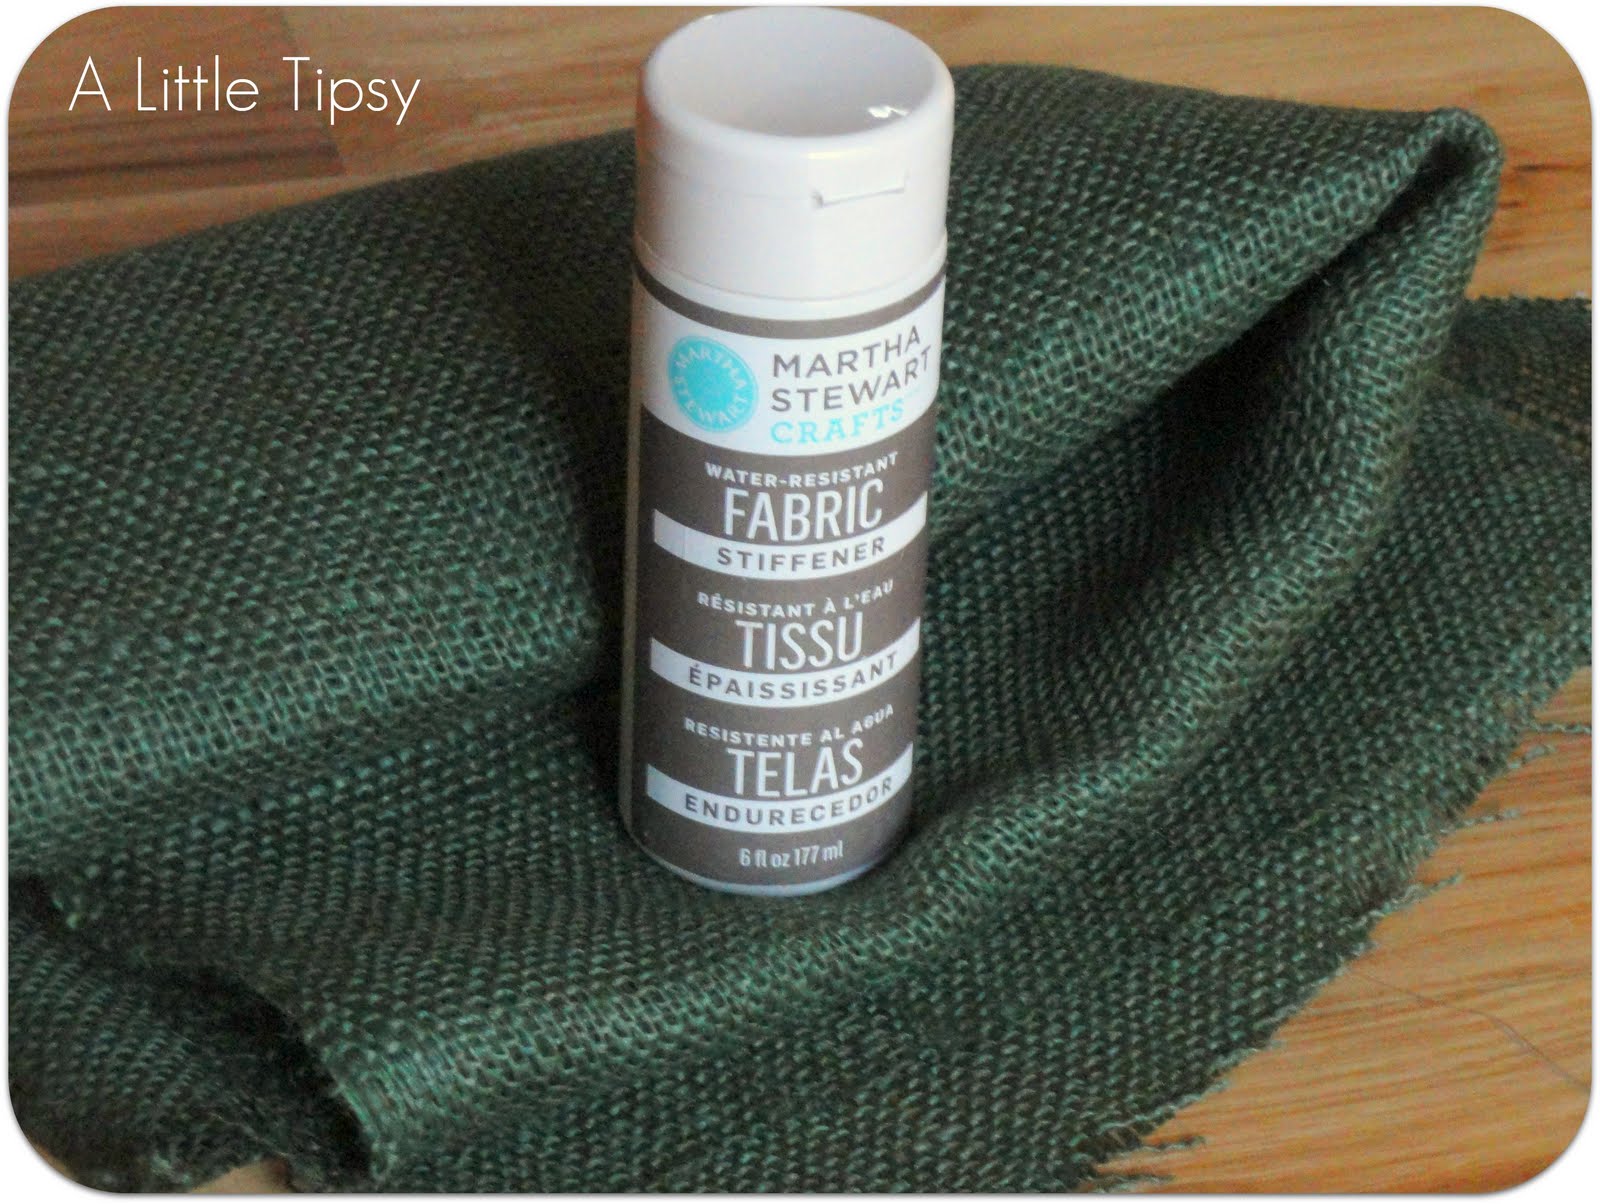
Start out with some green burlap and Martha Stewart Water-resistant fabric stiffener.
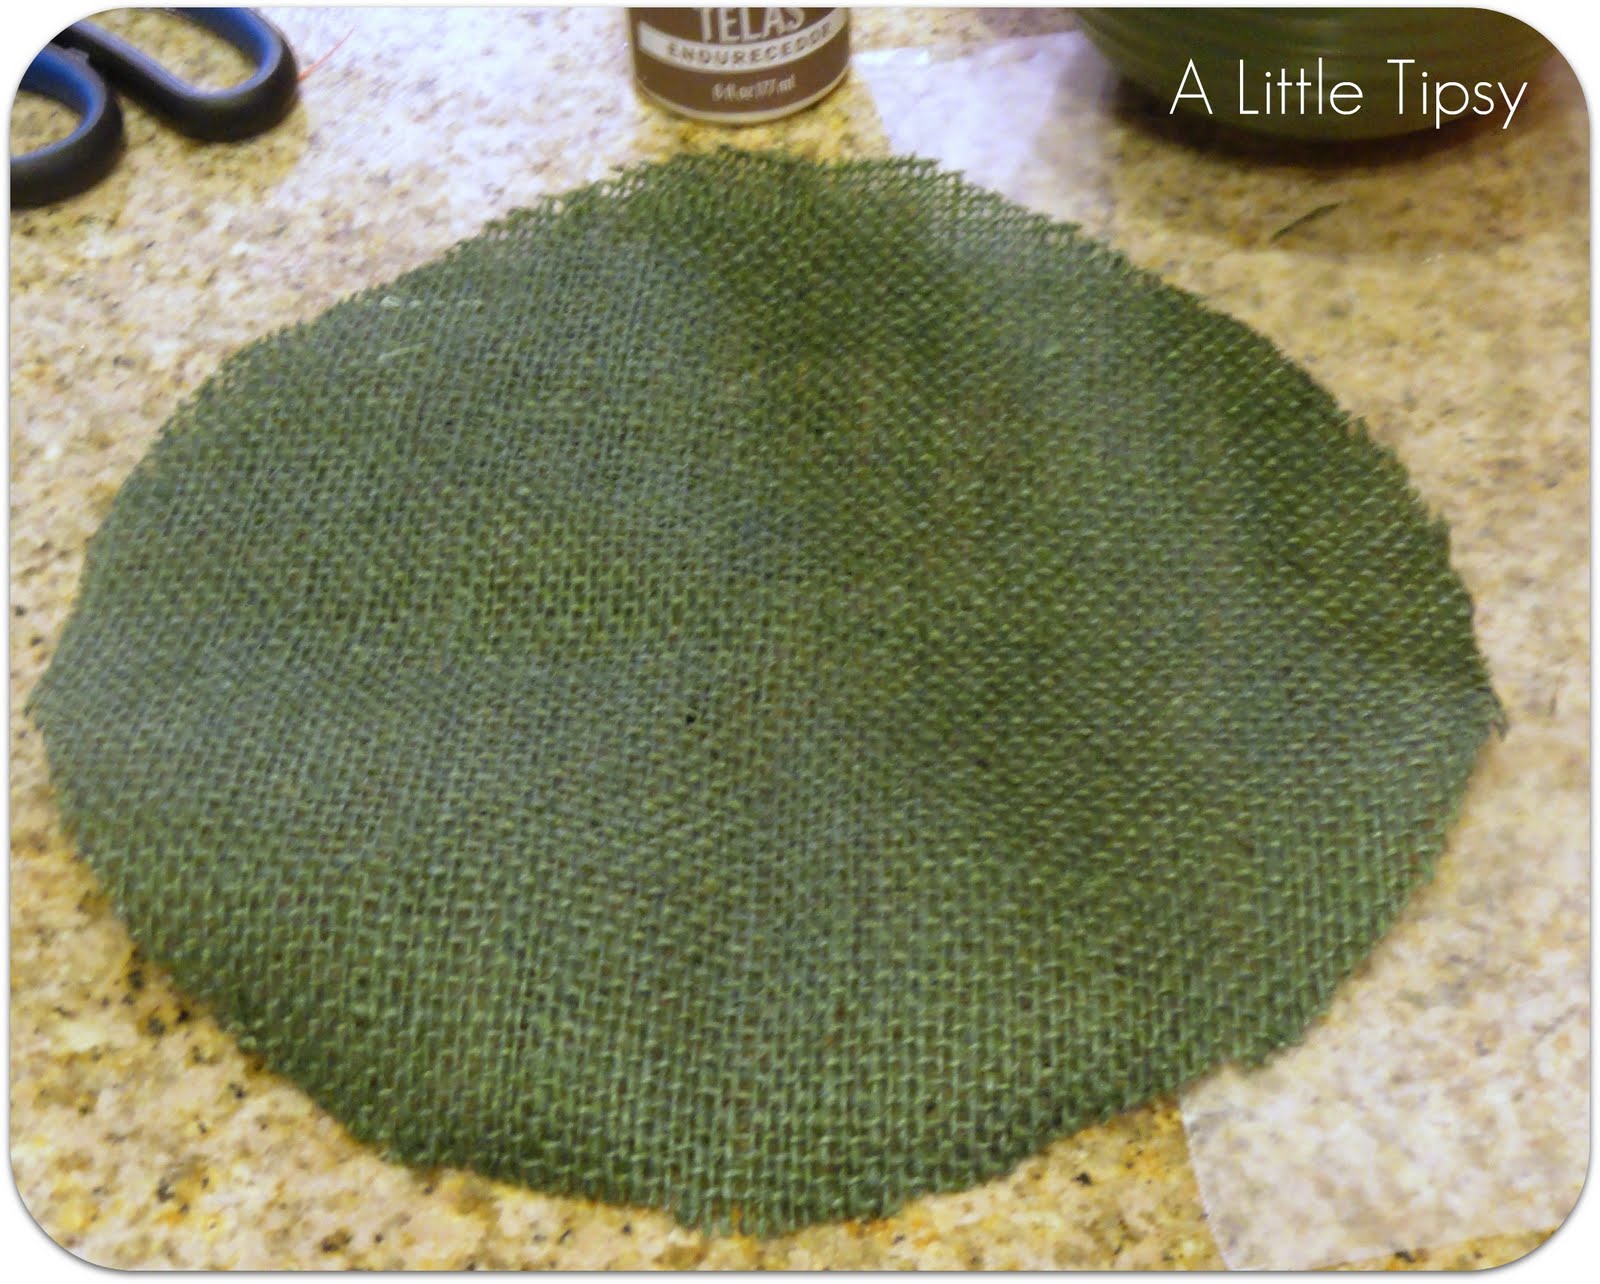
Cut three circles from your burlap.
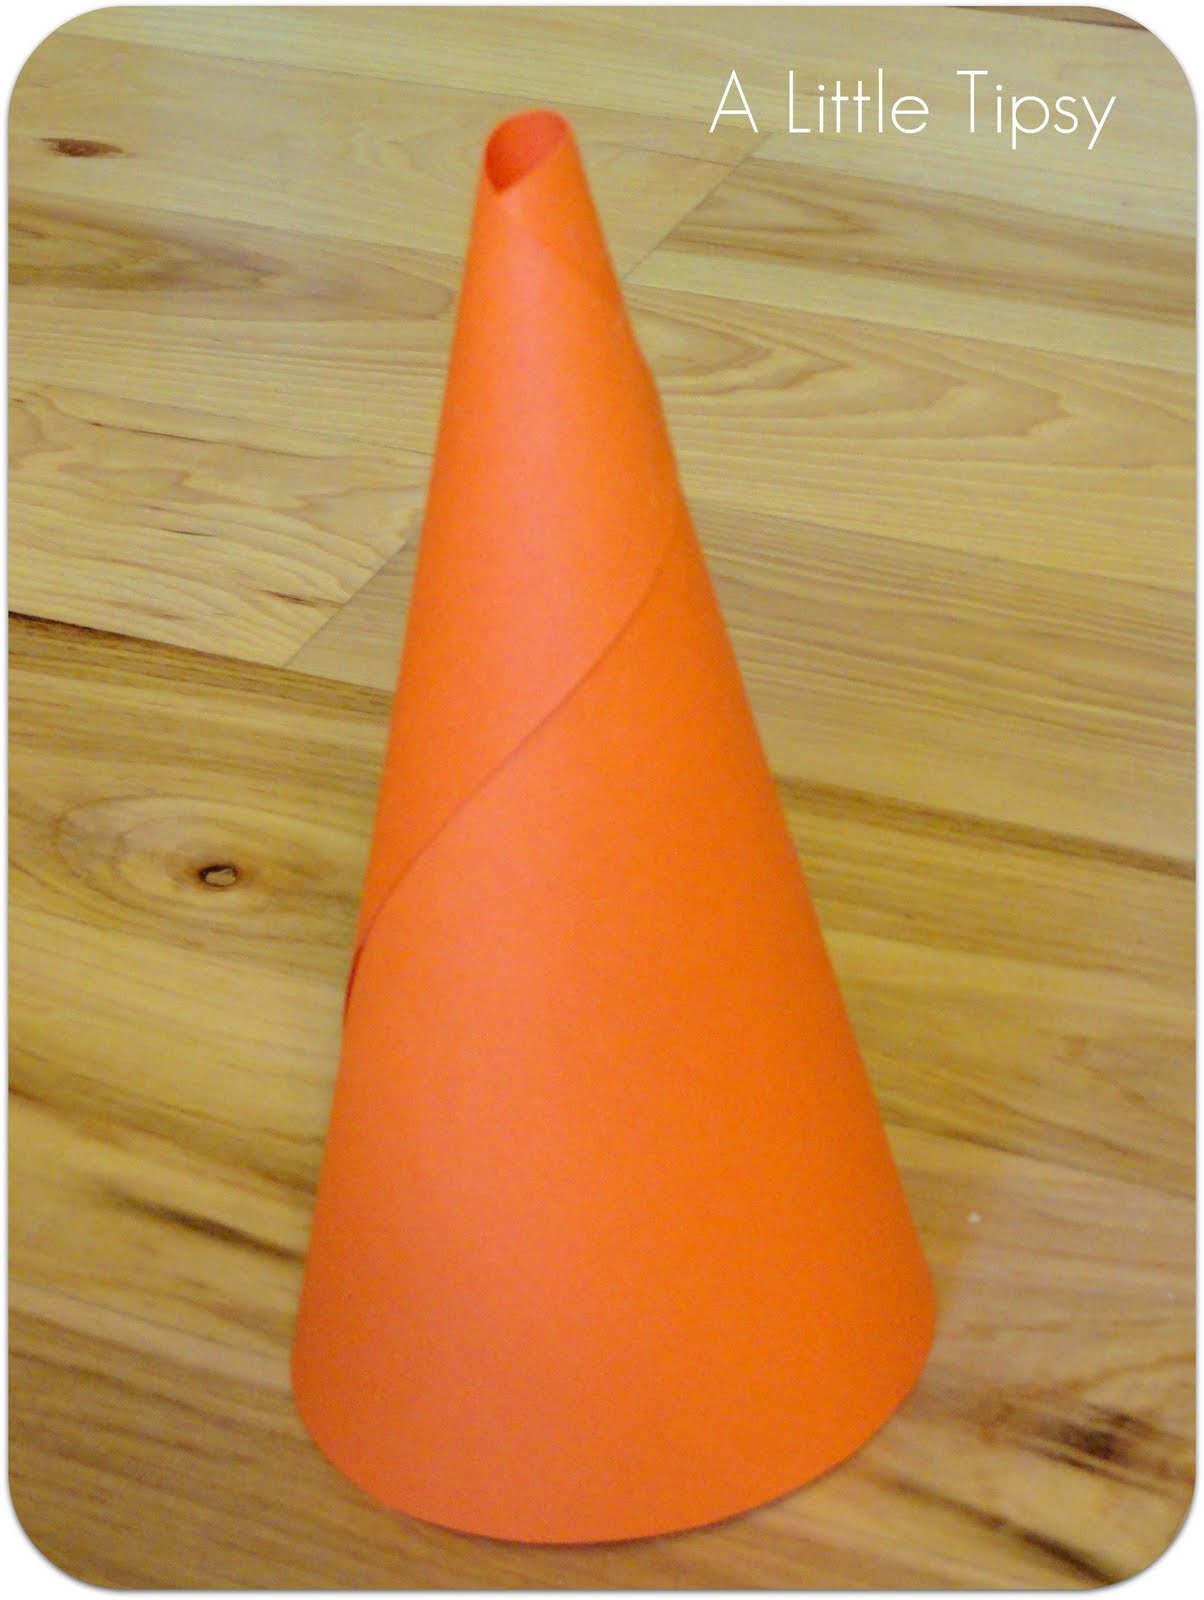
Make three cones out of cardstock by rolling it and hot gluing in place.
This is my ode to the road construction that’s been going on around here.
Over a piece of wax paper, douse your circles in fabric stiffener spreading it evenly over the whole surface. I just used my hands so I could really get both sides completely drenched on both sides.
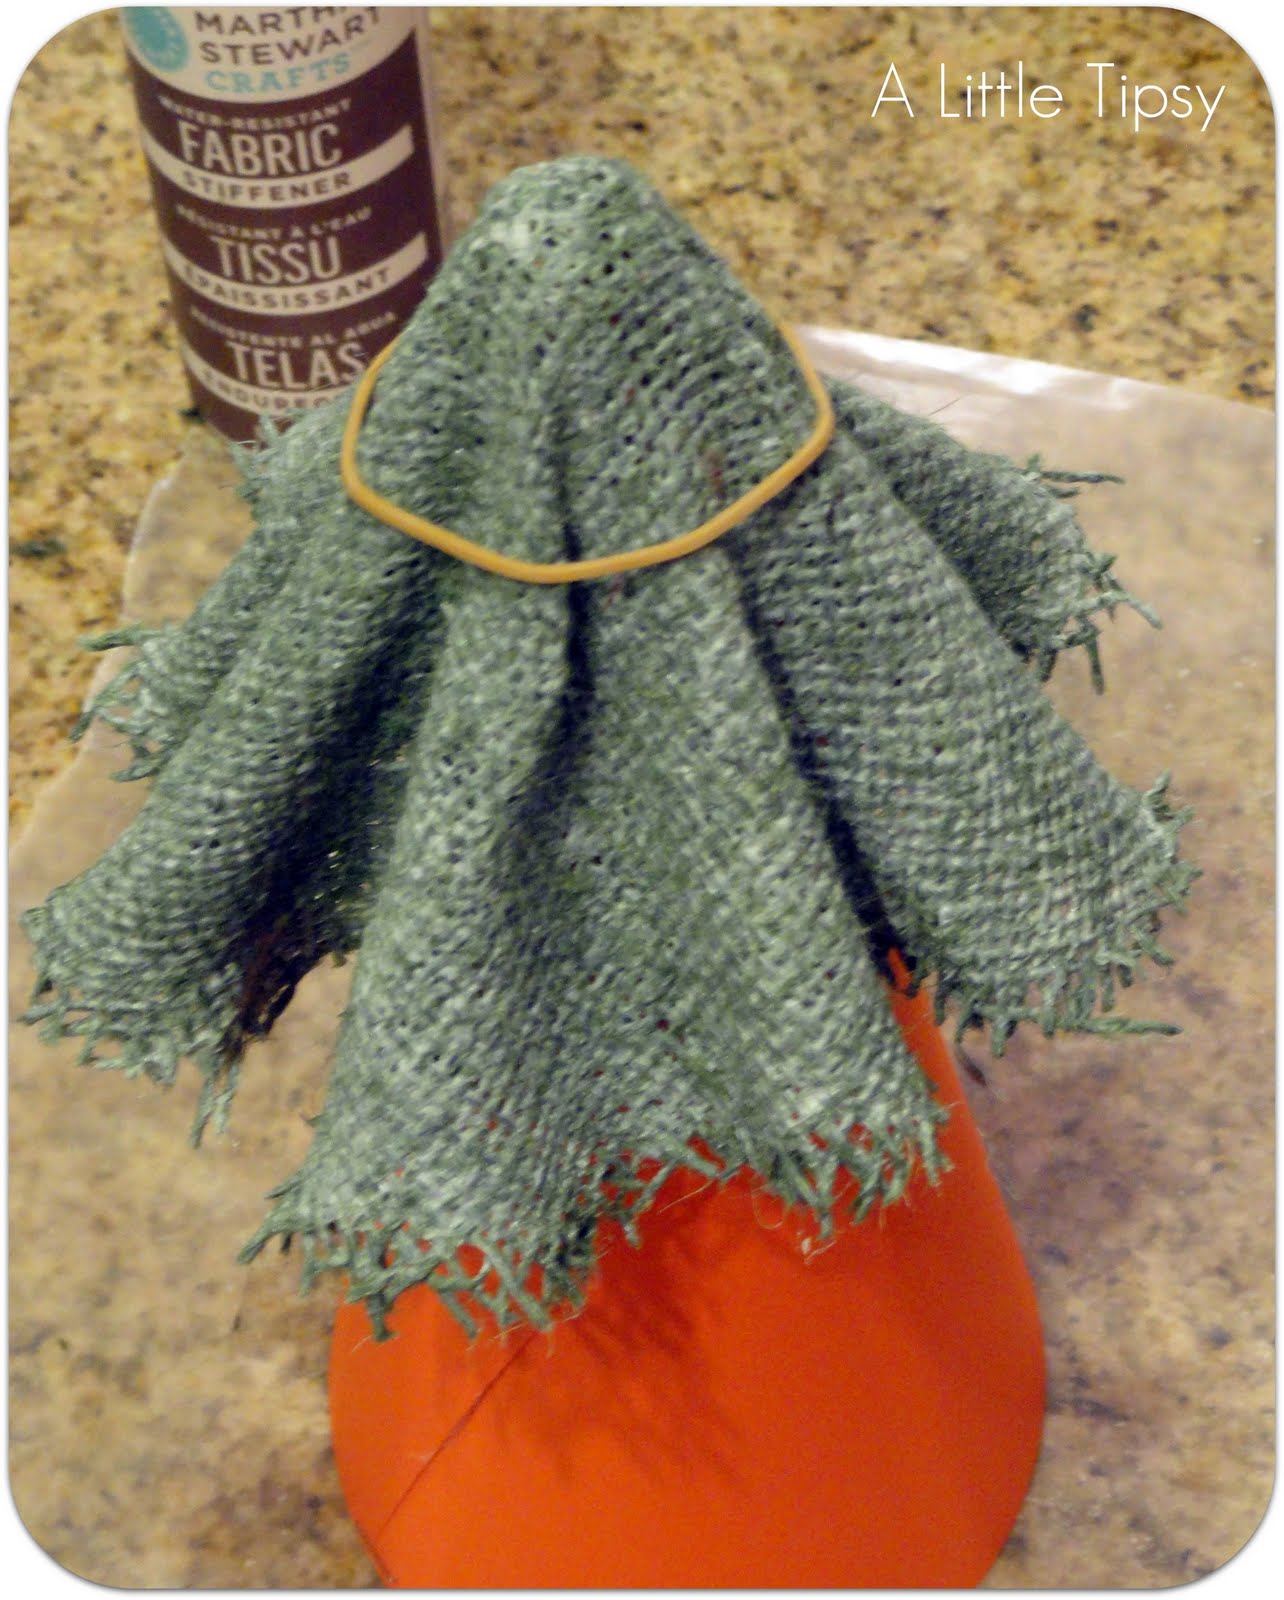
Lay your circles over the cones, helping them to ripple just how you want them. I put a rubber band lightly around the top to help them stay, but it really isn’t necessary. Let them dry overnight.
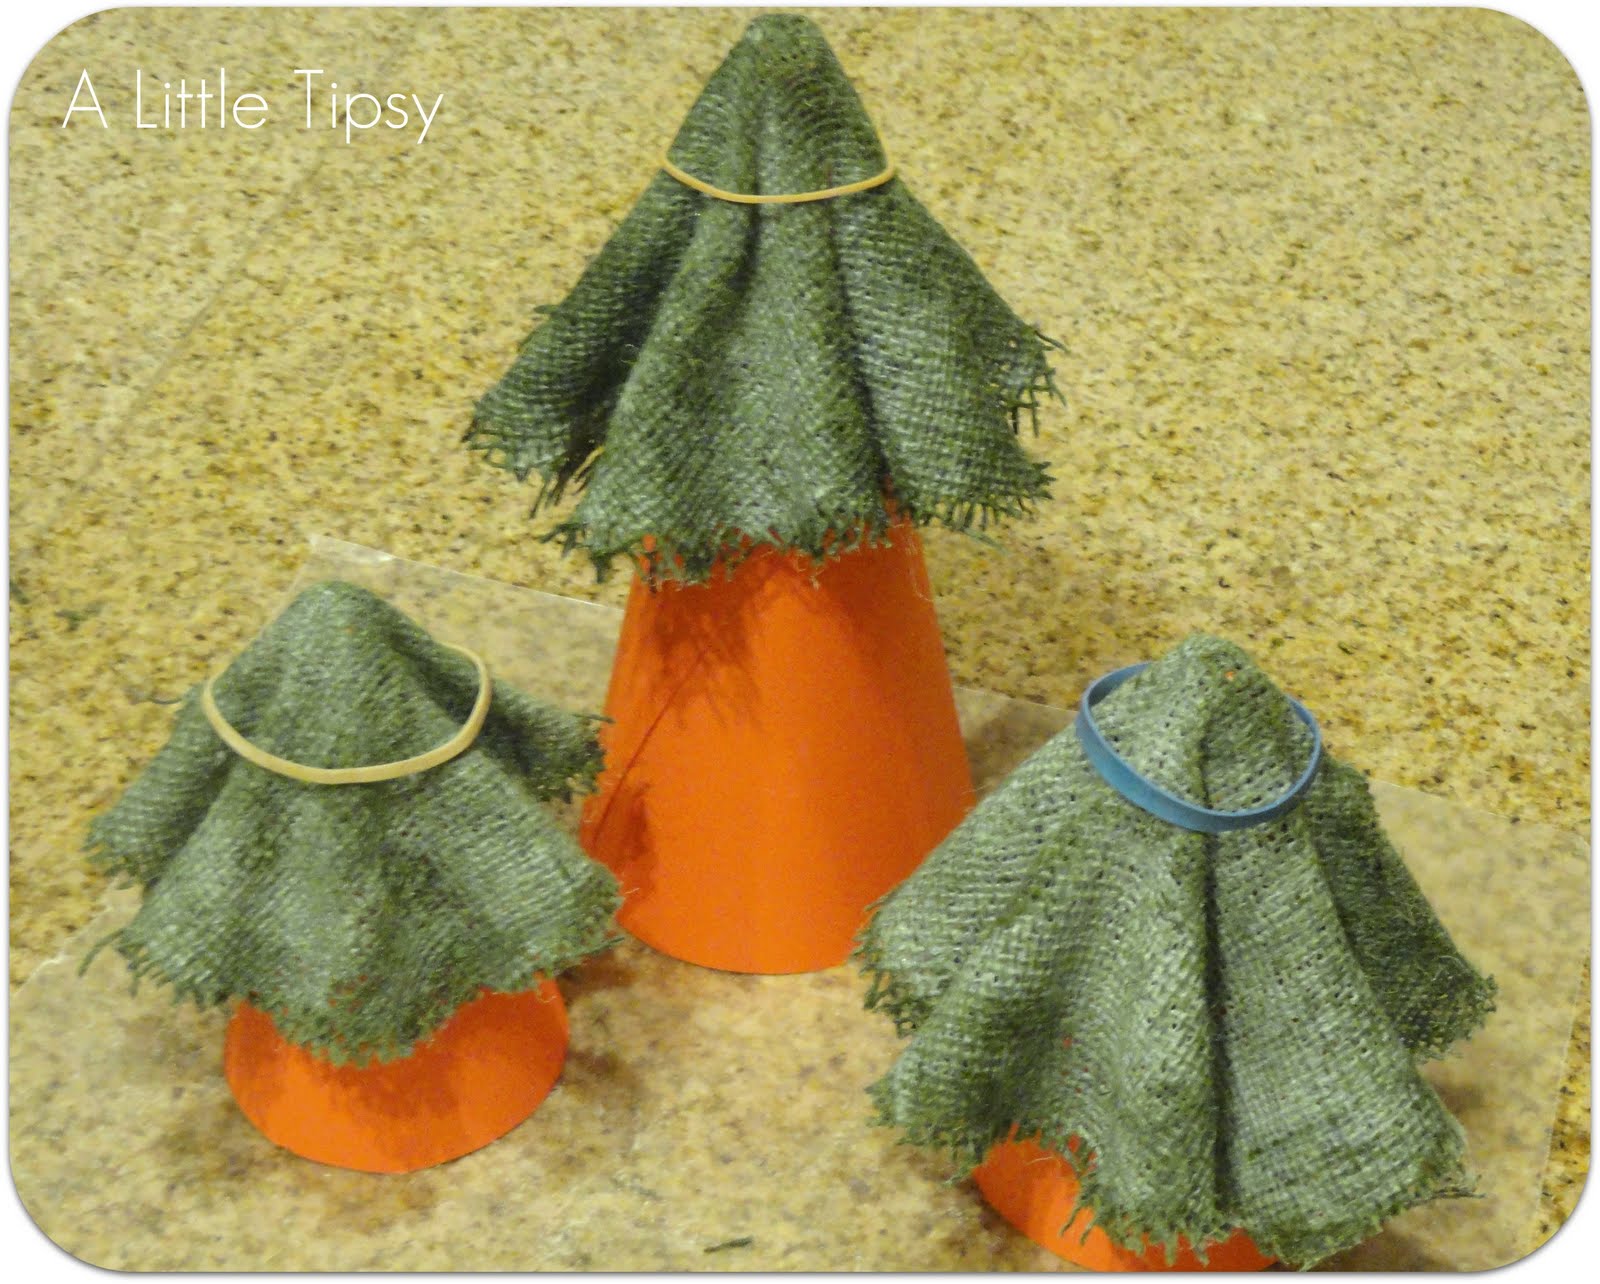
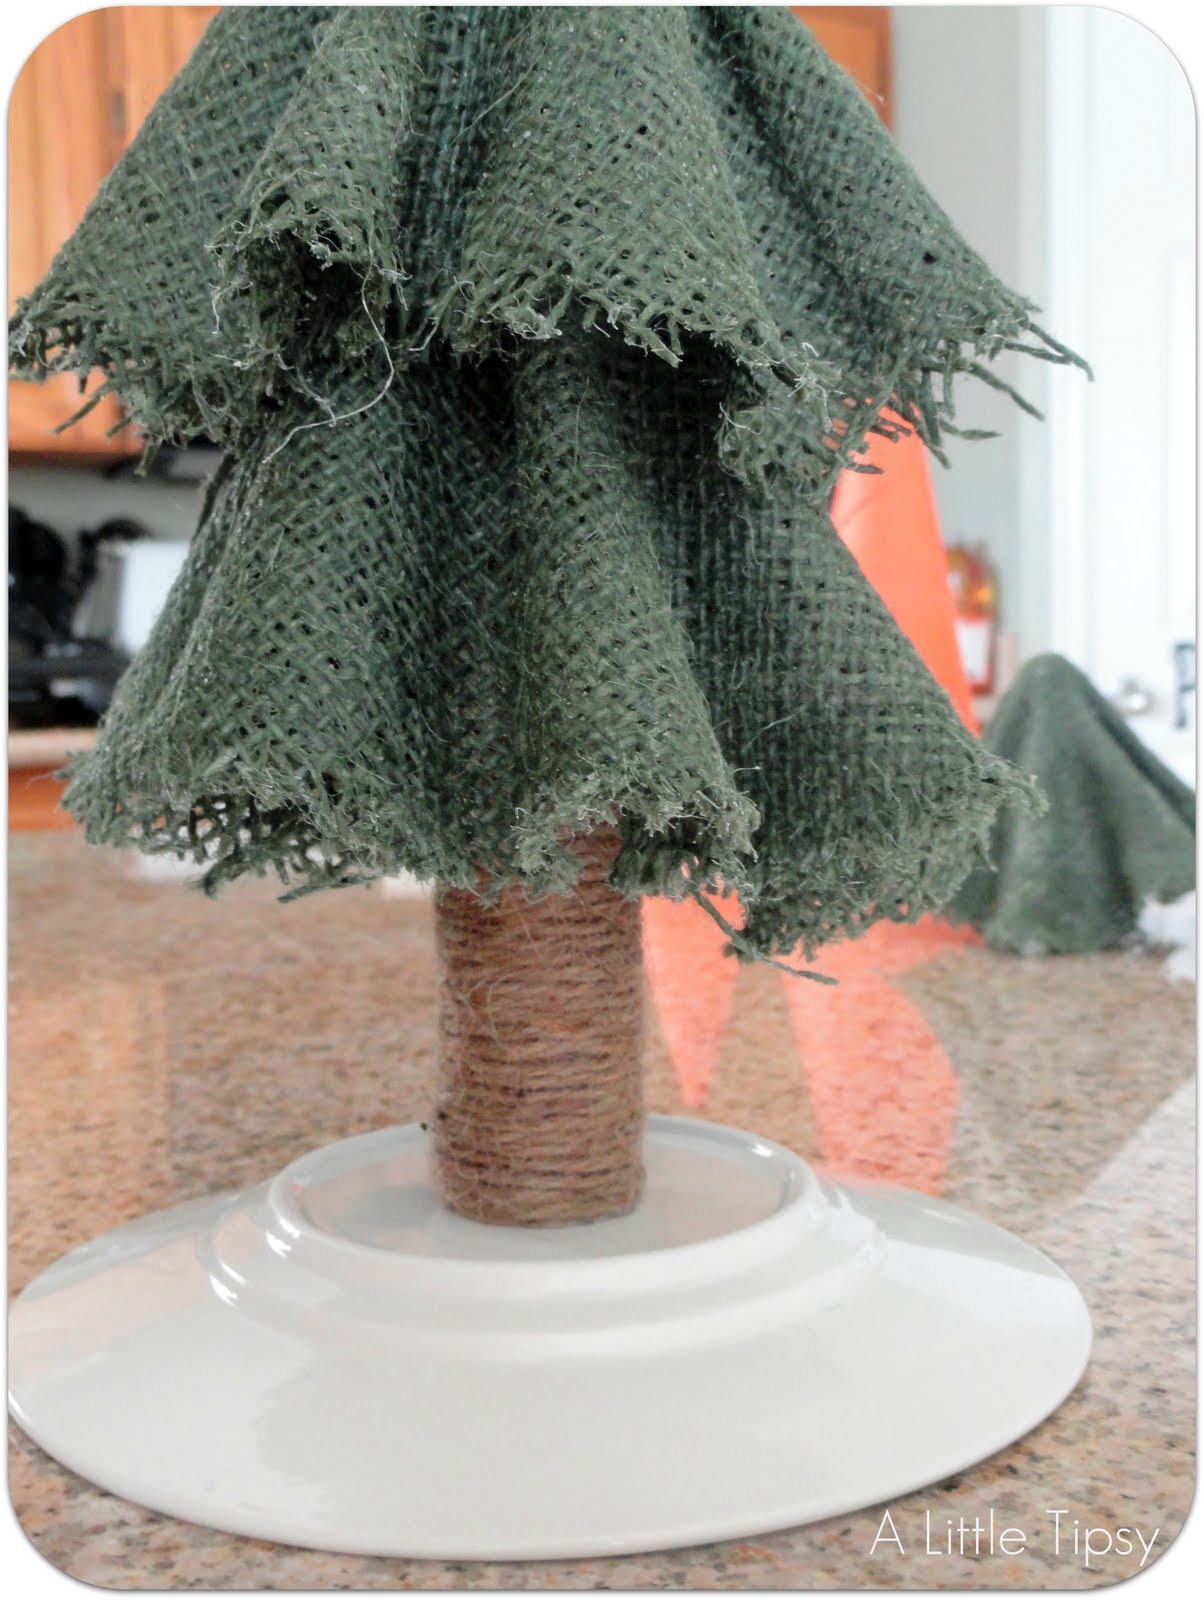
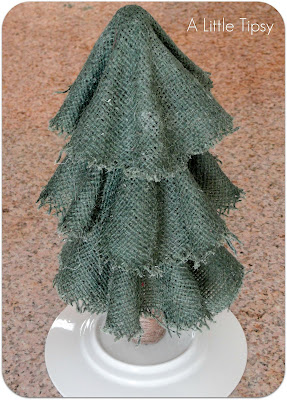
Cut a sturdy cardboard tube (smaller and thicker than a paper towel roll, I think mine may have been the middle of a tiny wrapping paper roll?) to size. About half of what is shown here.

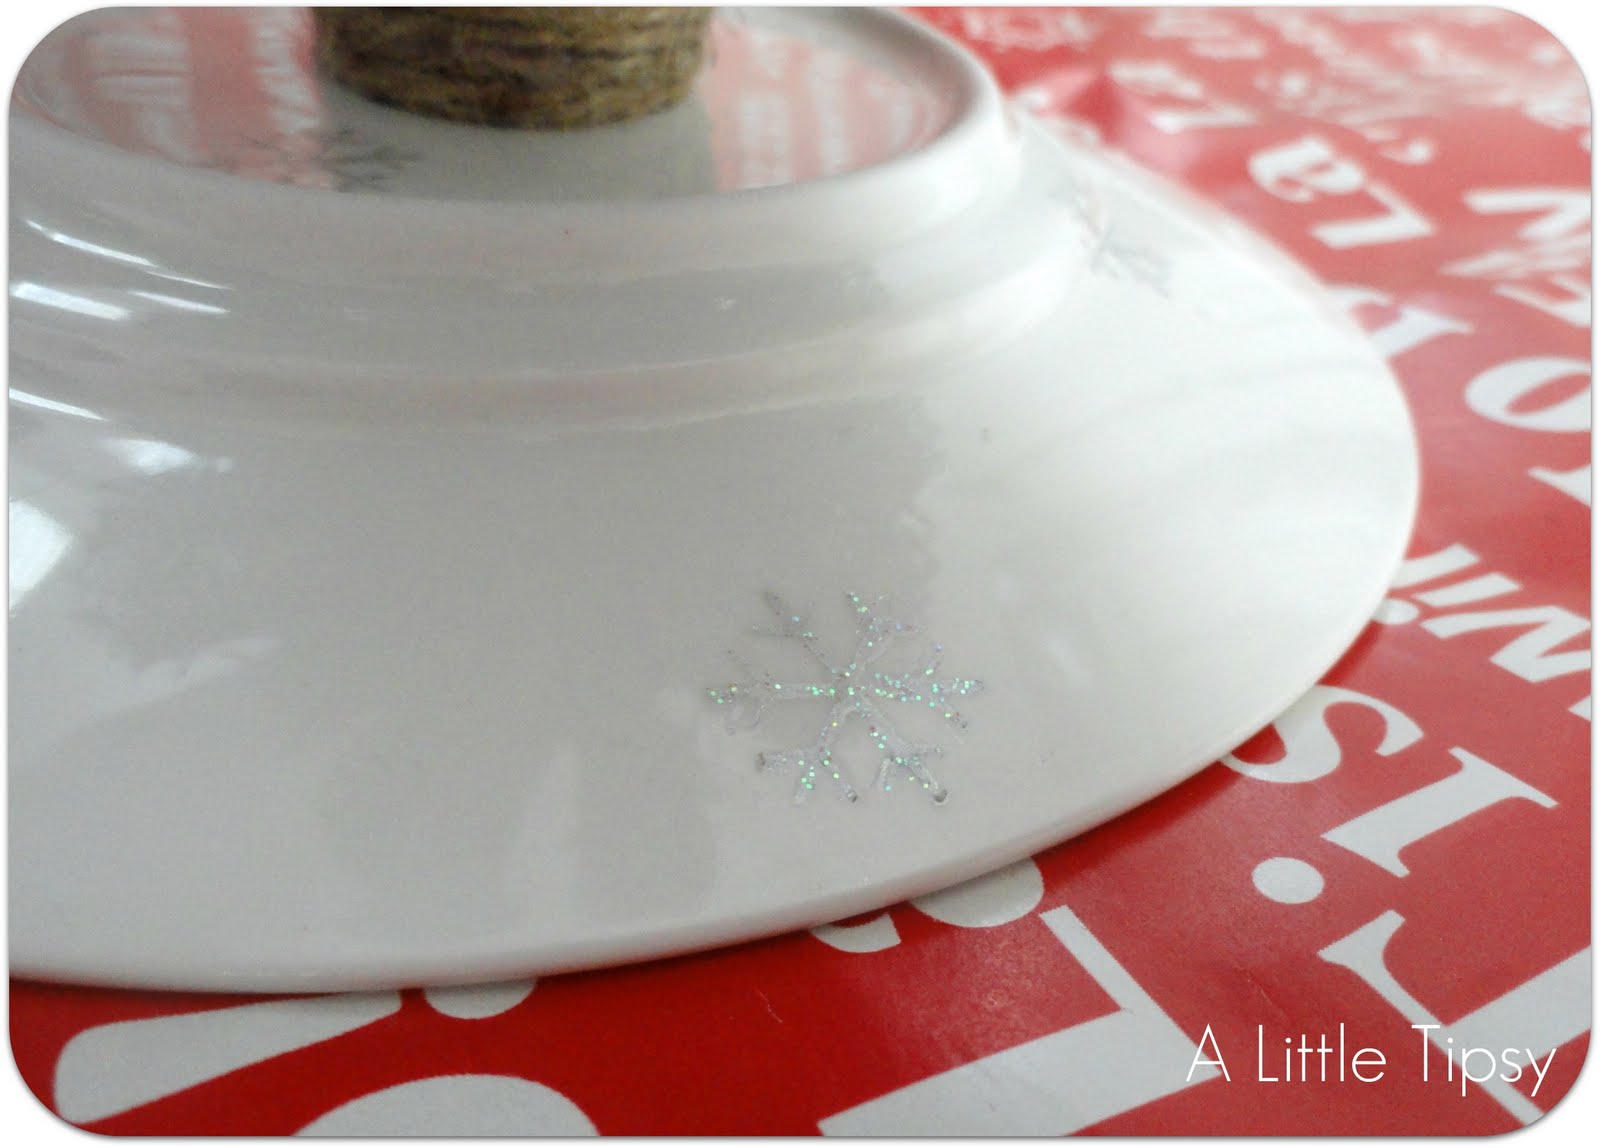
Cover in garden twine securing with hot glue along the way. Hot glue it to an upside down dessert plate.

Hot glue on your “circles” one by one. This can get tricky gluing where the ripples touch the next layer without having the glue show.
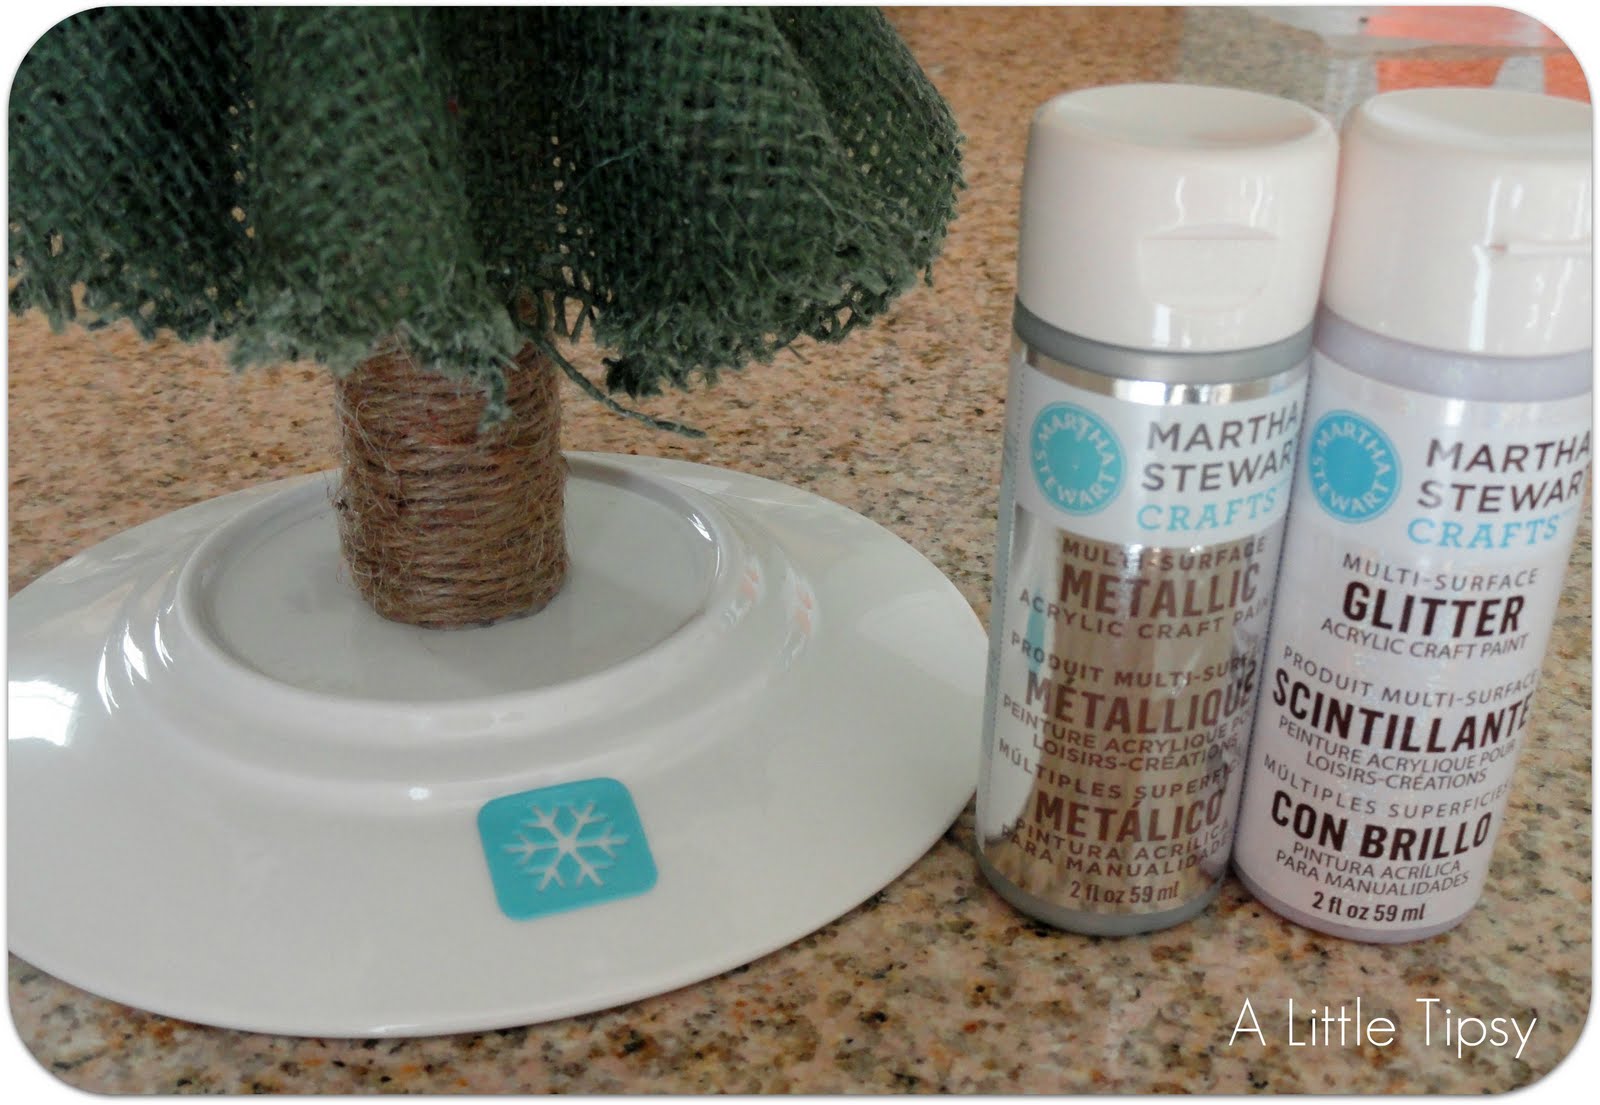
Grab your Martha Stewart Adhesive stencils.

Use the smallest snowflake and stencil all around the plate with Martha Stewart silver metallic paint.
I love that you can literally stencil ANYWHERE wtih these! Can you imagine trying to get in that tiny nook with a regulr stencil?! These were so easy to use I had all the snowflakes done in like 5 minutes!

I let the silver dry and then went back over and hand painted glitter paint over each snowflake.
Now here she stands, waiting patiently for the rest of the Christmas decor to join her on the day after Thanksgiving.
Check out these other fun Christmas DIY projects!
Tatertots & Jello: Holiday Stenciled Sign
I received product and payment for this post – all opinions and project instructions are my own.
Linking up:
P.S. Don’t forget to sign up for free Tipsy updates via RSS or email.
We have decided to truncate our feed to help protect against stolen content. I apologize for any inconvenience. Please love us anyway. 🙂
This turned out great! I need to play with that fabric stiffener!
So cute! I haven’t tried the fabric stiffener, but now I want to!
Wow! I didn’t even know she had fabric stiffener. I just some stencils today to try. Love her paint! The colors are gorgeous!!
Very Cute! I love, love, love this!!
This is SUCH a cute idea Michelle! Thanks so much for including my beadboard frame in your round-up!
Adorable Michelle! I absolutely love these! Going to give them a try! Thanks for the inspiration!!
What a fun and cute idea. Now to find someone to make it for me.
The trees turned out so cute! I love the plate and the touches of glittery snowflakes you added.
Thank you so much for featuring my project as well! Happy Thanksgiving!
It looks great! Who would have guessed it was so easy!
What a cool project Michelle!! I love it. I want to make a little forest of those trees!!
I stumbled it for you and FB’d it 🙂
xoxo
Jen
This is such a great project! And easy enough for the kids to help with! Thank you 🙂
Hi Michelle, I think I’m going to make my own Christmas tree next December from your idea. Thanks for sharing like it very much.
This may sound silly but how do you glue the circles on if there is no whole in the center? Thanks
The bottom one goes on the tube and the others nest on top, like how ice cream cones stack.