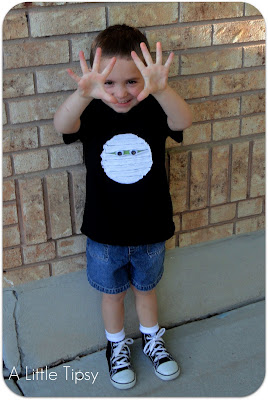
I wanted to have some cute shirts for my little guys for Halloween, but did not want to spend a fortune on something they would only wear a few times. Dressing boys can be hard. I don’t love that almost everything out there for boys is a graphic tee with something obnoxious on it. So I took things in to my own hands and got to work on the mummy shirt.
How do you make a mummy you may ask. What does a mummy make? Well let’s get down to business. Here’s what you’ll need.

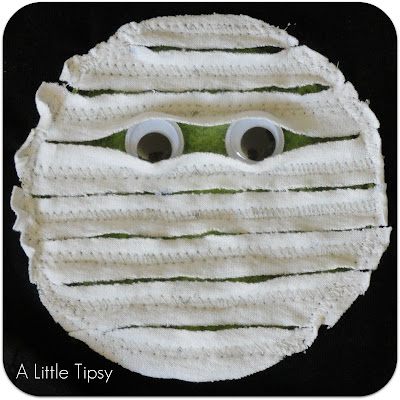
Ignore the puffy paint. I was going to do glow in the dark eyes, but decided on googly eyes instead.
Mummy Shirt Supplies:
- Black t-shirt (Target clearance $1.99)
- Small bowl
- White jersey (Dad’s old t-shirt)
- Light green acrylic paint
- Fabric medium (turns acrylic paint into fabric paint)
- Foam Brush
- Scissors
- Ruler
- Sewing Machine
- White thread
- Googly eyes
- Adhesive velcro or glue
1. Wash t-shirts to remove any shrinkage issues. Find a bowl the size you want the mummy head to be and press on to shirt leaving a ring.

2. Mix up your fabric paint using the instructions on the textile medium. Mine was 2 parts paint to 1 part medium. Paint your circle. Messy is fine, it’s a mummy. Black shirts need a lot of coats. My sis did white shirts and they only needed one coat. I stamped my shirt with the bowl at the end to see how accurate I was.
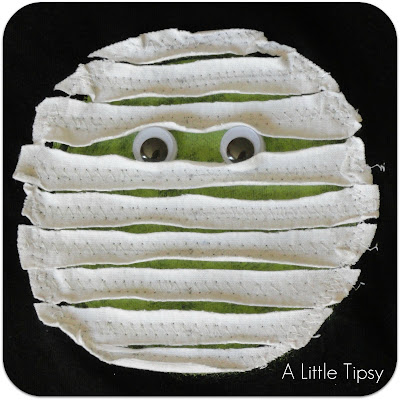
3. Cut a circle out of the white a little bigger than your bowl rim. Fold it in half and mark where you want your stitches. We decided that 2 cm for the eye gap and 1/2 inch for the rest of the gaps worked best (the pic is wrong). Trace horizontal lines across your marks to show you where to sew. If you want your jersey to curl a lot, make sure you have the underside of the jersey facing up when you mark and sew. You will be able to tell which side will curl.

4. Place your white circle over the dry paint.
5. Sew over each line using a zig zag stitch. Cut the white fabric between each stitch line with scissors.
6. Sew around the edge of the circle to secure and control the curling.
7. Secure googly eyes to your mummy shirt with adhesive velcro dots (if your child is over 3 and you want to take them off to wash) or glue (if your child is under three or you want them affixed permanently).
Below you can see the difference between sewing the strips on with curling side up and down. One also has larger eyes.
My little guy is loving his mummy shirt and got to show it off at preschool during show and tell. I love that it was so easy to make a mummy shirt that no one else has.
P.S. Don’t forget to sign up for free Tipsy updates via RSS or email.


That’s Adorable
Oh these are so cute! I love the googly eyes! Well done my friend!
I LOVE this!
Very, very cute!
love it! what a great idea!
SO CUTE! I want one for myself!! I am going to feature it on my blog tomorrow.
We were just talking about halloween costumes with some friends and ways that we can reuse and repurpose to save some money… this is a great idea and the mummy itself is so cute. There are lots of ways to stretch your dollar this Halloween, get creative!
Those are adorable!!!!
How sweet and what fun. Terrific idea to dress up a plain black tee.
Thank you for sharing this tutorial!!! These shirts are adorable. I made some for my boys and blogged about it. Just wanted to say thank you!
Tammy
http://tobyandtammythornton.blogspot.com/2011/10/mummy-shirts-with-googly-eyes.html
very cute ,it makes a perfect gift for halloween!
These are adorable, looking for black shirts tomorrow for my grandsons. Thanks for the easy to follow tutorial.
How cute and easy this was! I made one for my granddaughter and sewed a cute polka dot green bow on the mummy’s head!